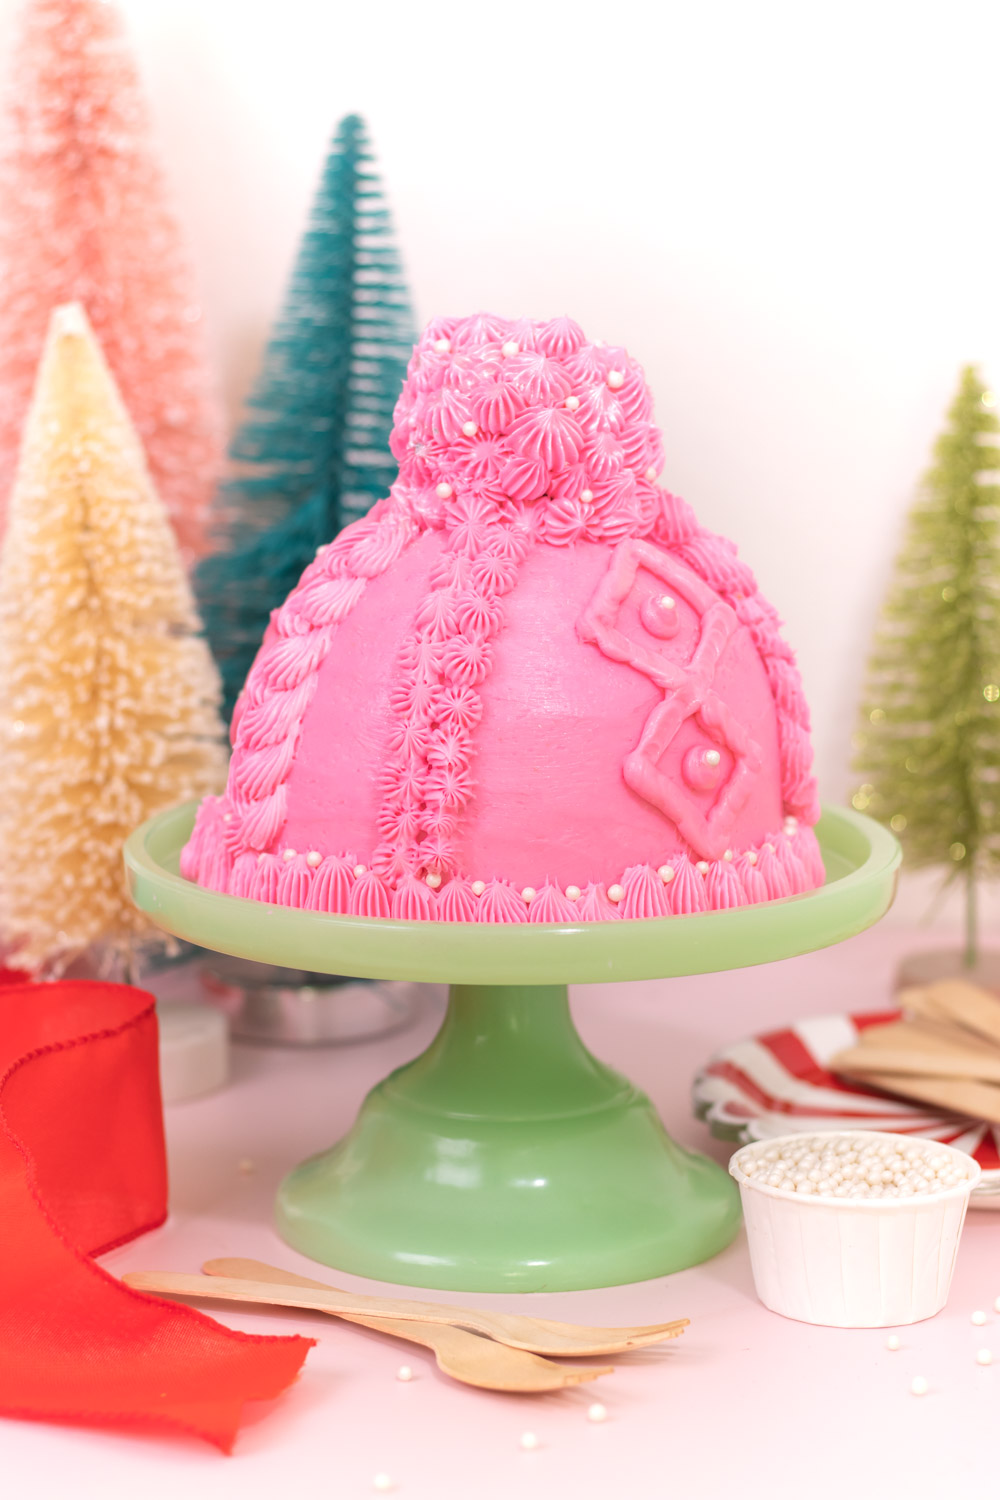
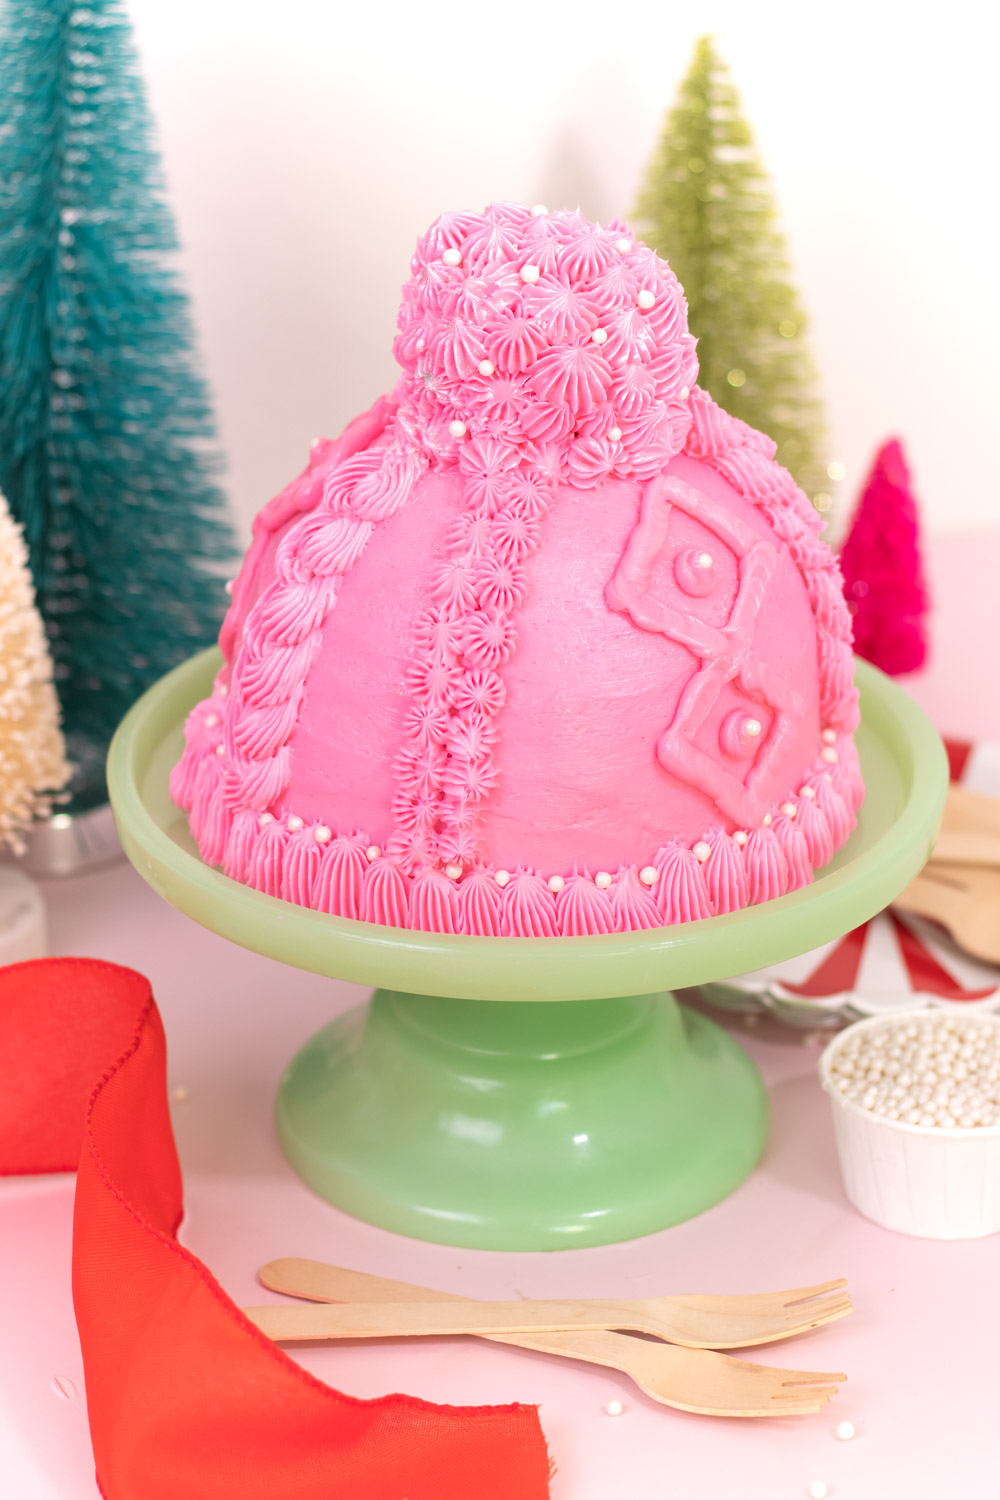
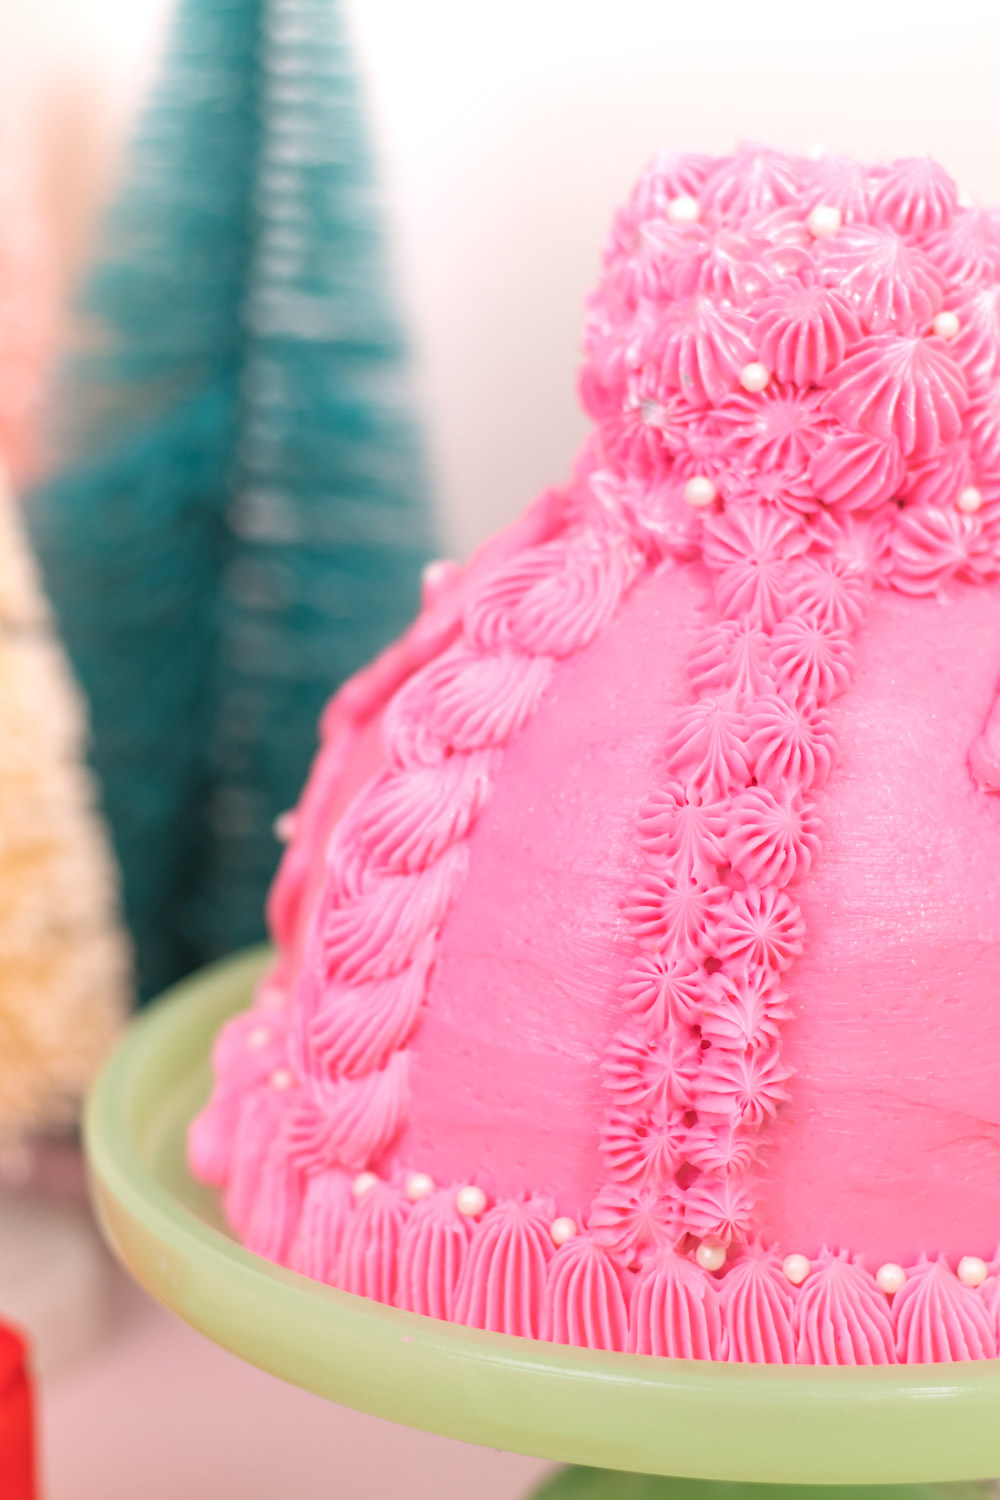
I’m just about ready to sign off for the rest of the YEAR – always weird to say – but I wanted to share one last DIY before I wish you all a happy end to this awful year. It has been forever (yes, literally, I do mean it feels like forever) since I shared a cake decorating idea, and this one seemed perfect for the season…a knit beanie cake! Does everyone call them beanies? Some might just call it a knit hat cake I guess. This completely fondant-free cake is perfect for more than just Christmastime, and you can decorate it in your favorite color(s) for any occasion. Use a variety of piping tips to create those knit textures! Three types of pans allow you to make this new shape with NO need for carving. Keep reading for the tutorial to make this cute, colorful winter hat cake!
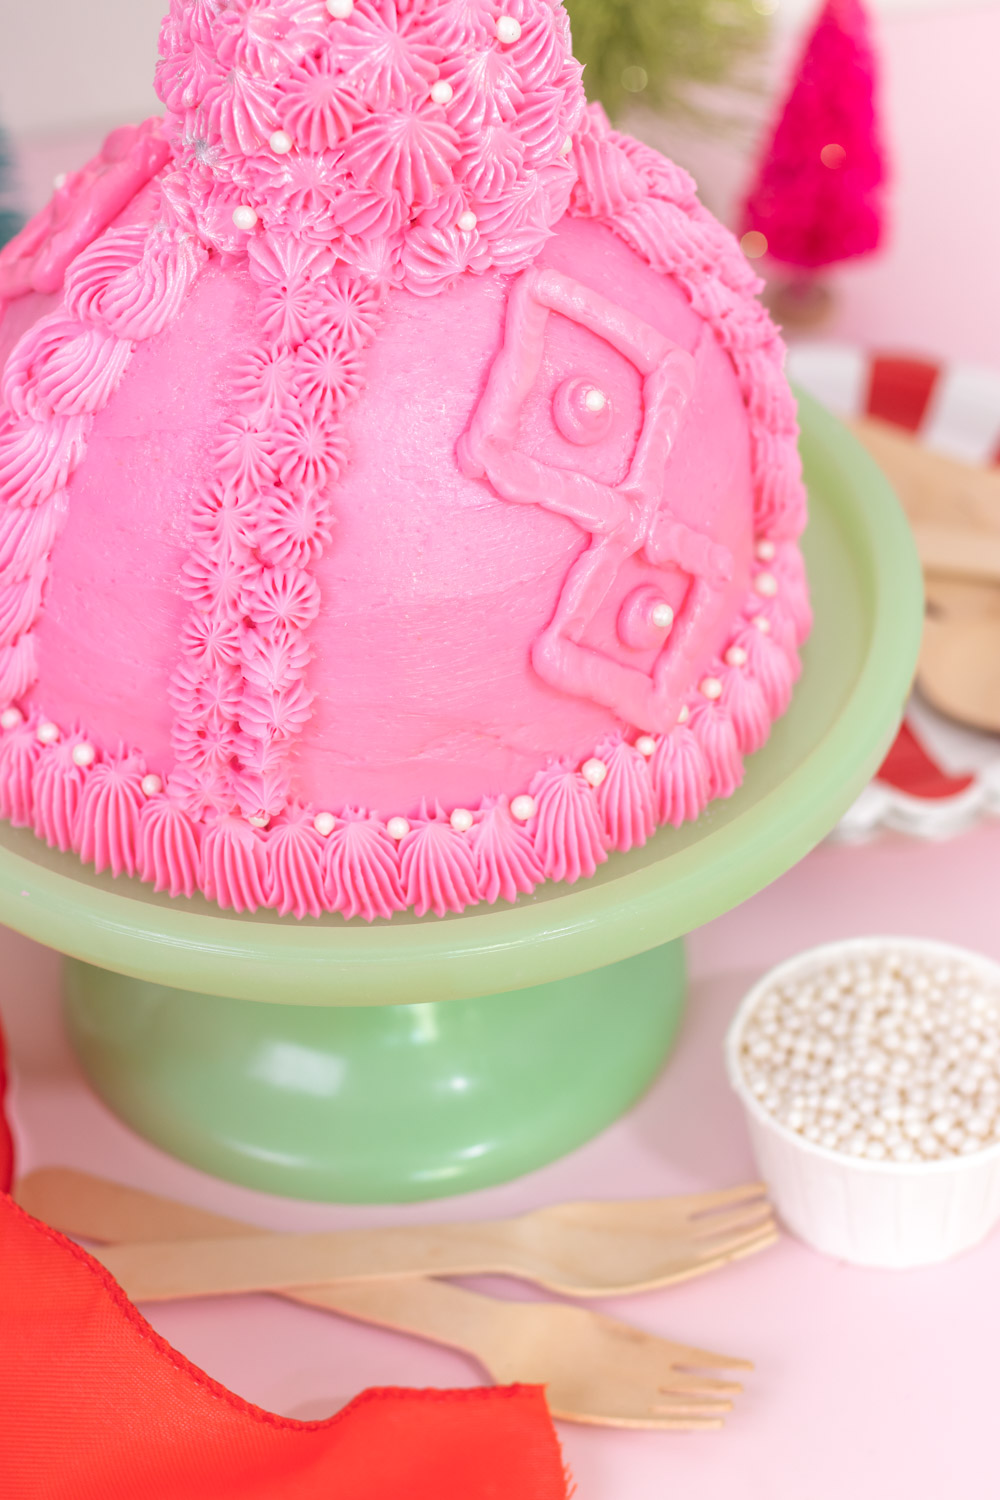
To make this cake, you use a 6-inch round pan, one half of a 6-inch spherical pan and a cupcake pan. See that little pom pom on top of the knit beanie cake? It’s a cupcake! All of these supplies are really easy to find so that you don’t have to attempt carving this signature shape. Because I decided to go with an all-pink winter hat design, I added a few white nonpareils and a bit of luster dust for shine. All in all, it’s one of the easier cakes I’ve tried to make.
At one point, I maaaay have added too much luster dust. It’s so easy to go overboard. Luckily, it make it look festive! Just beware – apply luster dust with a bit of caution. My favorite method is to pick it up with a small brush, then blow it onto the cake to distribute it somewhat evenly.
OK, now let’s get to the knit beanie cake and how to make those special textures!
How to Make a Winter Hat Cake
Supplies:
- Favorite cake recipe (I love this classic vanilla cake)
- Favorite buttercream recipe
- Food coloring
- Cupcake pan
- One half of a 6- inch spherical pan
- One 6-inch cake pan
- Piping tips, round and closed star
- Pastry bags
- Spatulas
- Sprinkles, optional
- Luster dust, optional
Step 1: Prepare the cake batter for your desired recipe. Grease the two cake pans and insert liners for at least one cupcake. Distribute the batter between the prepared pans and bake until cooked through.
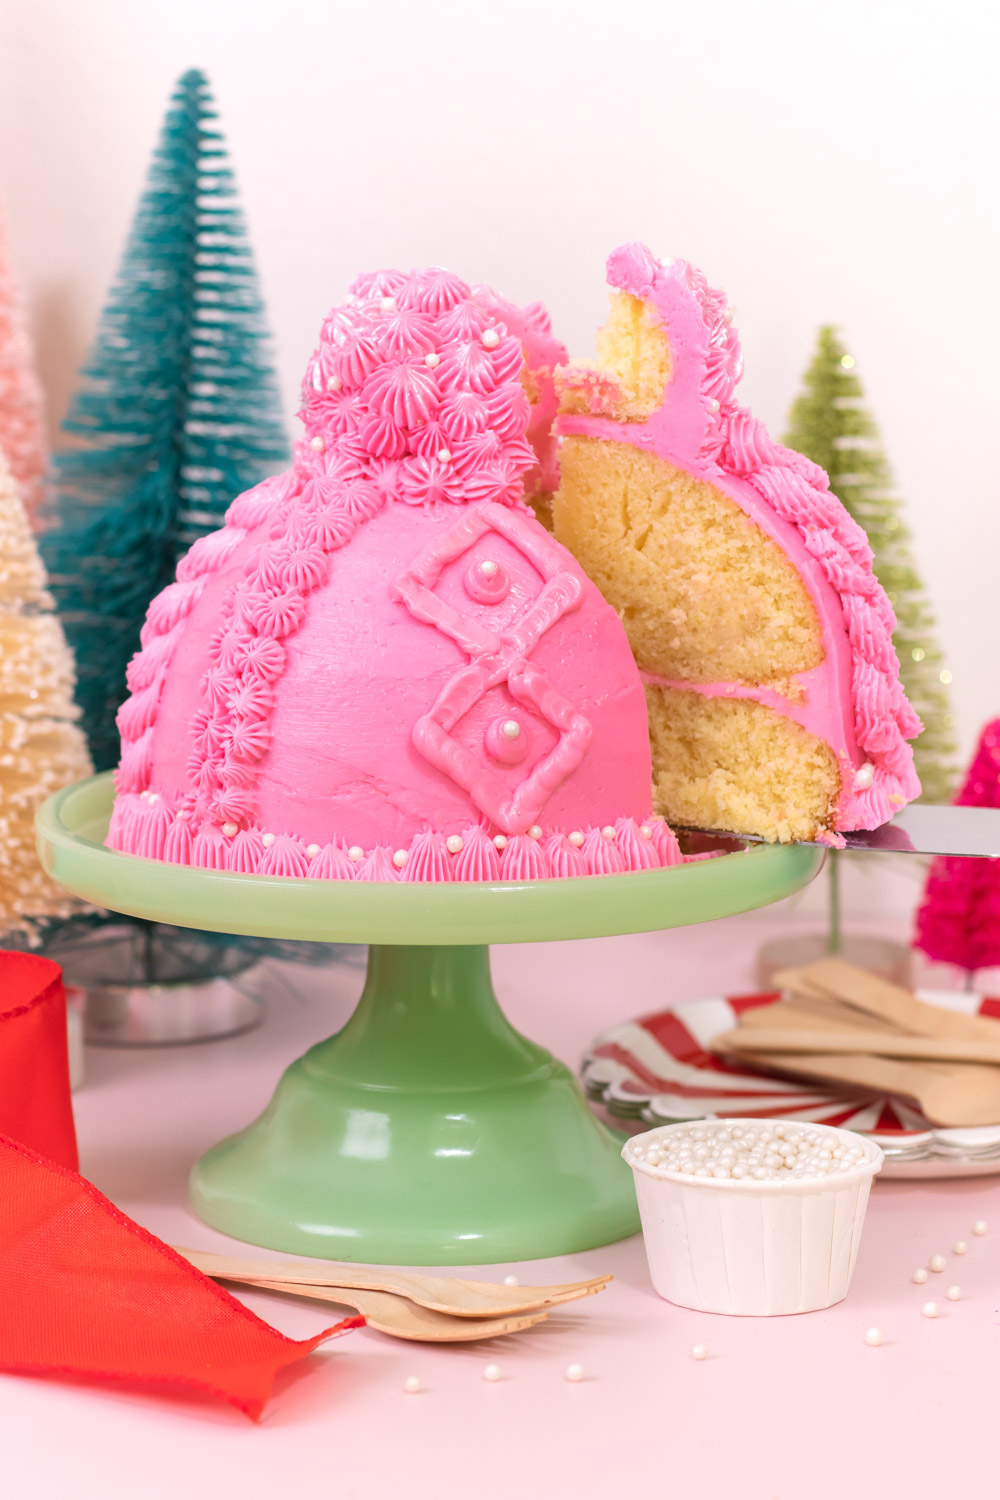
Step 2: Once the cakes have cooled, carefully remove them from the pans. Level the half-sphere and 6-inch layer as needed to prepare for stacking.
Step 3: Place the 6-inch layer on the bottom. Top with buttercream, then place the rounded layer on top. Apply a crumb coat to begin seeing the shape of the winter hat cake. Refrigerate until firm.
Step 4: Spread a smooth, thicker layer of , buttercream all over the cake. Use extra buttercream to adhere a cupcake (liner removed) to the top of the cake.
Step 5: Fill pastry bags fitted with piping tips with the colored buttercream. Starting at the bottom with the closed star tip, dispense frosting in an upward motion, creating a uniform pattern around the entire base. This creates the folded-over appearance on the knit beanie cake.
Step 6: Then apply other patterns like a faux braided pattern, star dots or smooth triangle shapes. Completely cover the cupcake on top with dollops of frosting to create the pom pom topper. Embellish with sprinkles or luster dust if desired!
Now it’s ready to serve! One slice of this bad boy is pretty big, so a thin slice is all you need. This knit beanie cake was really fun to make, so I hope you enjoy it too!
With that, I’m signing off for a while. Wishing you all a safe and happy Christmas and New Year! Let’s hope there are much better things on the horizon.