The following post is sponsored by JOANN
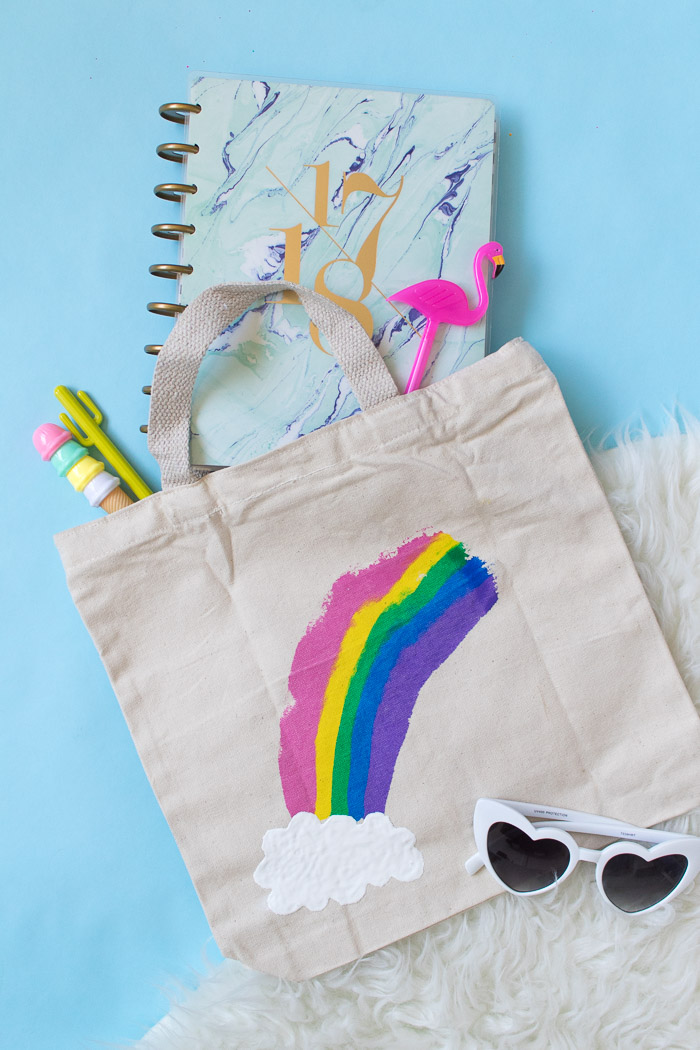
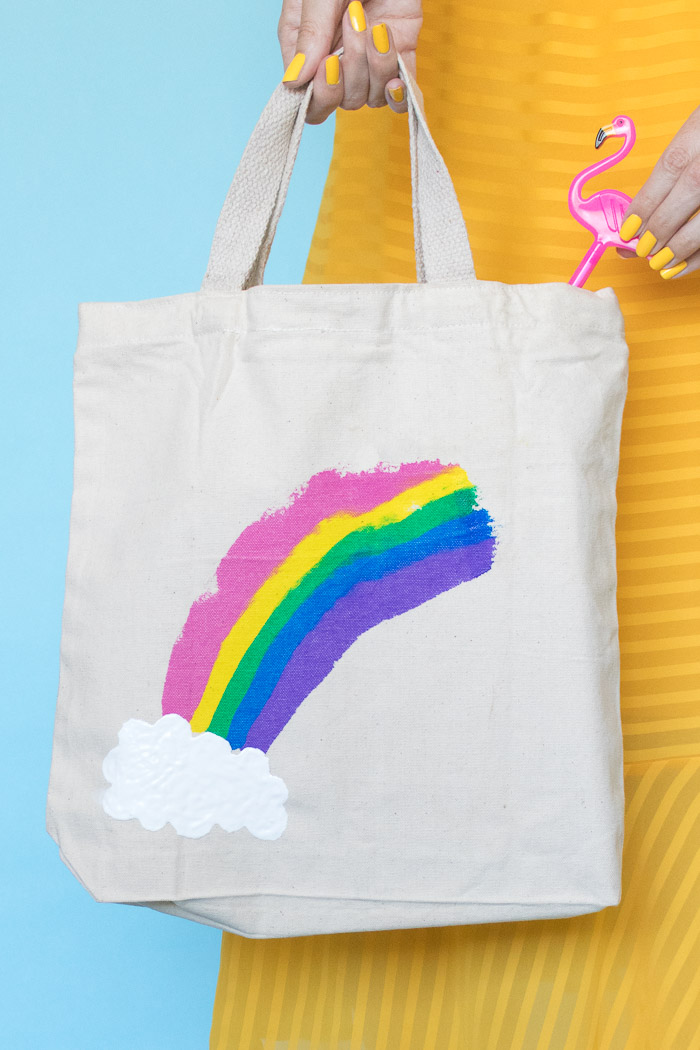
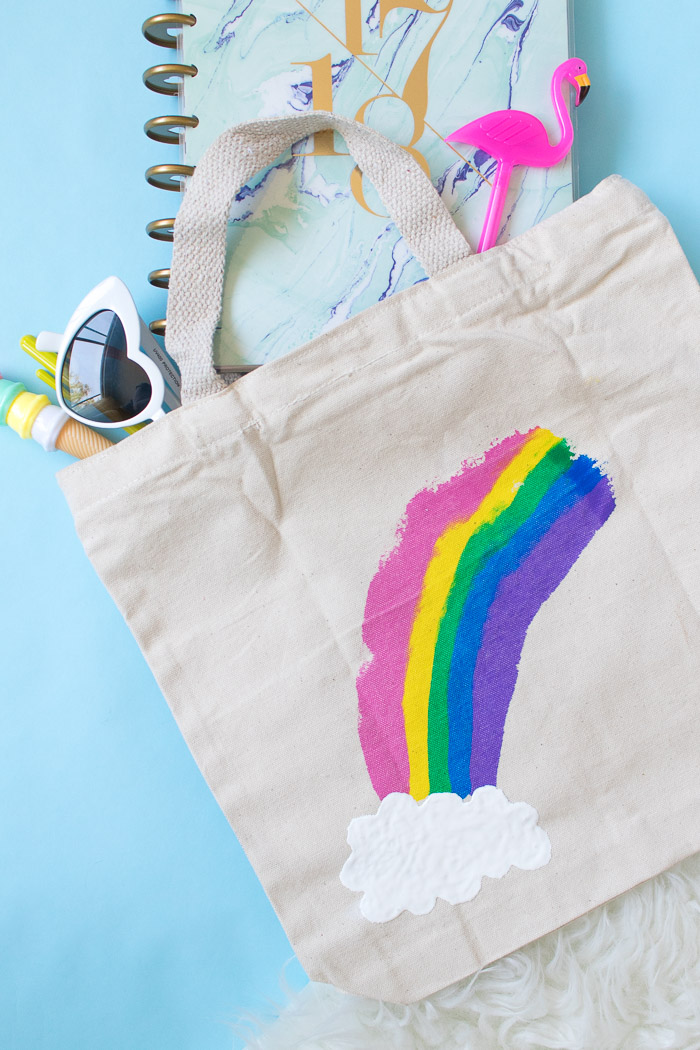
If you’ve never tried paint scraping, you’re seriously missing out. It’s one of the easiest but most satisfying projects, and you can even do it on fabric. So what is it? Well, it’s pretty much what it sounds like…it’s scraping paint. This time, I used the technique to make this simple rainbow paint scraped tote bag! I think my goal is to put a rainbow on everything I own now, which seems entirely doable.
Because JOANN sells pre-sewn tote bags that are ready to decorate, this simple paint scraping project is perfect for non-sewers. Psst, even kids would have SO much fun with this project! I mean, who doesn’t love playing with paint? It’s surprisingly mess free too.
Fill up the tote bag with school supplies, groceries or even your laptop as you head out the door, and a rainbow will go perfectly with anything you own!
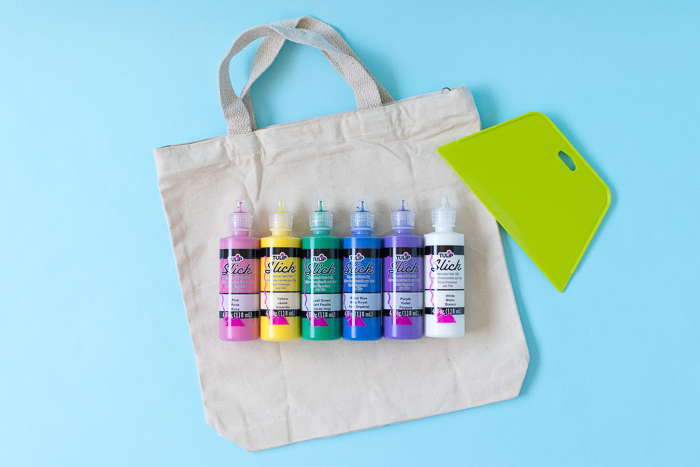
I used Tulip Dimension Fabric Paint and a pre-sewn tote bag from JOANN, but you can use any fabric paint for this project and feel free to make your own tote if you prefer to go the entirely handmade route.
Time: 10 Minutes
Supplies:
- Fabric paint, rainbow colors
- White fabric paint
- Tote bag
- Wallpaper smoother or similar (like a Cricut scraper!)
- Iron (recommended)
Step 1: Iron the tote bag completely flat. Any wrinkle in the fabric could change the design.
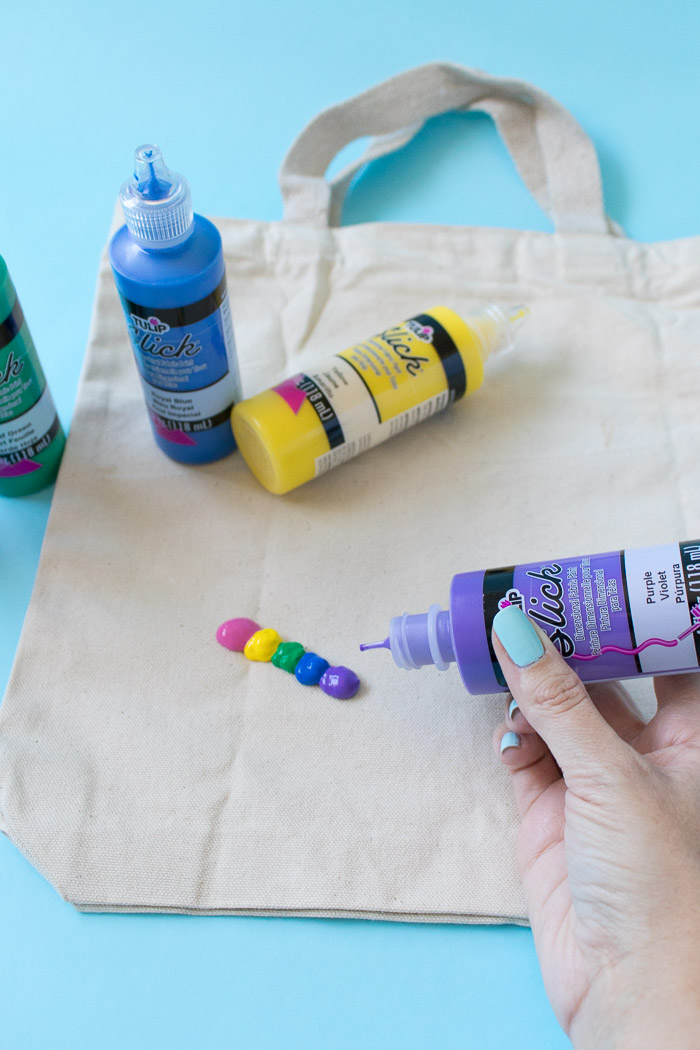
Step 2: Apply a dollop of paint about the size of ¼ teaspoon where you want the rainbow to begin near the bottom left of the bag. Line up the other colors of your rainbow next to it so that they are all touching.
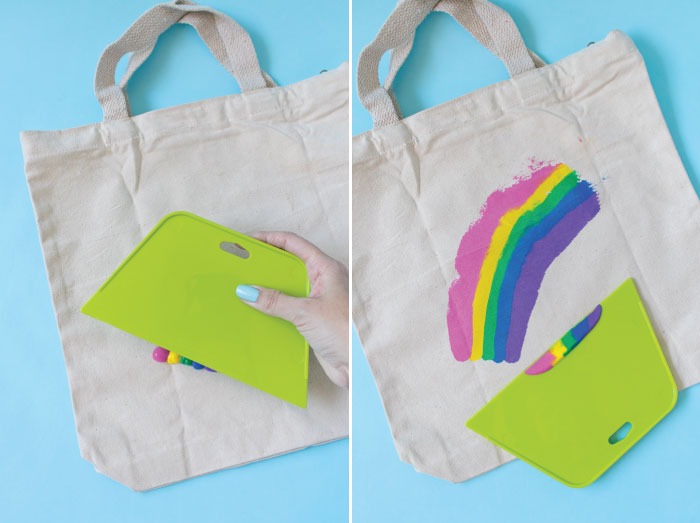
Step 3: Place the scraping tool on the left side of the paint and scrape an arc in one fluid motion. The leftover paint should stay on the scraping tool. It may not be perfect, but that’s part of the appeal! Simply wash it away.
Note, I am right handed, so I go from left to right to make the rainbow. It may be easier to do the opposite if you are lefthanded, so adapt as needed.
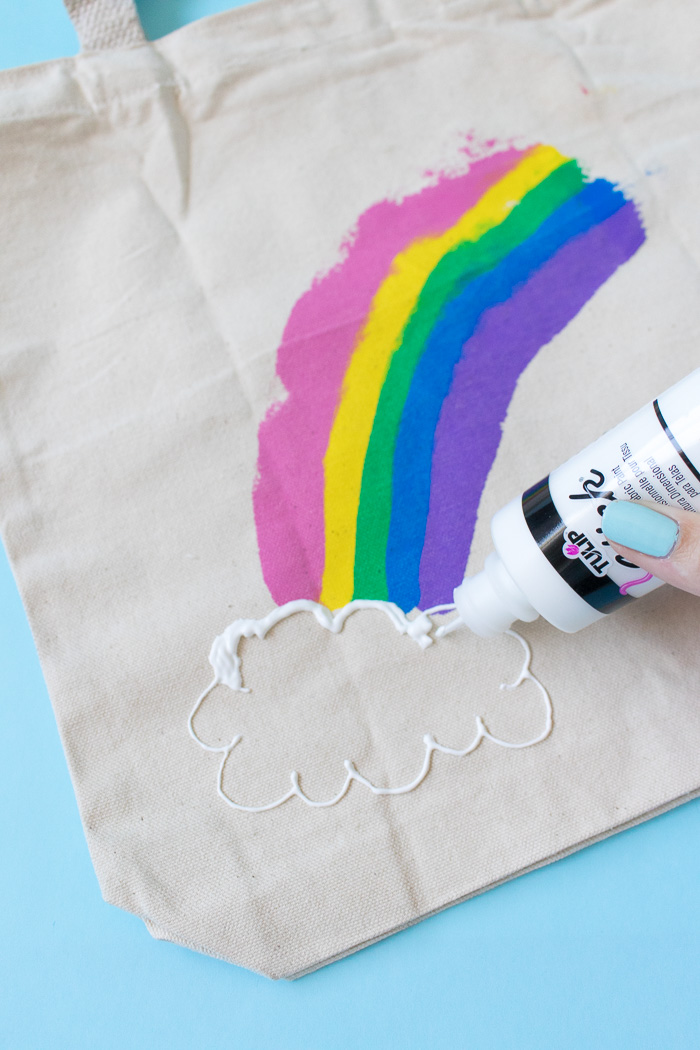
Step 4: Use the white paint to create a cloud at the bottom, covering the start of the paint scraping.
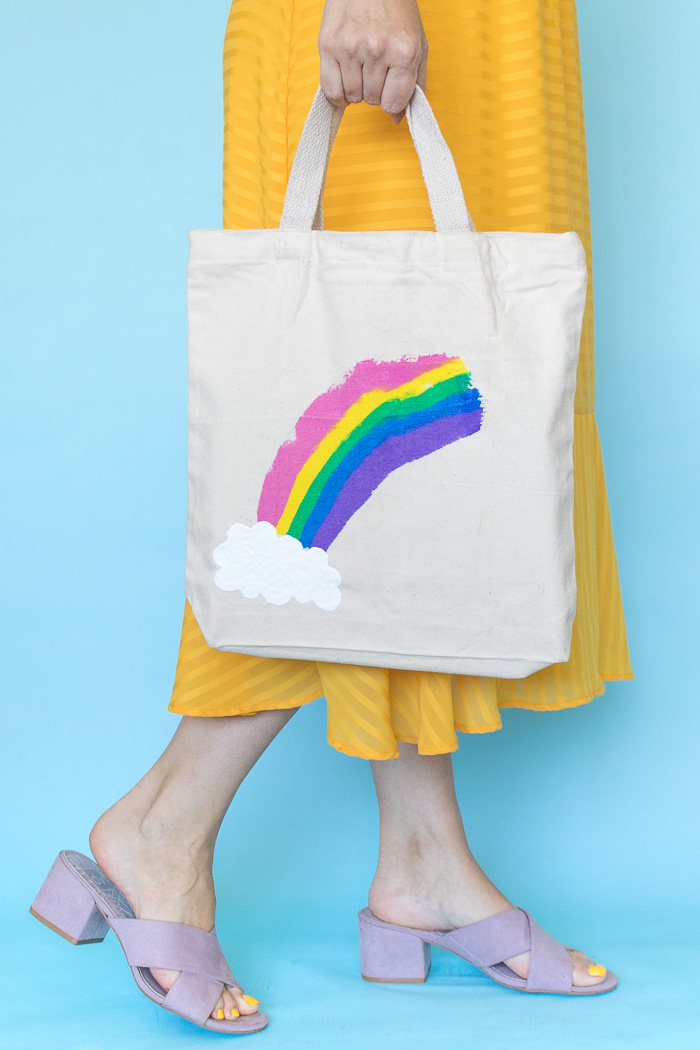
Let the paint dry overnight, especially if using a thick dimensional paint.
Then your rainbow tote bag is ready to hit the road! Fill it up and take it out on the town. After one project, you’ll love trying this paint scraping technique on everything!
Thank you to JOANN for generously sponsoring this post. All opinions are my own. Please note that this post contains affiliate links from which I may collect a profit should you choose to make a purchase. I only link to products I personally use or recommend. Thanks for supporting the brands that keep Club Crafted sharing!
Kate
This is a pretty good DIY tutorial. Support you!