The following post is sponsored by Excel Blades
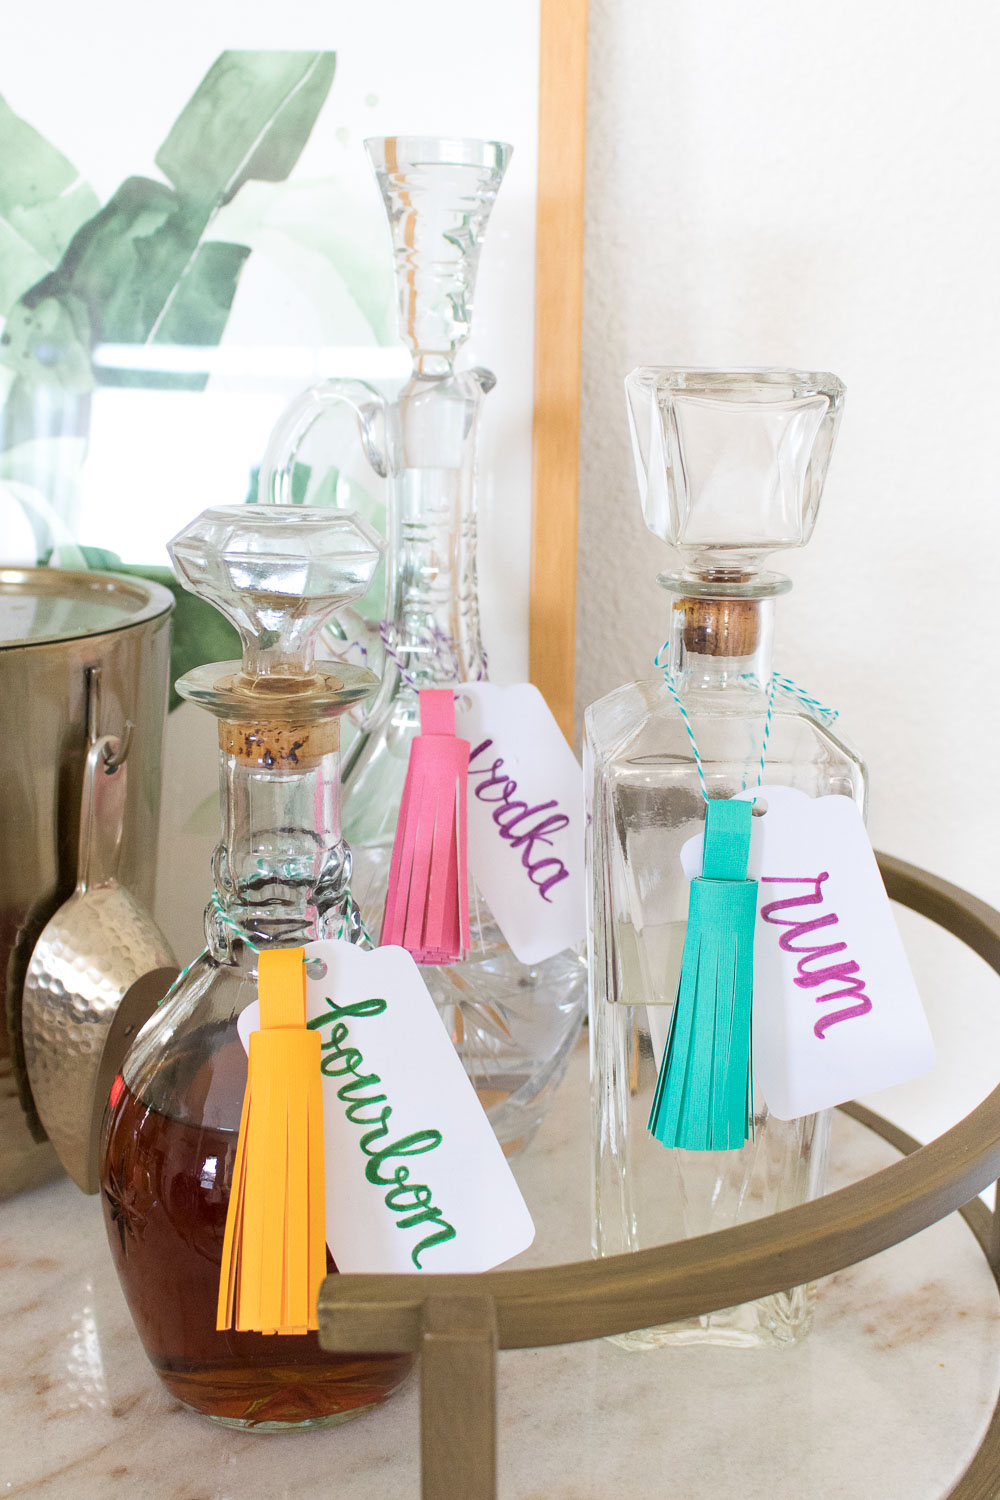
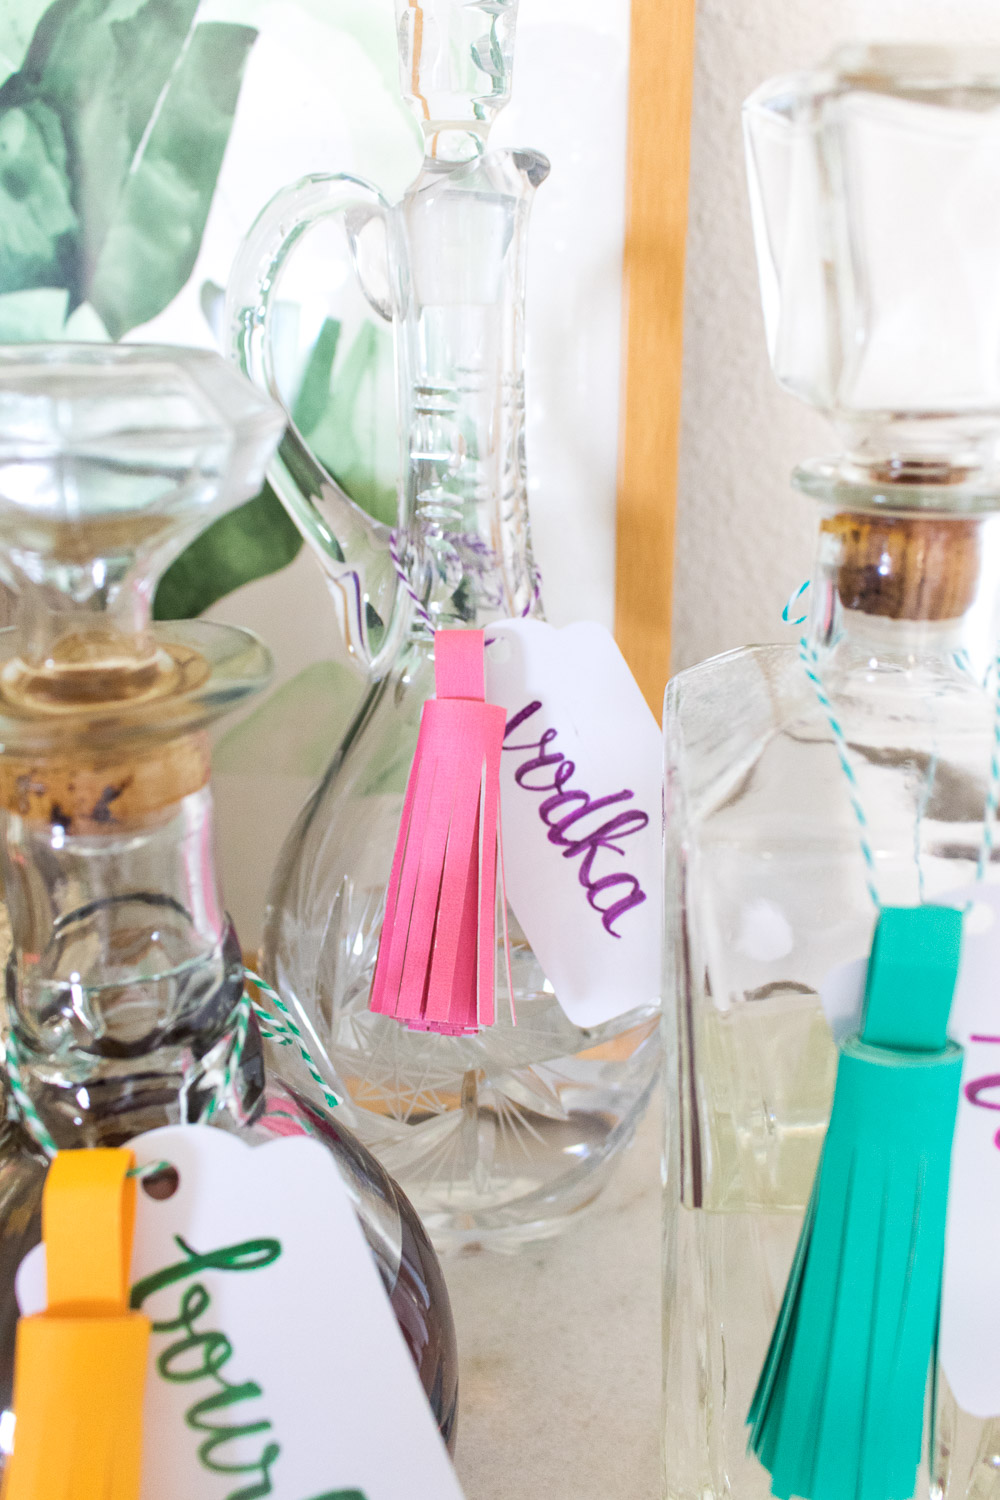
It’s a new year and you know what that means…time to get organized. I guess you could say I’m starting small since my first task to tackle was labeling my decanters on our bar cart. I recently purchased two of them at a vintage festival and now I have three camped out on the cart, but when guests came over, they’d have no idea what’s inside. Oops! So my first organizational task was to create these colorful DIY paper tassel decanter tags with my trusty Excel Blades hobby knife to label each of my decanters, and they can be easily traded out if I refill the decanters with something new. Because tassels are still all-the-rage and have a soft spot in my heart, they were the perfect decoration for these glass decanters.
 We’re all so used to seeing fabric or string tassels, but paper tassels are just as easy to make and come out beautifully. #humblebrag
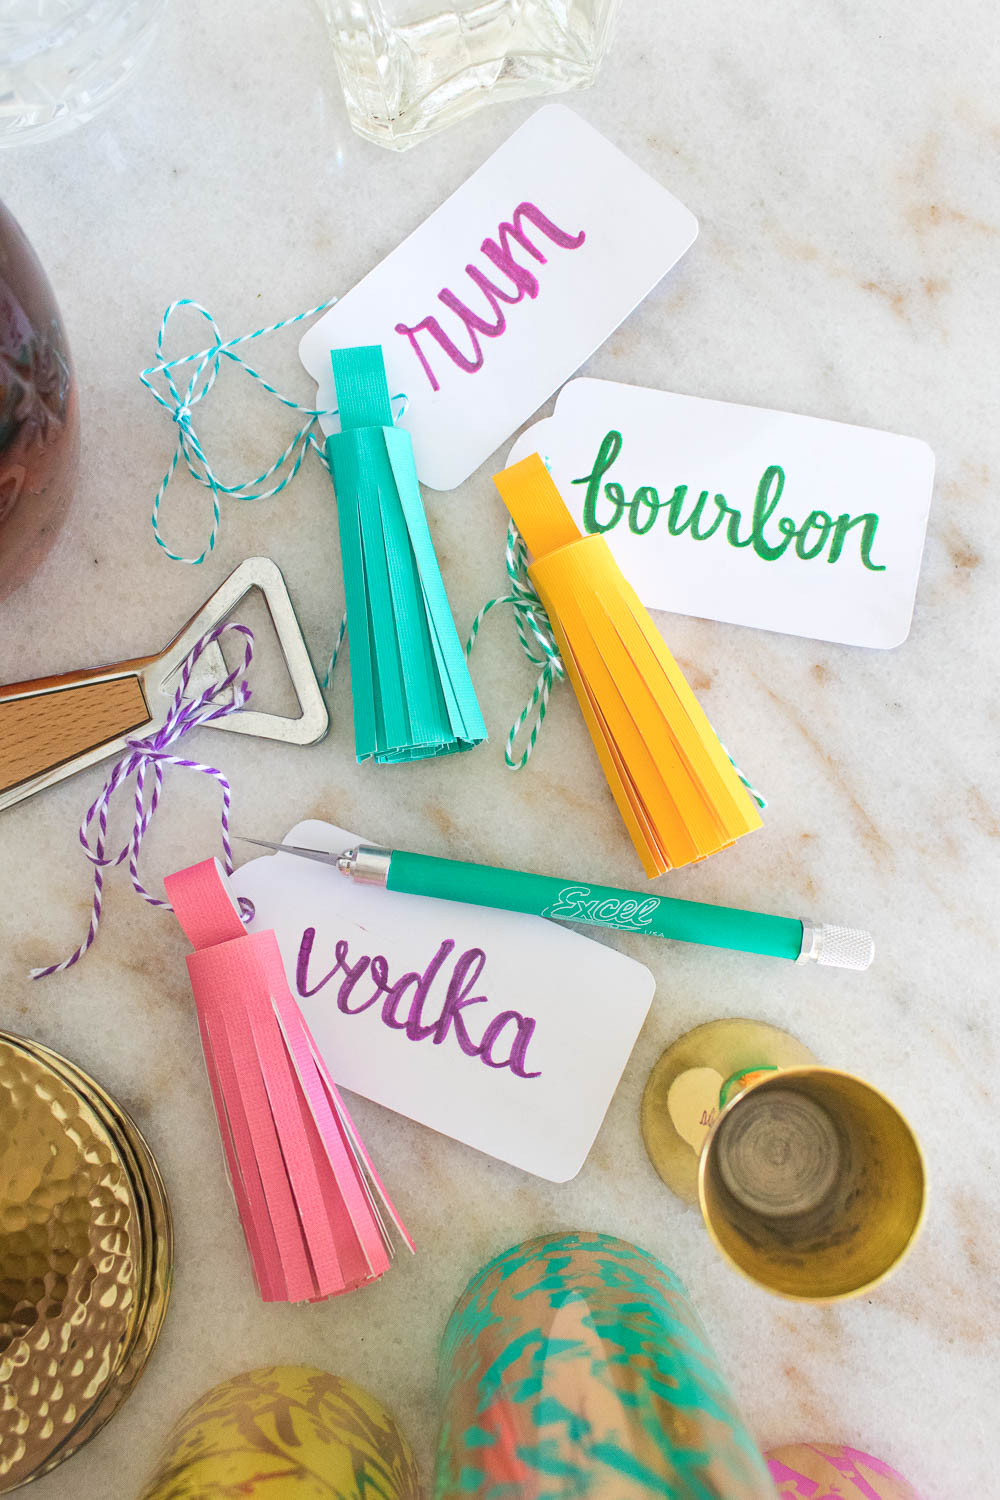
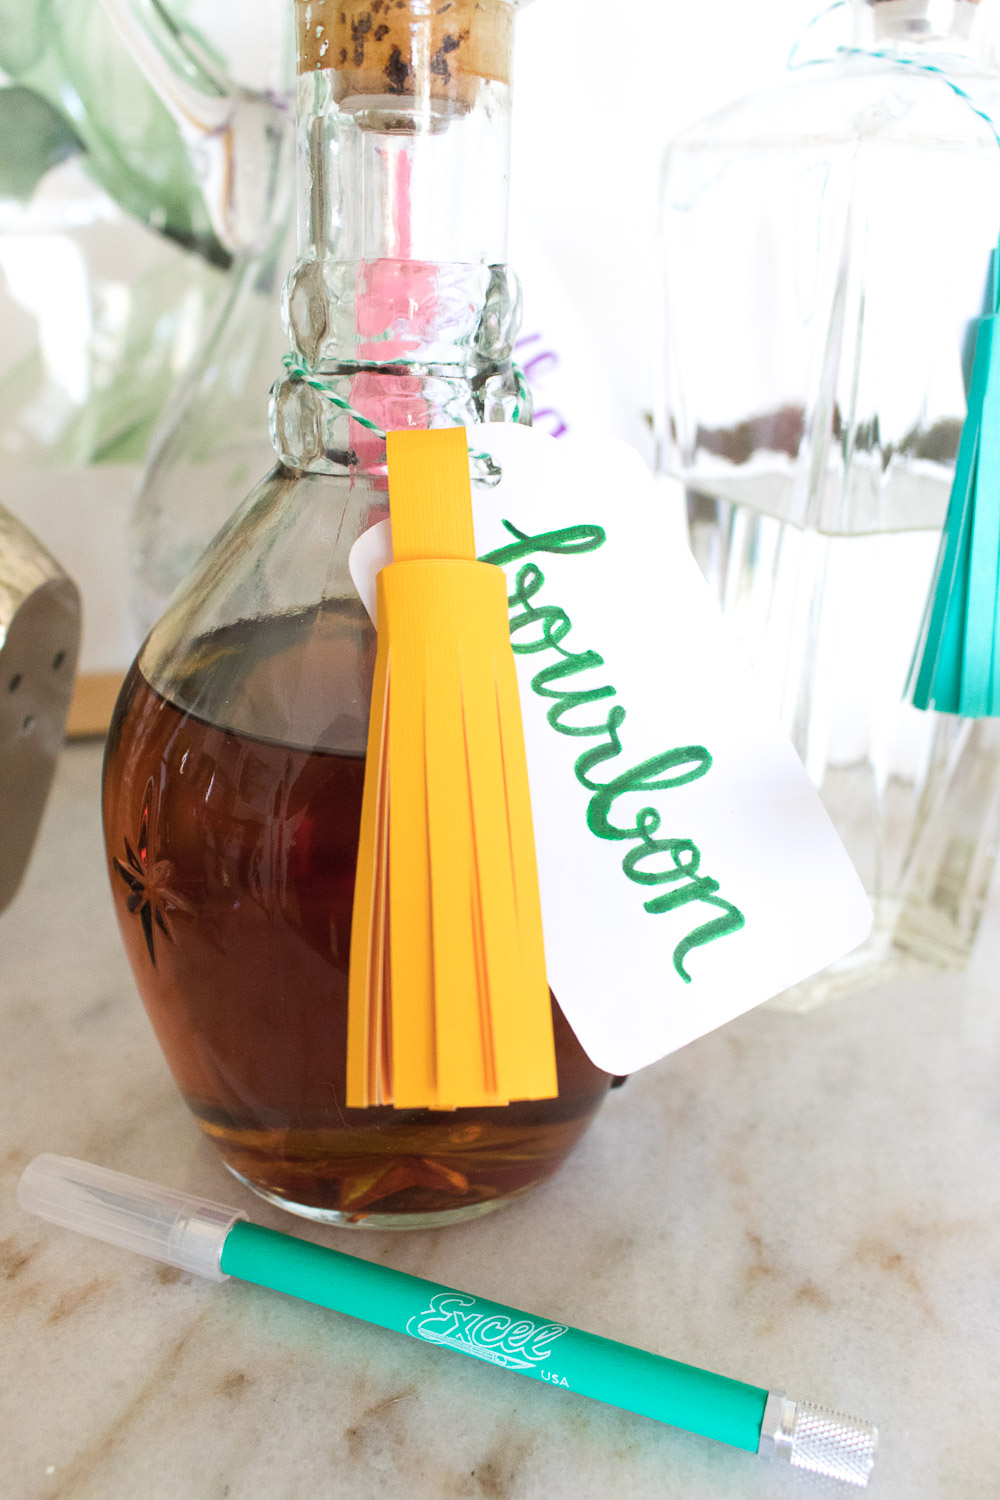
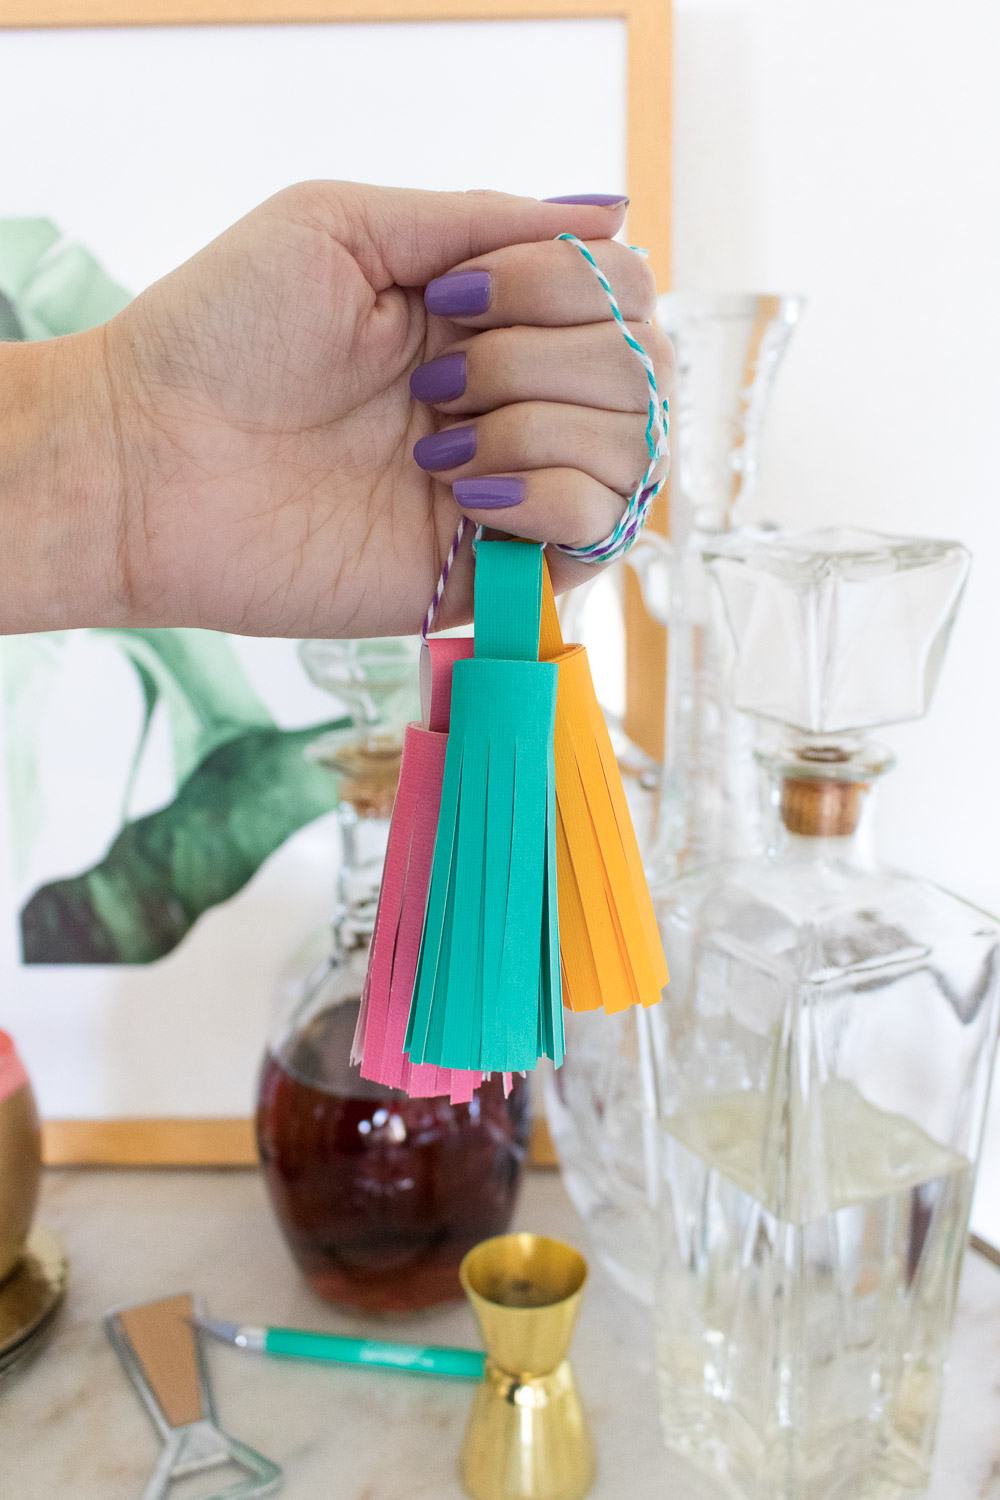
In minutes, turn a strip of cardstock into a paper tassel! I added simple handlettered tags labeling the alcohol in each decanter, and that’s all there was to it. These paper tassels are thick and strong, so they hold up well over time. I just love that they add a pop of color to my clear glass decanters, especially against my gold and marble bar cart. A little color makes a big impact!
 Time: 10 minutes
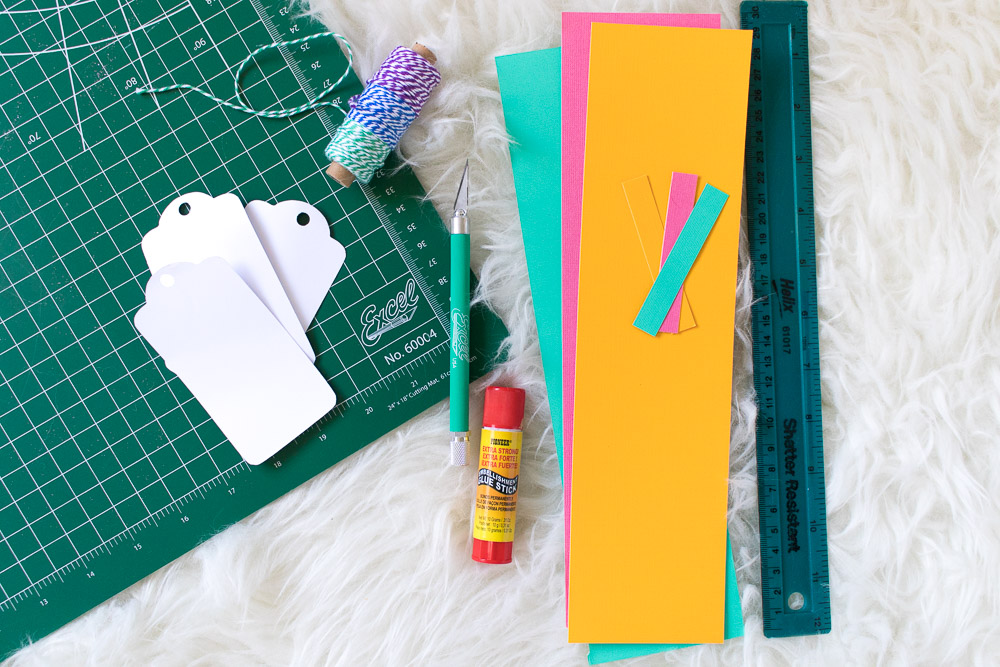
Supplies:
- Colored cardstock
- Ruler
- Excel Blades hobby knife
- Excel Blades cutting mat
- Glue stick
- String
- Cardstock tags
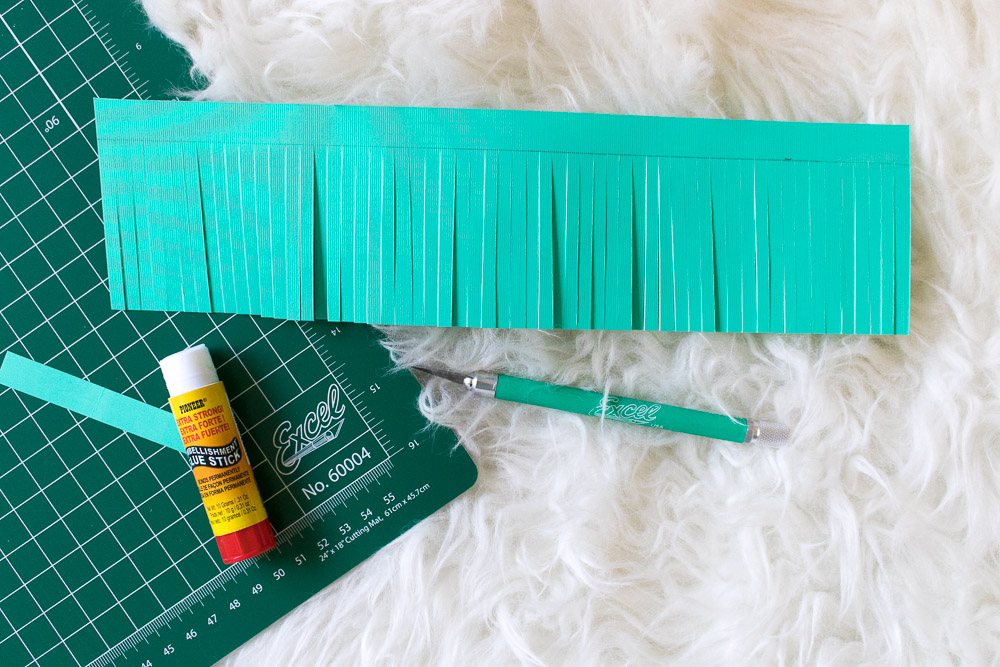
Step 1: Cut a piece of cardstock to 11.5 in x 3 in. Cut another piece 3 in x 1/2 in.
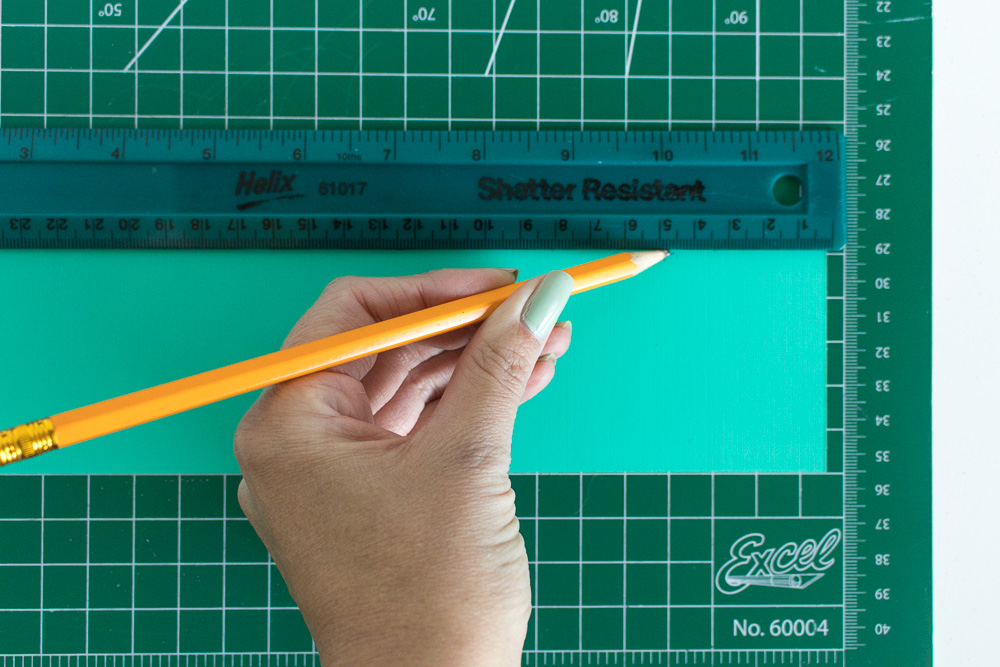 Step 2: On the side of the cardstock that will NOT be facing outward, draw a line 1/2 inch from the top. This will be a guide for the tassel cuts.
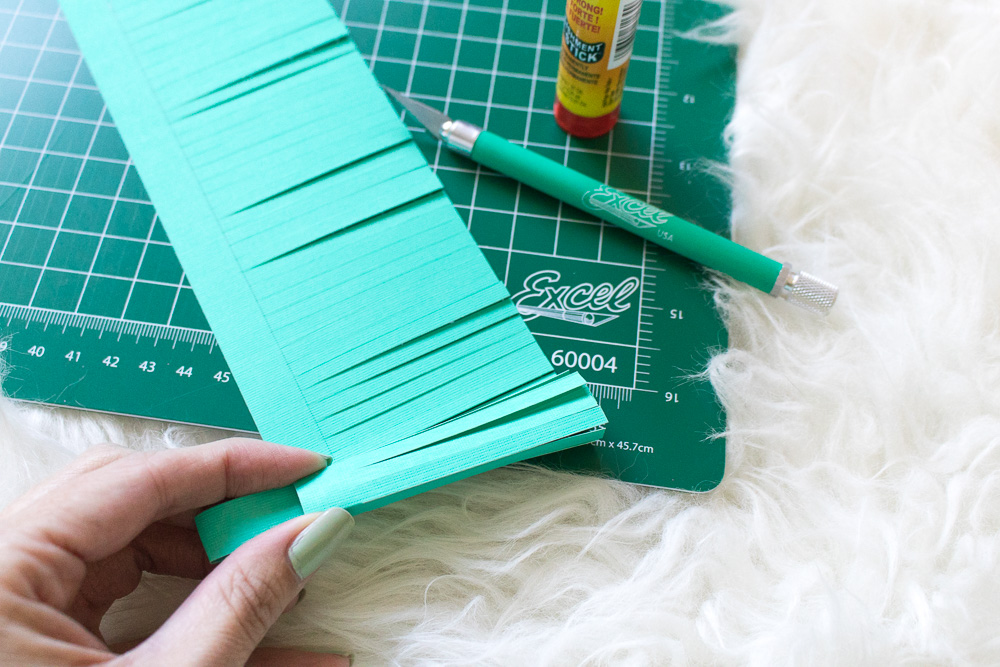
 Step 3: Using the lines of the cutting mat as a guide and a ruler to ensure straight cuts, use the blade to cut from the marked line to the edge of the cardstock every centimeter. The top 1/2 inch should remain uncut. Continue all the way across the 11.5-inch strip to create fringe.
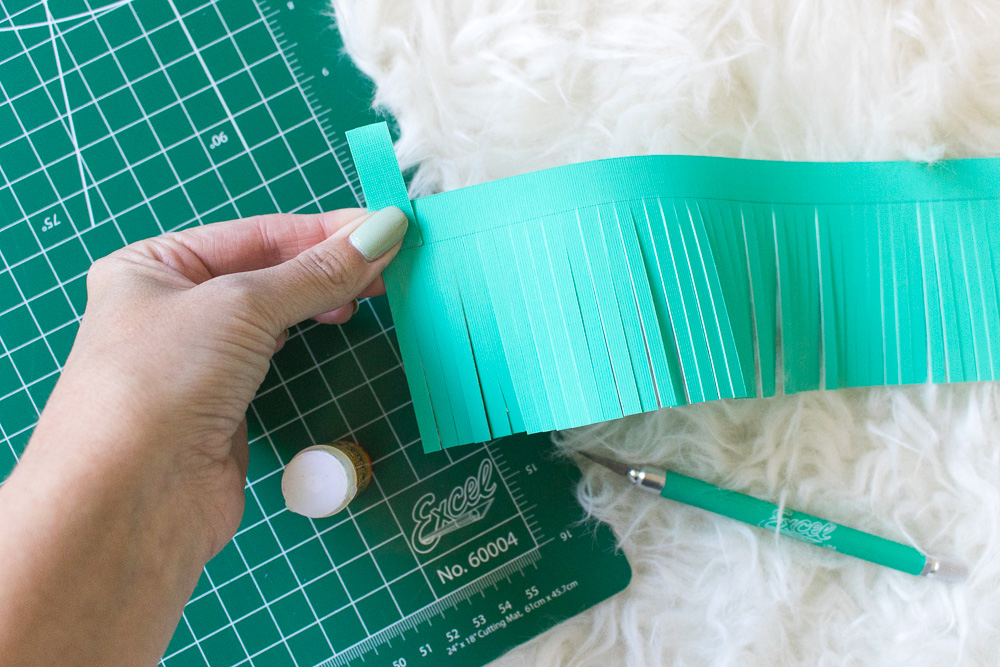 Step 4: Bend the 3 in x 1/2 in strip in half and glue together with the glue stick. Then glue to one end of the fringed paper.
 Step 5: Spread glue along the uncut strip. Starting at the end with the tab glued to the top, gently roll up the paper and glue the end down to create a tassel.
Step 6: Write on the tags or print them out, labeling the alcohol. Thread the tag and tassel onto a piece of string and tie around the neck of a decanter or bottle.
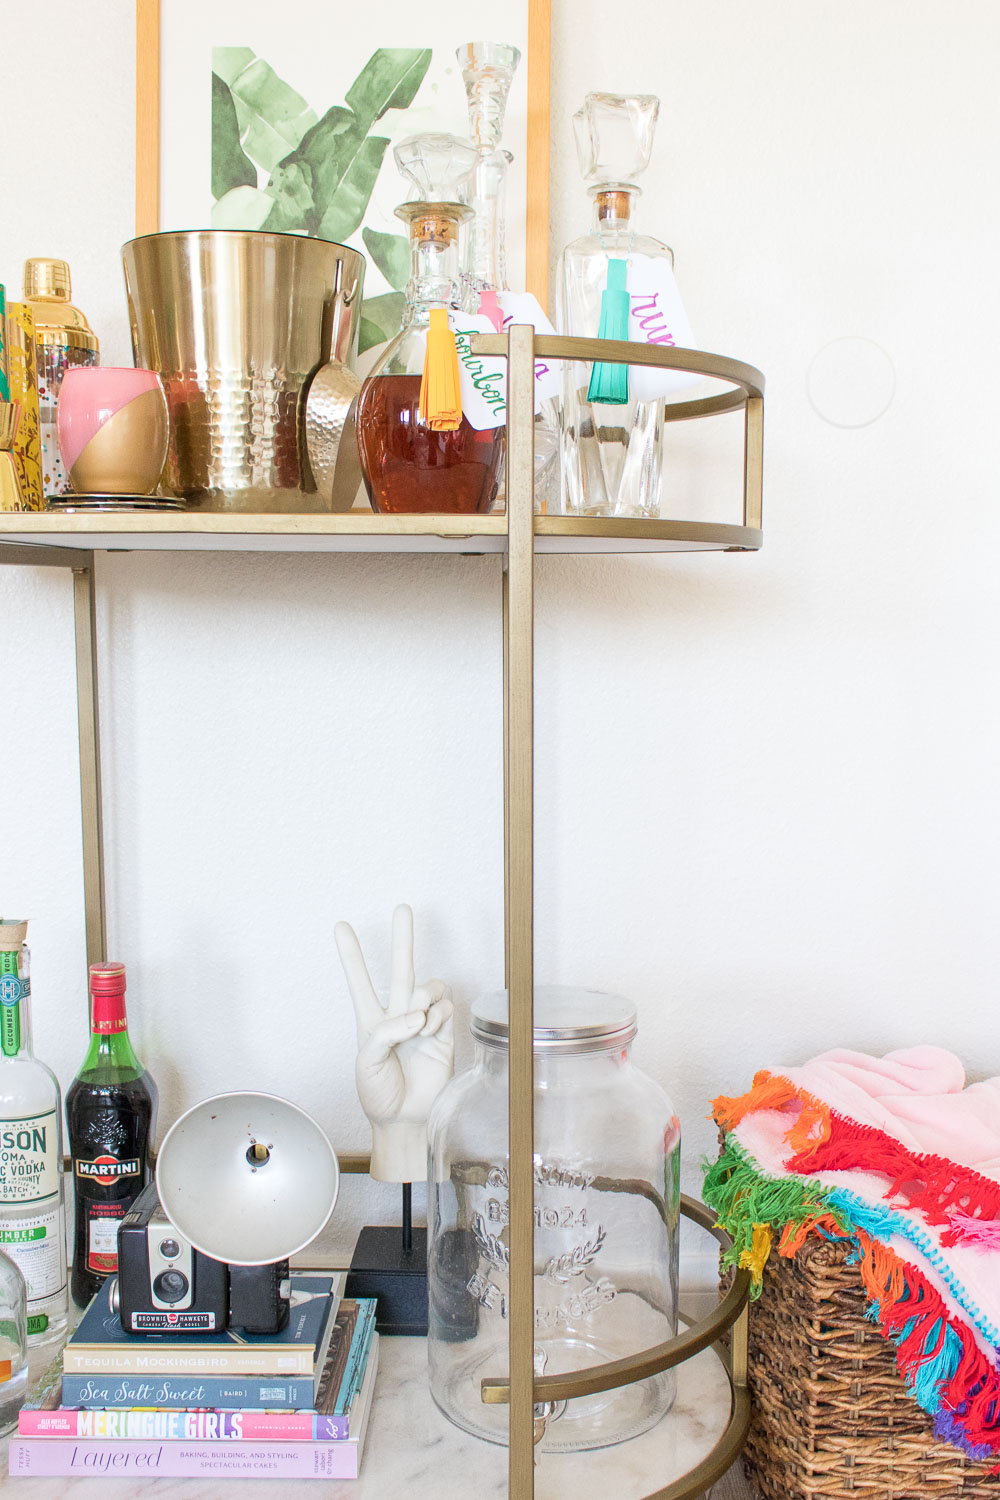 There you have it! Make them festive, colorful or coordinate with your home decor. Either way, your decanters never looked so good! Simply swap out the tags if you ever replace the alcohol inside and avoid getting the paper wet as it will stain or warp the cardstock.
What else can I add tassels to?!
Thank you to Excel Blades for generously sponsoring this post. All opinions are my own. Please note this post may contain affiliate links from which I may collect a small profit should you choose to make a purchase. Thanks for supporting the brands that keep Club Crafted sharing!