• HOME
  • SERVICES
  • PORTFOLIO
  • ABOUT
  • Club Crafted

  • CONTACT
  • BLOG
    • DIY
    • RECIPES
    • SPONSORSHIPS
  • SHOP

Club Crafted

DIY Tutorials, Featured
/
February 14, 2018

DIY Ombre Letterboard

DIY Ombre Letterboard | Club Crafted

The following post is sponsored by Aleene’s

DIY Ombre Letterboard | Club Crafted
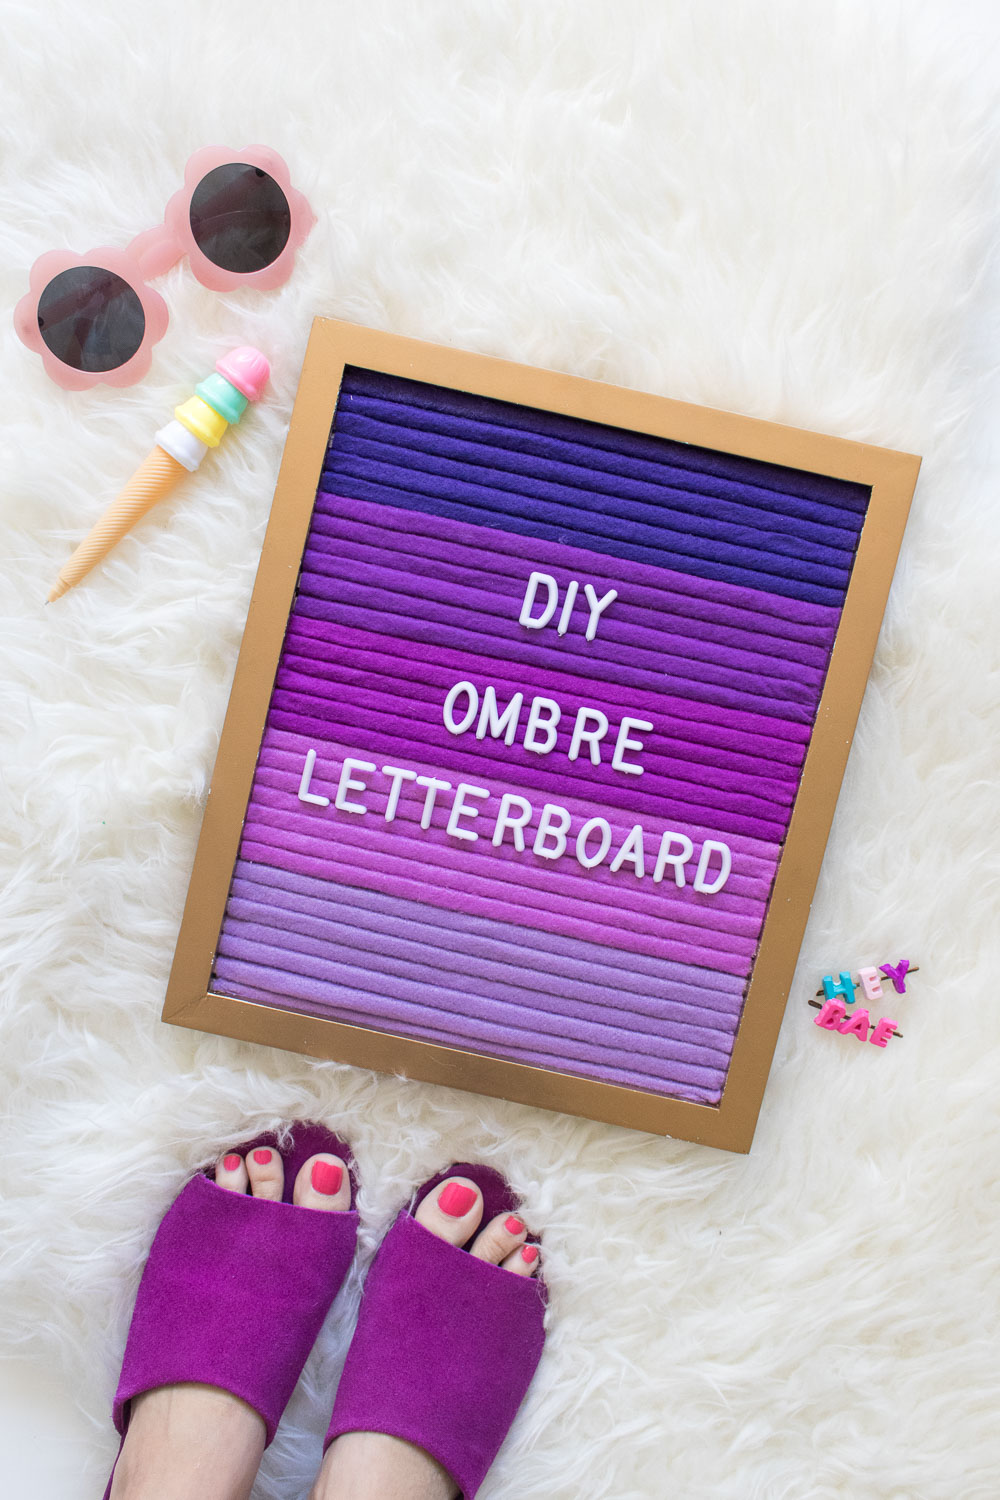
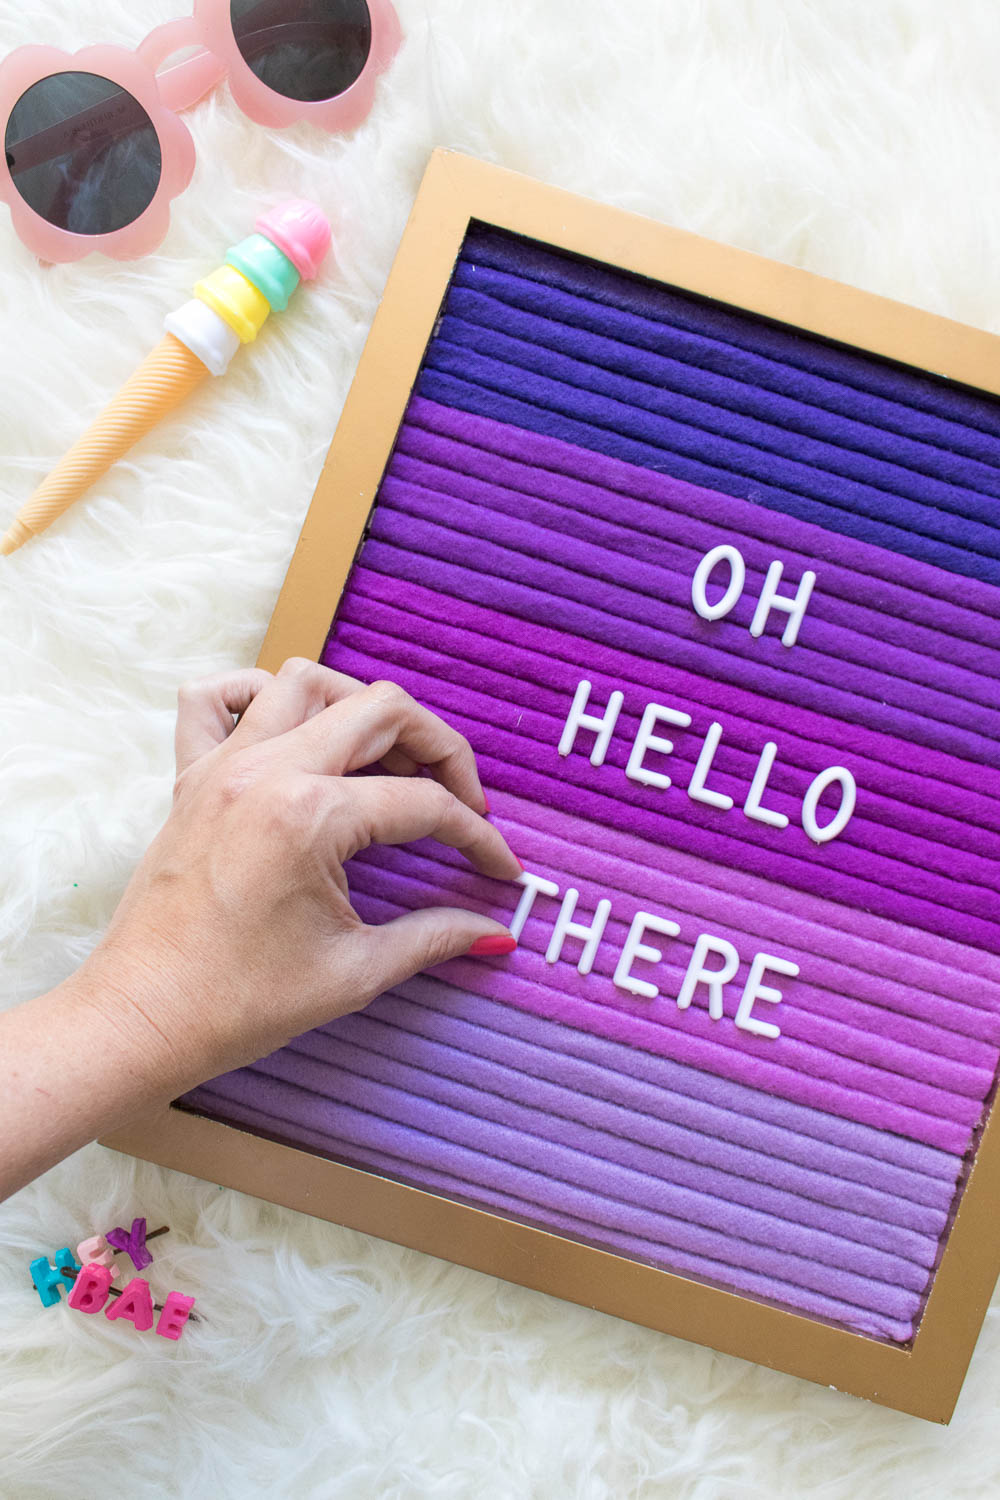
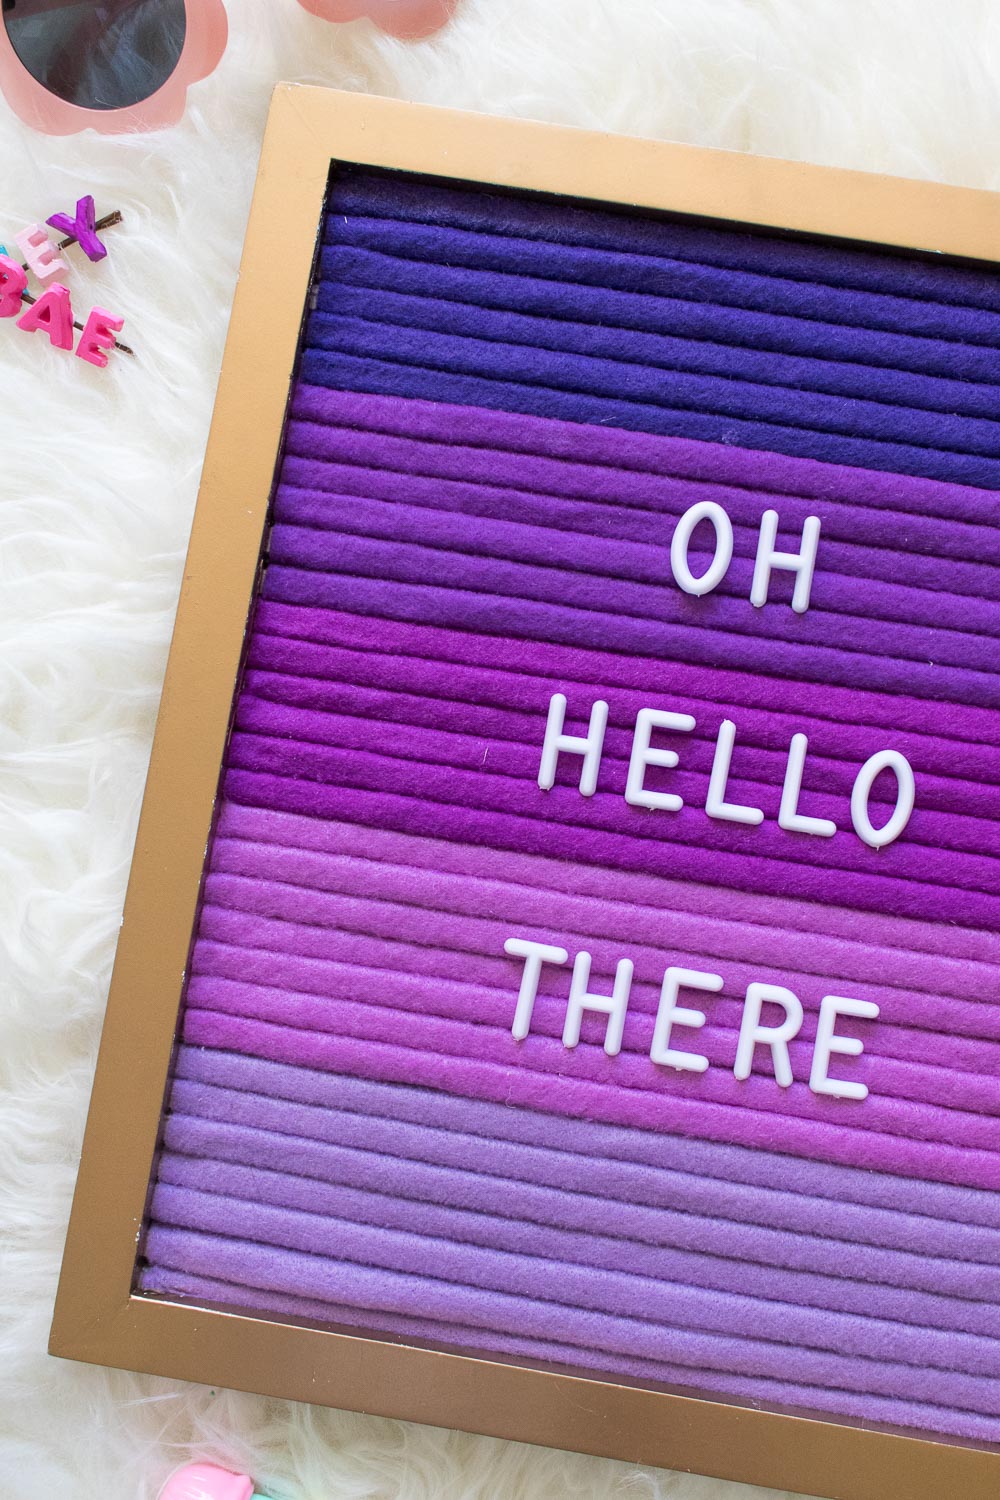
It’s pretty safe to say that we’ve all been a little obsessed with letterboards lately, and I’m definitely one of the many. These felt vintage-inspired letterboards allow you to display fun little sayings, and even though I knew I HAD to have one, I decided it would be more fun to make one for myself. This DIY ombre letterboard is inspired by the Aleene’s brand, set inside a gold painted frame with an ombre pattern of purple felt. I promptly spent an hour after finishing this project arranging and rearranging letters to make goofy sayings! 

DIY Ombre Letterboard | Club CraftedThis letterboard was no easy feat. It is more time consuming that a lot of the projects I share here, but it was SO worth it. 

With my Aleene’s Fabric Fusion Glue and Tacky Glue, it still took less than an hour to make this unique ombre letterboard. I’ve seen quite a few DIYs for making your own letterboards using a variety of techniques, but I found that using square dowels as a base for the letterboard was the most effective. 

Time: 45 minutes

Supplies: 

  • Felt, 4-5 different shades of color
  • Frame, 1 inch depth or more*
  • 1/4-inch square wooden dowels, cut to size of frame
  • Aleene’s Fabric Fusion Glue
  • Aleene’s Tacky Glue
  • Credit card, gift card or similar
  • 1-inch letterboard letters
  • Scissors

* I recommend this frame style because it has the ideal “lip” for placing the dowels.

Note, before beginning, cut about 3/4-inch square dowels to the size of the inside of the frame. You will need 30-34 pieces to fill an 8 x 10-inch frame. The wood is soft enough that you may be able to cut it with a craft knife. 

Step 1: Remove the backing of the photo frame and set aside. Place frame front side-down on a flat surface. 

Step 2: Apply Tacky Glue to the inside “lip” of the frame. Place the pre-cut dowels on top and space about 1/8-inch apart. 

Step 3: Repeat with all of the dowels spaced very close together inside of the frame. Once you’ve glued several in, insert a letterboard character to ensure spacing is correct. Let the glue dry until sturdy.

Step 4: Measure the open area of the frame. In this case, it was 9 1/2 inches wide. Cut the various shades of felt to the same width using scissors or a rotary cutter. 

Step 5: Once the dowels are securely in place, turn the frame right side-up. Starting with the darkest shade, apply Fabric Fusion Glue to the top dowel and smooth the felt on top. 

Step 6: With a credit card or similar, gently press the felt into the crevices between the dowels and up against the tops and side of the frame. 

The first few are the most difficult. It becomes easier and much faster as you go. 

Step 7: For most accurate results, measure the length of the open area of the frame and divide it by the number of shades of felt to determine how often to switch colors. In this case, every 2 1/4 inch. When you’re ready to switch colors, maneuver the felt all the way through the crevice between the next dowel and cut away excess.

Step 8: Pick up where you left off when the next piece of felt. Apply glue and leave excess felt to press through the crevice and continue the pattern until the letterboard is full. 

Step 9: Insert the backing of the frame back in place and add letters for displaying around the house!

DIY Ombre Letterboard | Club CraftedHonestly, this is probably one of my favorite projects to date!

Thank you to Aleene’s for generously sponsoring this post. All opinions are my own. Please note this post may contain affiliate links from which I may collect a small profit should you choose to make a purchase. Thanks for supporting the brands that keep Club Crafted sharing! 

TAGS:felthome decorombresponsored

You May Also Like...

DIY Iridescent Party Hats

September 21, 2017

DIY Silhouette Heart Balloons

February 7, 2018

DIY Embossed Heart Keychains

January 30, 2018

Leave a Reply Cancel Comment

Recipe Rating


Previous Post
Cosmic Brownie Butter
Next Post
DIY Rainbow Catch-All Dish

Hey there! I'm Holly and I like to make stuff.
  • Facebook
  • Instagram
  • Pinterest
  • Twitter
  • YouTube

LOOKING FOR SOMETHING?

TRY THESE FAVORITES!


RAINBOW PLACEMAT CLUTCH


RAINBOW FRINGE BLANKET


COSMIC BROWNIE FUDGE


IRIDESCENT PARTY HATS


WELL, I was going to post this photo and talk abou WELL, I was going to post this photo and talk about the new pins in the shop...but they SOLD OUT in 12 hours instead πŸ˜­πŸ™ Andrew and I are so overwhelmed with the love of the #FIPWarriors community. Thank you to anyone who's purchased a pin to support Milo's treatment! We're so close to the end now! One more batch of pins coming up soon 😽
What do you mean I have to take down my Christmas What do you mean I have to take down my Christmas decorations?! 😭 Half our neighbors already took down their Christmas lights, so I guess the only goal is to not be the LAST one with lights up. How long do you keep up your decorations?
Maybe next year I'll finally remember to do a holi Maybe next year I'll finally remember to do a holiday card before it's a week til Christmas, so we can actually send one πŸ€ͺ When we get Christmas cards, I always feel like a little kid getting mail again! Do you send a holiday card??⁠
⁠
(Grab this DIY card holder in the blog archives! πŸ‘‰)
More product is coming soon! πŸŽ‰ I'm honestly SHO More product is coming soon! πŸŽ‰ I'm honestly SHOCKED to see Milo's pins sell out so quickly. We made 50 with the expectation that we wouldn't sell very many, but I just put in an order for more inventory! 😭⁠
⁠
This time we'll be selling black and white cat "FIP Warrior" pins to help raise money for Milo's treatment. Stay tuned - a pre-sale is coming! Pins will ship again in early January. In the meantime, there's plenty of other products available in the shop! (Visit my @etsy via the link in my bio)
NEW LAUNCH! 😸 Thank you all so much for your su NEW LAUNCH! 😸 Thank you all so much for your support of Milo while he goes through FIP treatment! I designed a new enamel pin to help us raise the funds to pay for Milo's treatment...THEN we sold almost all of the pins in just in a few hours! I'm so thankful and in shock of the generosity of our FIP community 😭⁠
⁠
There are a few left and more on the way, so you can SHOP NOW on @etsy and here on IG!! If you want a pin and they are sold out, please tag yourself below! Visit the link in my bio to purchase πŸ›β 
⁠
"FIP Warrior" is the name we give to cats fighting FIP and the humans who help them, bringing awareness to the disease and possible treatments. Our Warrior Milo is almost halfway through his treatment and we couldn't be more grateful to see him getting better! Every purchase from my shop helps us to pay for his expensive treatments and is so, so appreciated πŸ™πŸΌ
🍁 I can't beLEAF it's been a whole month since 🍁 I can't beLEAF it's been a whole month since my last post (oops!) but I had to fit in my one obligatory fall photo before I dive straight into Christmas! If you caught my Stories recently, you may have already seen why I've been so absent...⁠
⁠
Last month, our sweet Milo was diagnosed with a disease called feline infectious peritonitis (FIP). It's very serious and has required our full attention to give him daily injections that should help him recover. The treatment is 84+ days long and has taken a huge emotional toll on us. You can learn more about Milo's FIP story in my profile Highlights!⁠
⁠
Long story short: I've been too emotionally drained from Milo's treatment, my regular work and the crazy world around us to even think about social media 😣 I truly don't know how you fellow creators do it! Hopefully the cheerfulness of Christmastime gives me the urge to create again! (πŸ“Έ cookies made for a project with @spectrumorganic)
  • ABOUT
  • SERVICES
  • CONTACT
  • BLOG

Copyright Holly Wade Β© 2019 Site Powered by Pix & Hue.