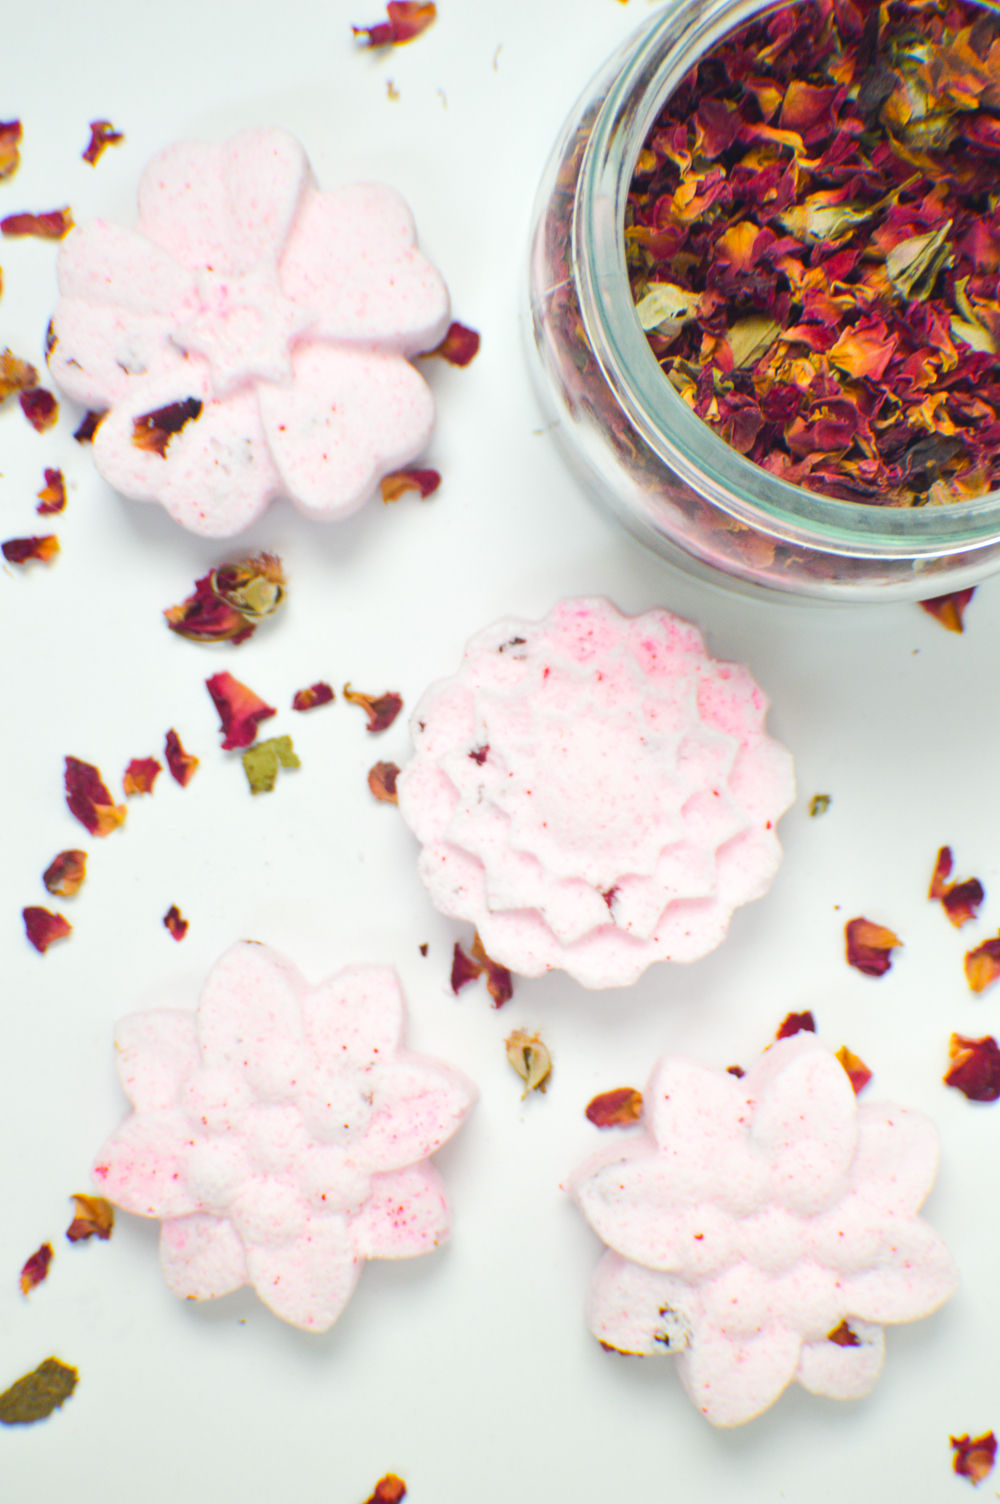

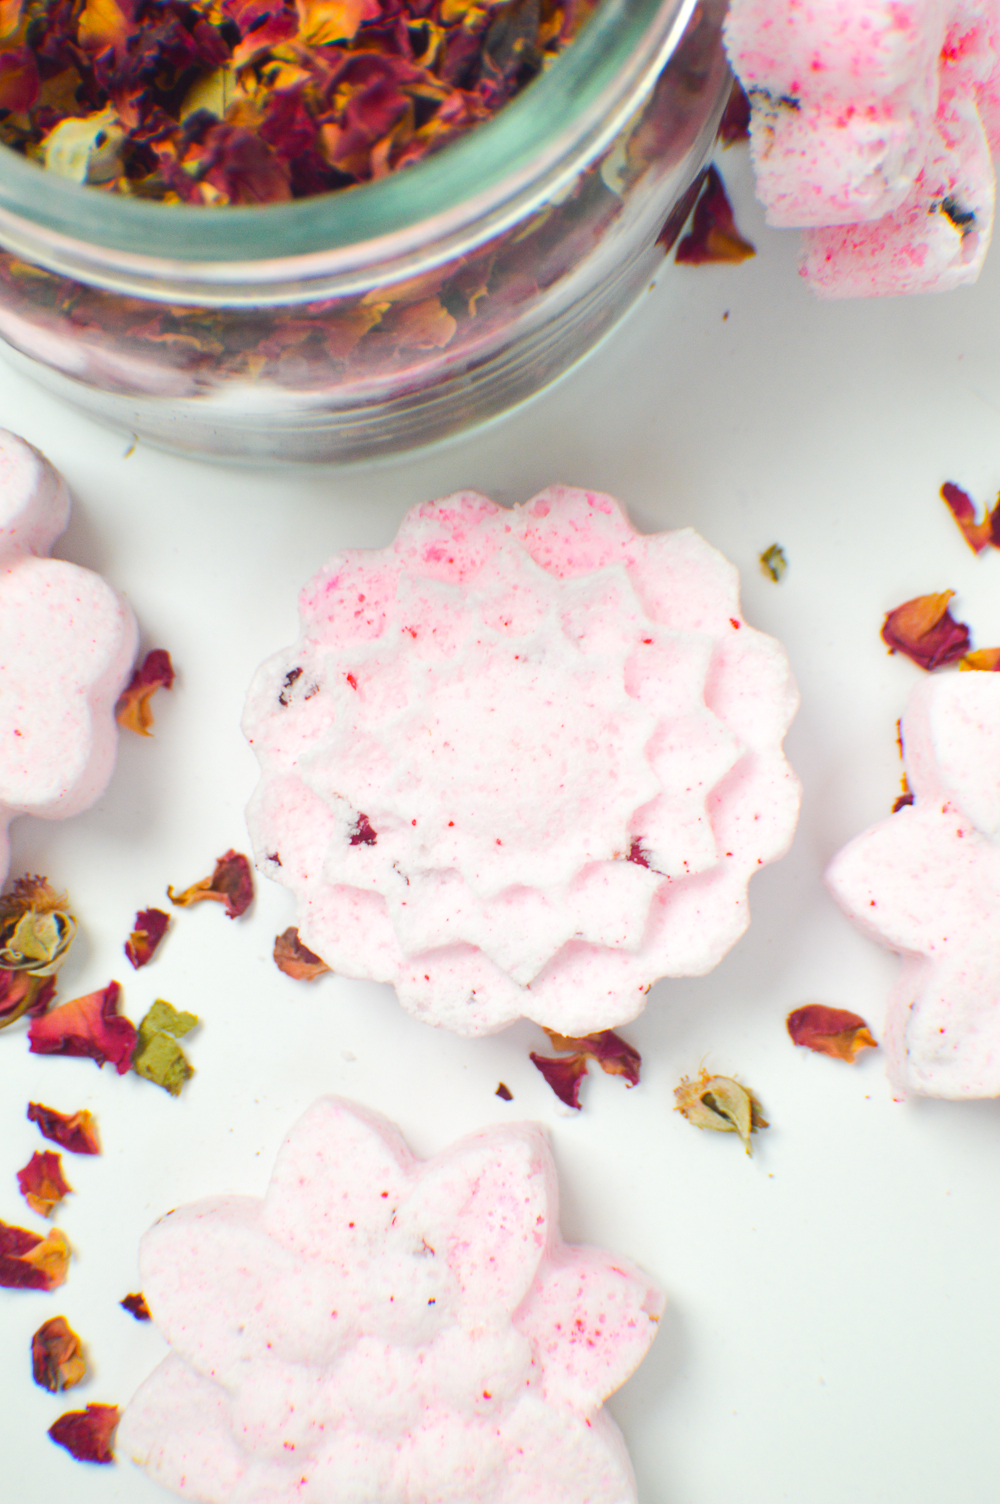
When we moved into our new apartment, I was thrilled to have a bathtub that felt clean enough to bath in! A warm bath feels wonderful after a long day, especially after a trip to the gym. So today I’m showing you how to make these very simple DIY floral bath bombs with your favorite scent using a silicone mold. After this, you’ll want to make a million bath bombs!
I’ve been trying very hard to be more active on a daily basis and going to the gym more regularly, which means I’ve been really sore. Since I’ve always had back problems, being active brings out a lot of muscle pain, so I started taking baths to help me relax. I bought some bubble bath and epsom salts and found that the epsom salts made a real difference. So I decided to make some bath bombs with epsom salt that smell like roses because rose is my favorite scent and I LOVED them. Thus, I wanted to share!
These floral bath bombs would also be the perfect gift! When in doubt, I always buy something that smells good, like lotion, bath salts or a candle, so these DIY bath bombs are perfect and it adds that homemade touch that people love. It always means more when something is homemade just for you, you know?
Use your favorite scent and even add things like flower petals to your bath bombs that will be revealed when added to water. Here’s how to make them!
Time: 15 minutes + dry time
Supplies:
- 1/2 cup baking soda
- 1/4 cup citric acid
- 1/4 cup epsom salt (regular or scented)
- 2 tbsp corn starch
- 12-15 drops fragrance or essential oil (I used rose)
- 1-1 1/2 tsp olive oil or vegetable oil
- Silicone flower mold
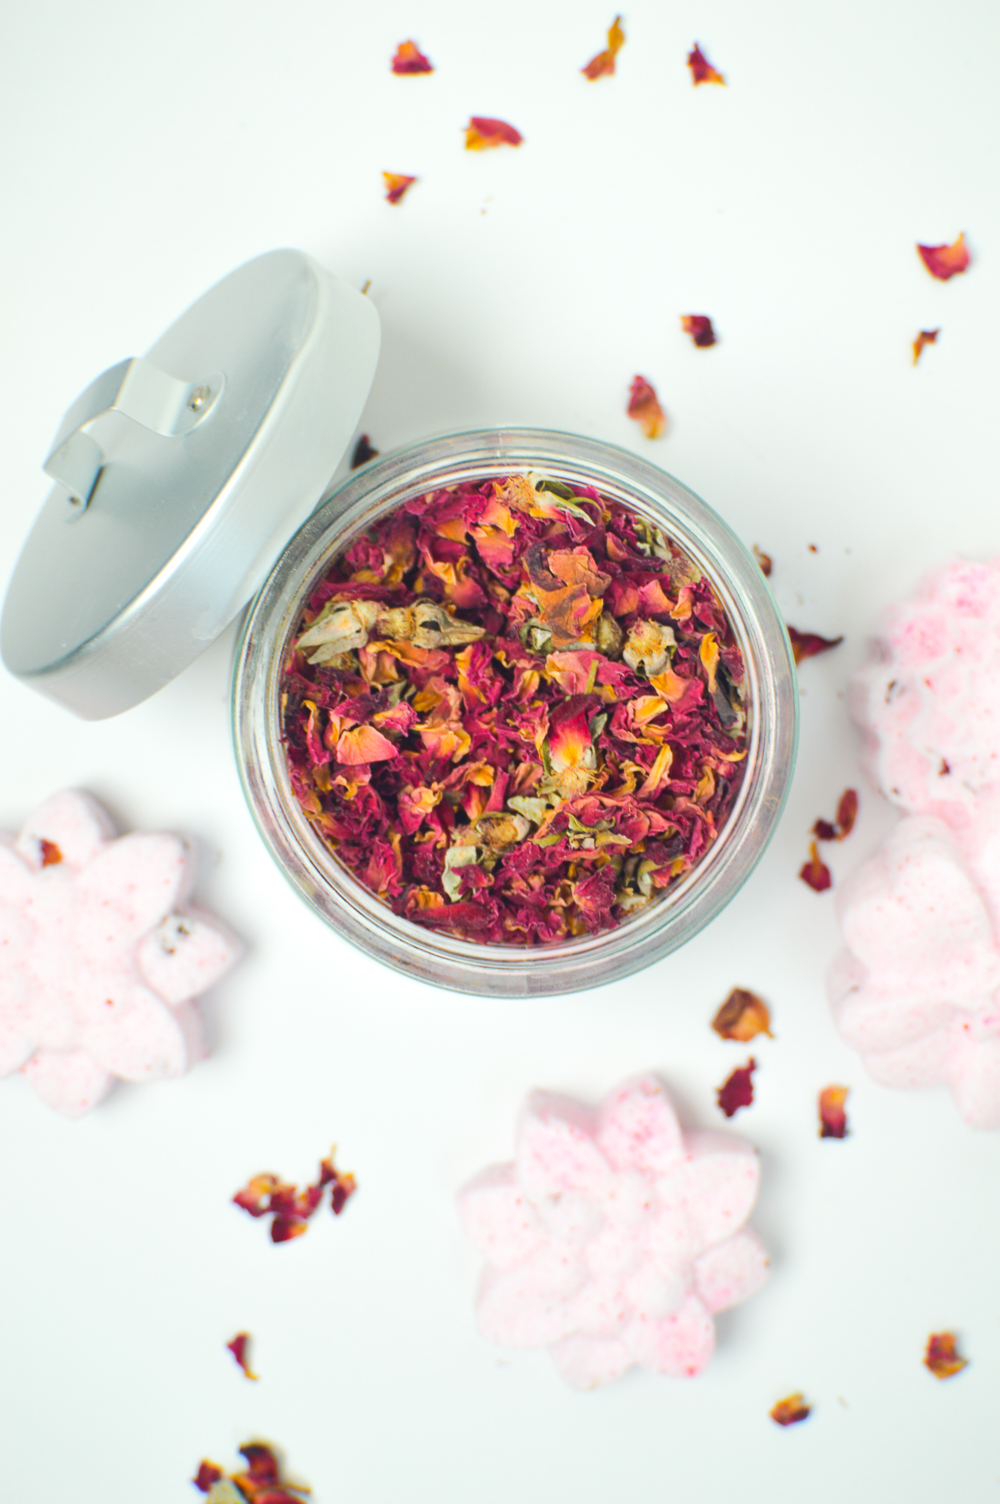
- Dried flowers (optional, I used rose)
- Food coloring (1-2 drops, optional)
How to:
- Incorporate all dry ingredients into a bowl and whisk to combine (add dried flowers if desired)
- A little at a time, mix the liquid ingredients into the dry ones with a whisk. You’ll know you’ve reached the right consistency when the mixture barely holds together (kind of like making a sandcastle)
- Press the mixture into the silicone mold with your fingers and/or the back of a spoon. It should be packed tightly
- Set aside to dry out for at least 2 hours and check occasionally. They are ready to remove when you can press on them without any give
- Once dry, carefully remove from the mold
- Wrap in cute bags as gifts or drop one into a bath and let it fizz!
I tried this recipe several times to get it right, and I discovered that using water is the enemy of bath bombs because it activates the fizzing of the baking soda. Use only oil and start with a small amount before adding more because too much oil can keep them from drying out well. If possible, let dry overnight to ensure best results.
What scent would you make your bath bombs? Share in the comments!
Kyra
Amazing gift! Thanks for such a fun activity!
Jillian Kelly
How big do these get? Will they fit in a 4×6 organza bag?
Holly Wade
Jillian KellyHi Jillian, the size completely depends on the mold you choose to use. You can use a small mold to fit your desired bag size.
Dereck
Is the oil supposed to be tablespoons? I had to use about 4 teaspoons on ours.
p.s. our girls loved making these for mothers day.
Holly Wade
DereckHi Dereck,
So glad you all liked them! The amounts are flexible because it also depends on the amount of liquid from the fragrance.
Christina
I just finished a batch. They look and smell great! I used vanilla sent but it made only 3 cupcake size bath bombs. Is that right? Or did I do something wrong?
Holly Wade
ChristinaHi Christina, as long as they do not fall apart, you definitely did it correctly! The amount of bath bombs the recipe makes depends on the mold size and how thick you make them, so it’s kind of subjective.
Lauren
I made these for my mom for her birthday and she loved them!
Deanna
How many pieces did this recipe yield?
Holly Wade
DeannaHi Deanna! It yields about 8 bath bombs depending on size
Diane
DeannaMine have been sitting in my molds for 4 days and they still fall apart when i try to push on them. do i need more oil?
Holly Wade
DianeYes, it either needs more oil or more dry ingredients depending on how the mixture feels. If it’s super dry, then more oil is the answer. If it seems wet enough but won’t stick together, then add more salts. Sometimes the humidity can impact how well the bath bombs come together.
Saltean
These bath bombs look so cute and fragrant. Thanks for sharing the recipe with us.
ittefaqco
I love to make bath bombs but never tried one with rose. I have pink Himalayan salt I want to use it instead of Epsom salt for all its amazing benefits and give them a natural light pink color. I can’t wait to try this recipe!
Holly Wade
ittefaqcoSounds like a great way to incorporate natural pink color!
Barcelone
Awsome site! I am loving it!! Will come back again. I am taking your feeds also.
Holly Wade
BarceloneThank you! I’m so glad you like it 🙂