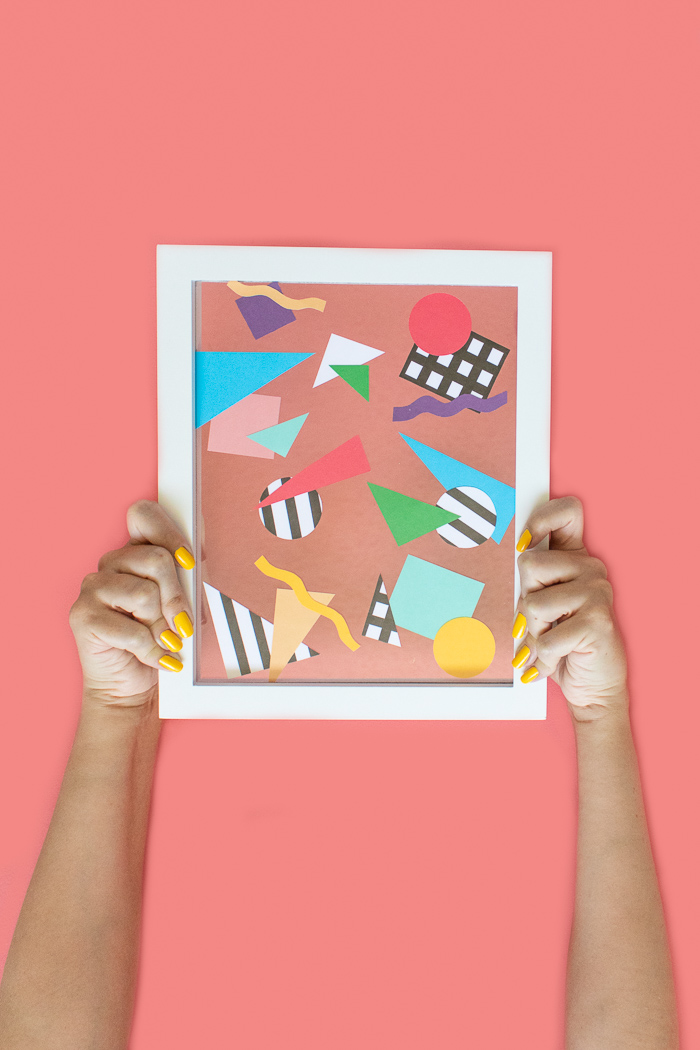
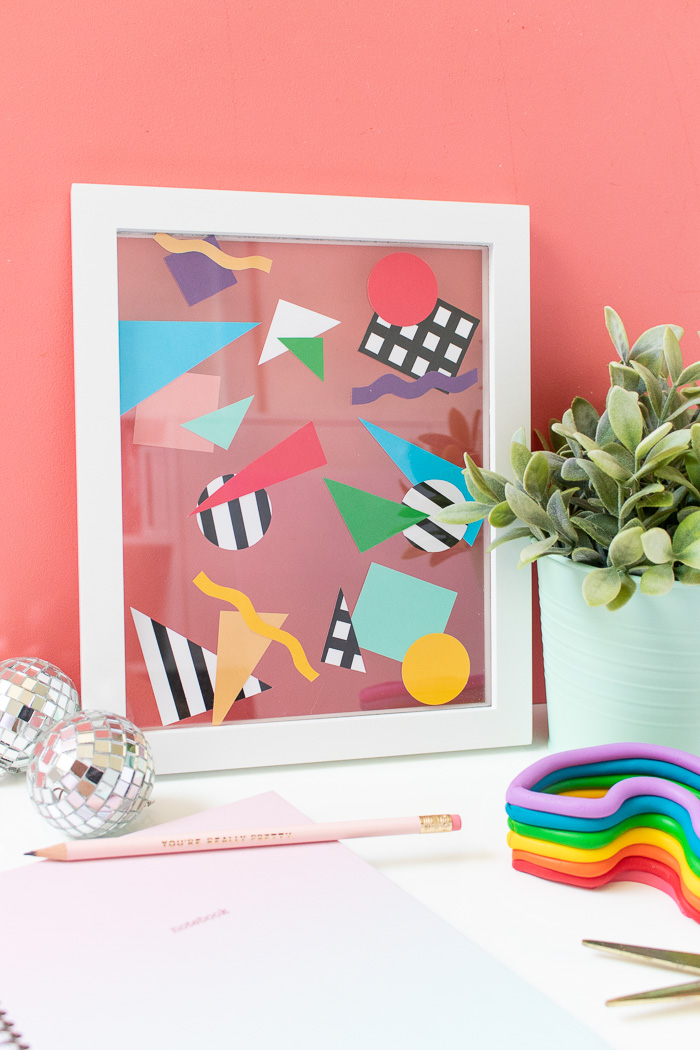
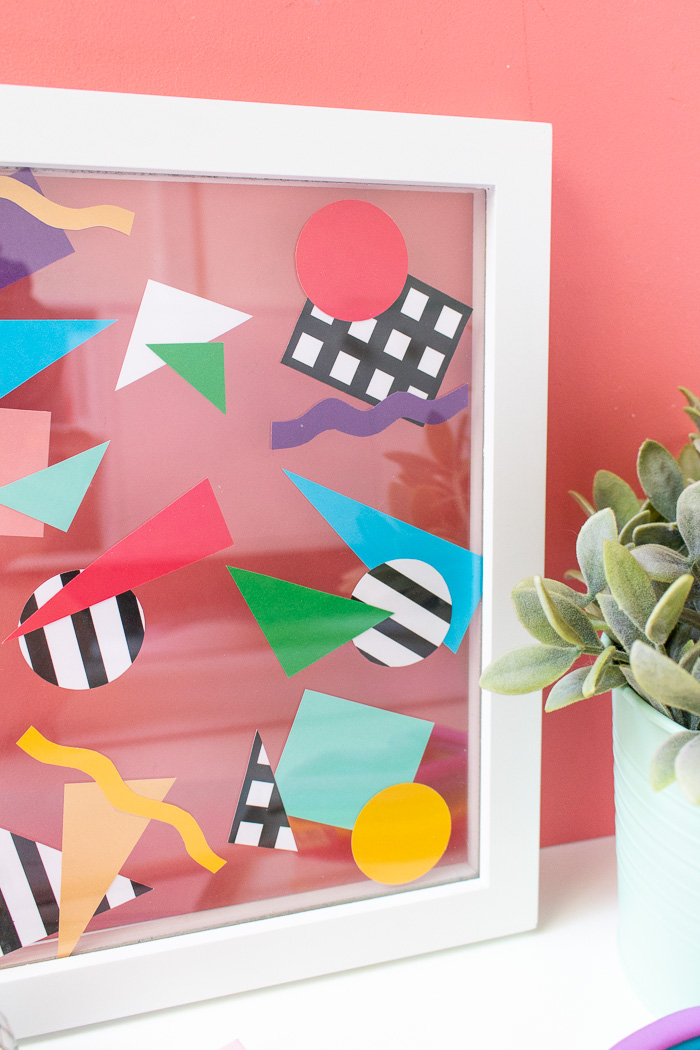
Do you ever just get sick of your walls? I have the urge to update my decor almost daily, so I finally went for it this week and made a new piece of artwork to replace a piece in my gallery wall. This simple 80s wall art is made with just paper and washi tape! It’s honestly as simple as wall art gets. As you may have seen from my previous posts, I love abstract 80s patterns (or 90s patters/Memphis design…whatever you want to call it) that remind me of things like Saved by the Bell. Squished between two pieces of glass in a floating frame, this 80s wall art appears to float on your walls, taking on the background of wherever you display it. I love the look of these patterns standing out on any surface, giving them an almost-3D appearance!

You can make a new piece of wall art in under 10 minutes with any paper you have in the house! However, if you want to recreate this look with grid patterns and stripes (more interesting than solids alone), you’ll need thin washi tape or patterned paper. I love the bold statement the patterns make alongside bright colored triangles, circles, squares and squiggles. Together, I feel transported to the 80s/90s.
Time: 10 minutes
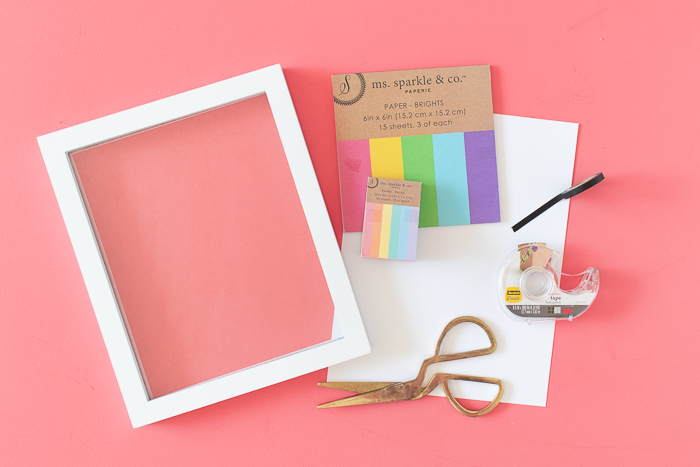
Supplies:
- White cardstock
- Colored cardstock
- Thin black washi tape
- Floating frame
- Scissors
- Double sided tape
Note, you won’t need full pieces of paper, so use scraps if you can.
Step 1: To make the patterns, arrange washi tape on the white cardstock in stripes and grids. You won’t need a whole sheet of paper.
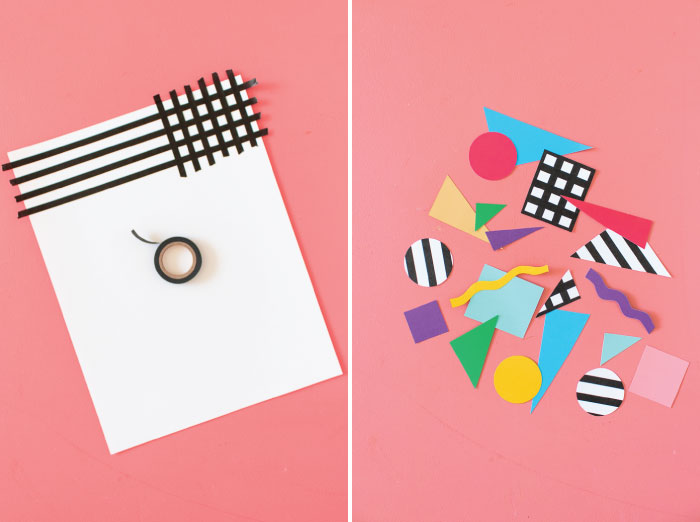
Step 2: Cut shapes out of the washi taped cardstock and the solid colored cardstock. Cut a mix of shapes in slightly different sizes for overlapping.
Step 3: Remove the back of the frame and the back piece of glass. Set aside. Arrange the shapes face-down onto the glass, overlapping patterns. Keep in mind you are working upside down, so overlapping pieces should go down first.
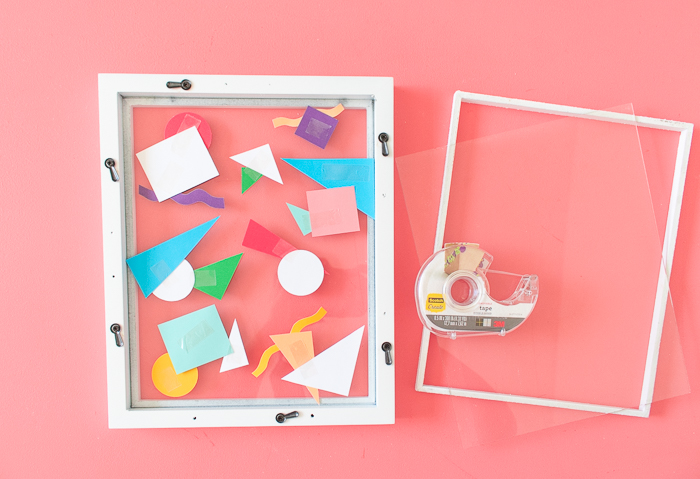
Step 4: Once satisfied with your pattern, adhere pieces of double sided tape to the backs of the shapes. Without it, the paper will slip once turned upright.
Replace the glass and backing, pressing lightly so that the tape adheres to the back piece of glass.
Now it’s ready to hang or display!
Lean on a shelf or hang it in your gallery wall to add a pop of abstract patterns and bright colors to any space. I wouldn’t mind filling an entire wall with 80s wall art in a variety of patterns!
Mike from The Crafty Gentleman
I really like how you left the back of the frame clear – it looks great with the pink wall showing through! 🙂
– Mike, http://www.thecraftygentleman.net
Holly Wade
Mike from The Crafty GentlemanThanks so much, Mike!