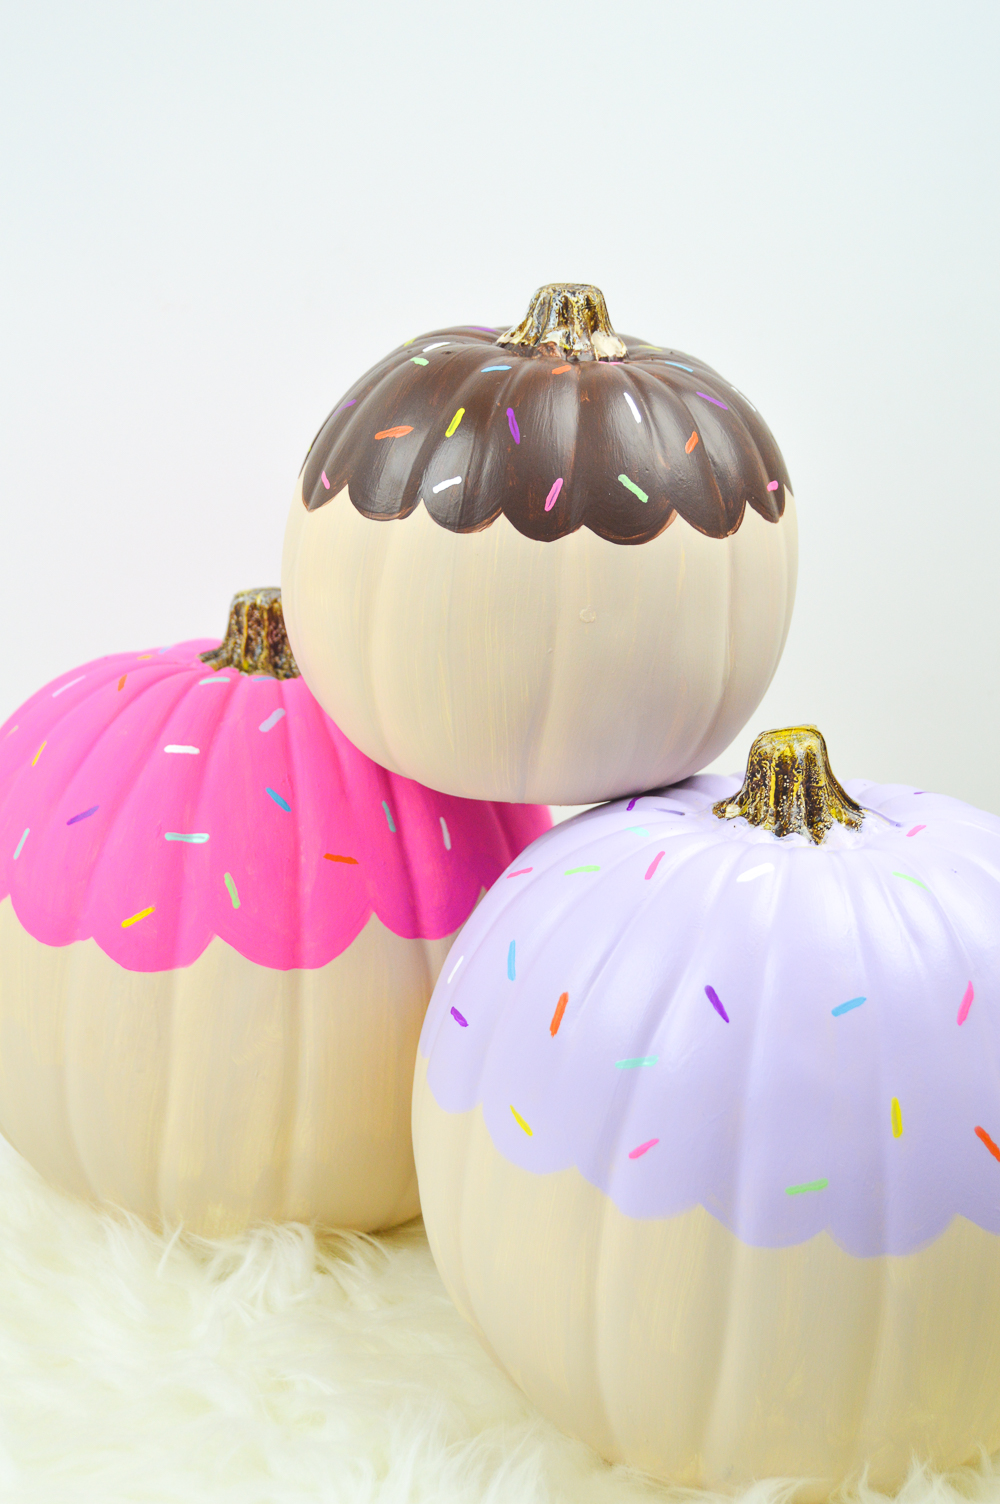
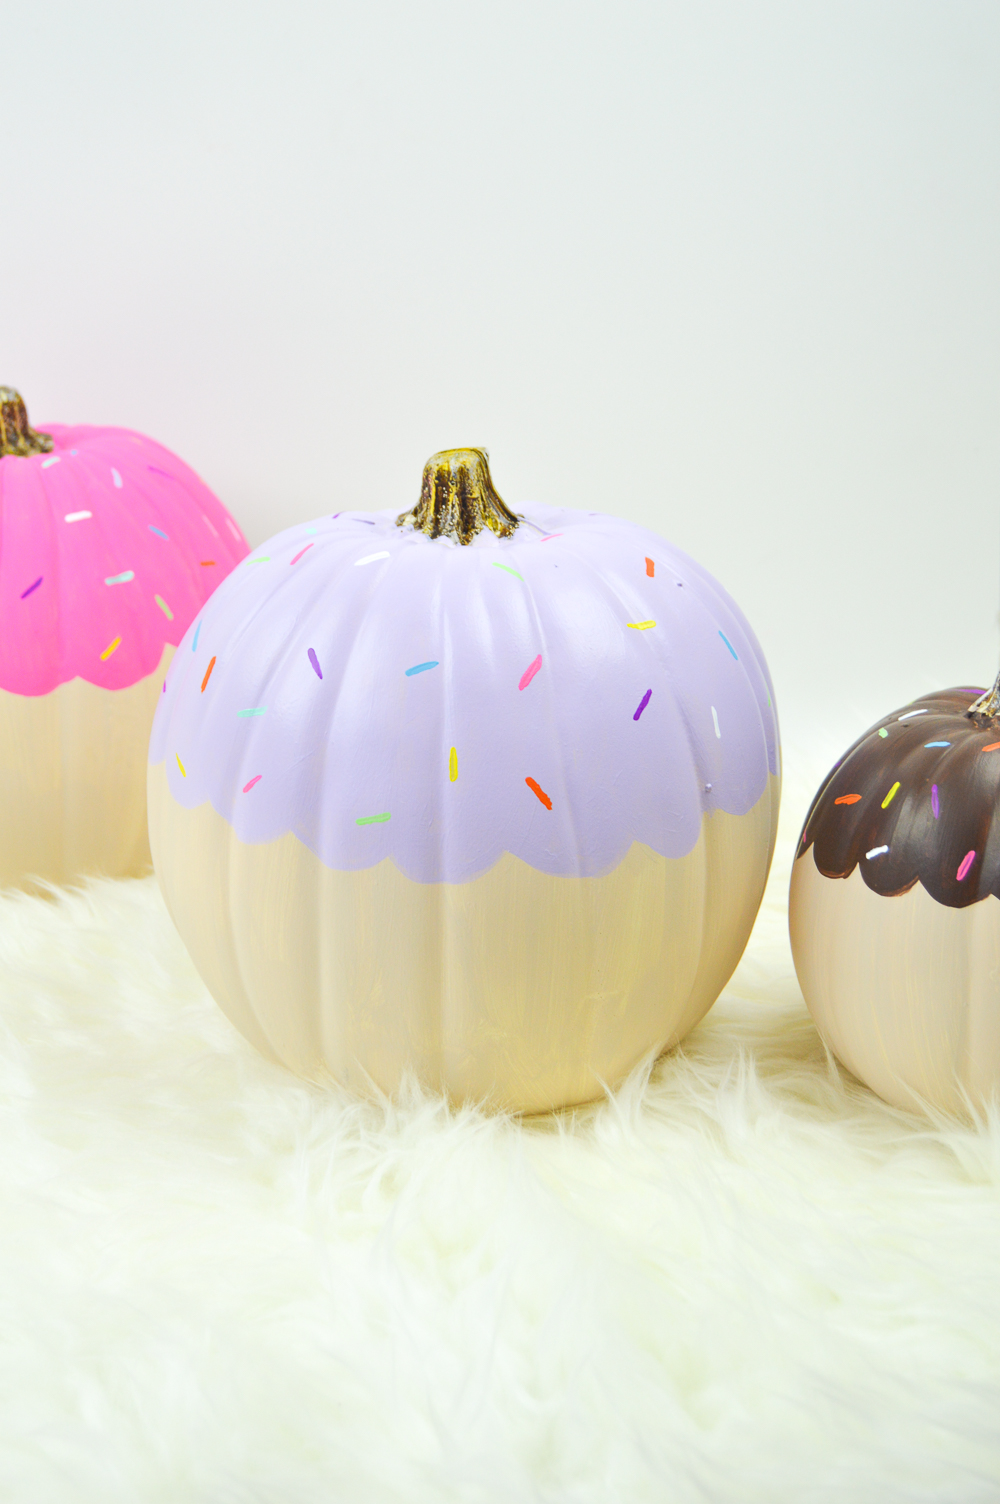
Now that it’s October I’m excited to decorate for Halloween and this was my first Halloween DIY of the season! When it comes to Halloween, I’m not very good at scary decorations or costumes. I prefer the lighter side of Halloween and fall, so naturally, I made the least scary pumpkins ever! Today I’m sharing how to make DIY cupcake pumpkin decorations because I just enjoy turning things into cake. I mean, there’s no reason pumpkins can’t also dress up for Halloween too, right?!
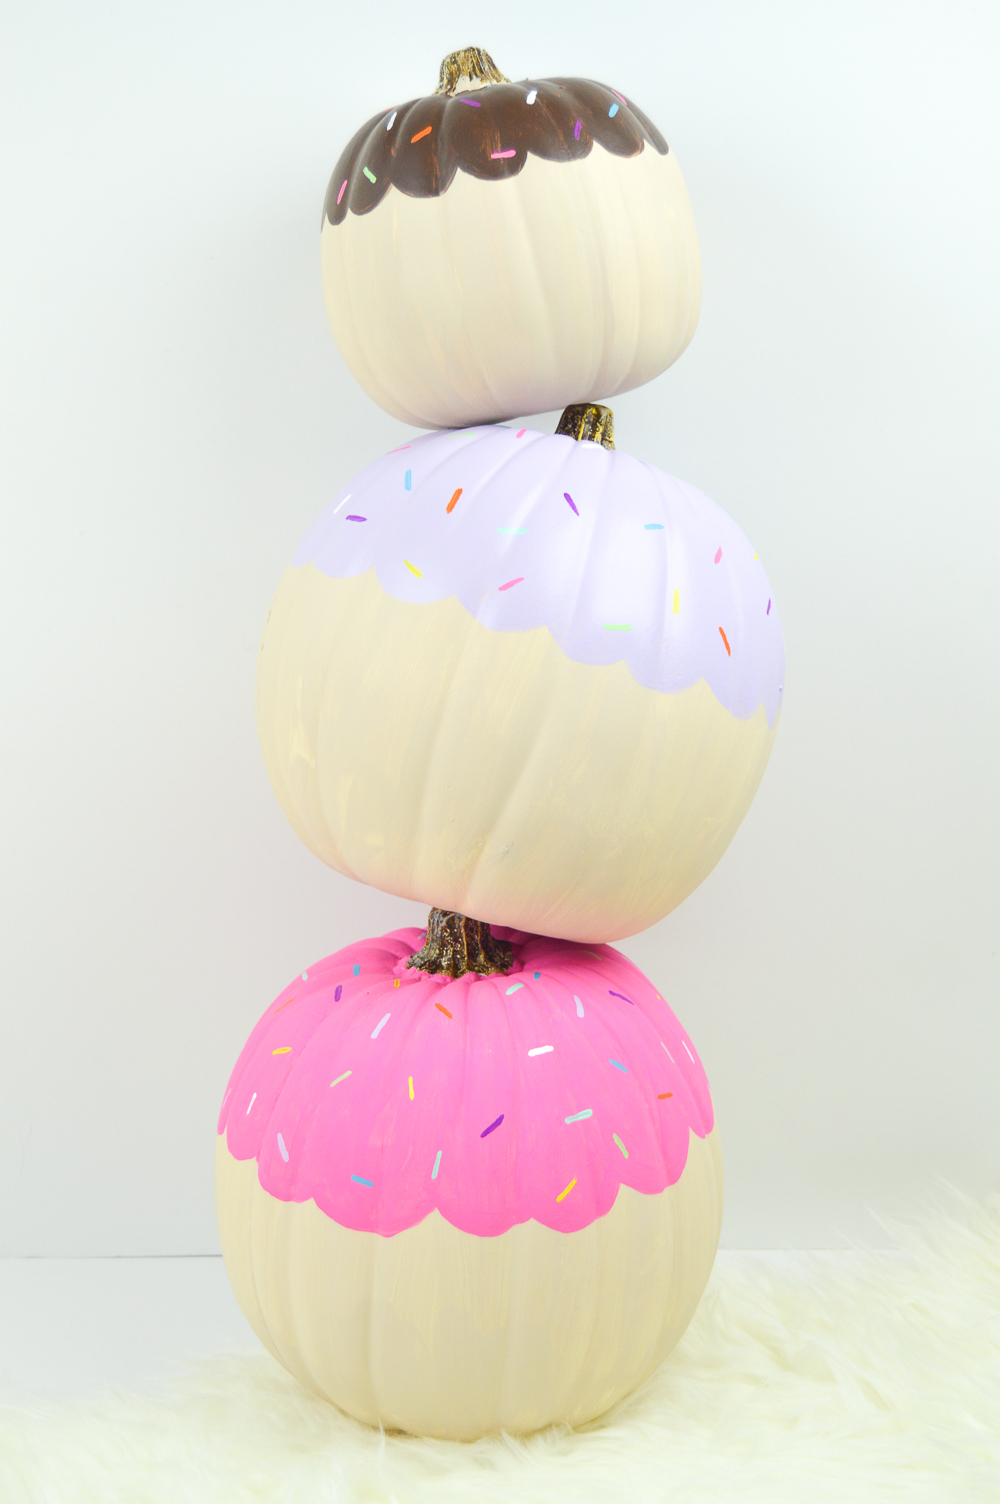
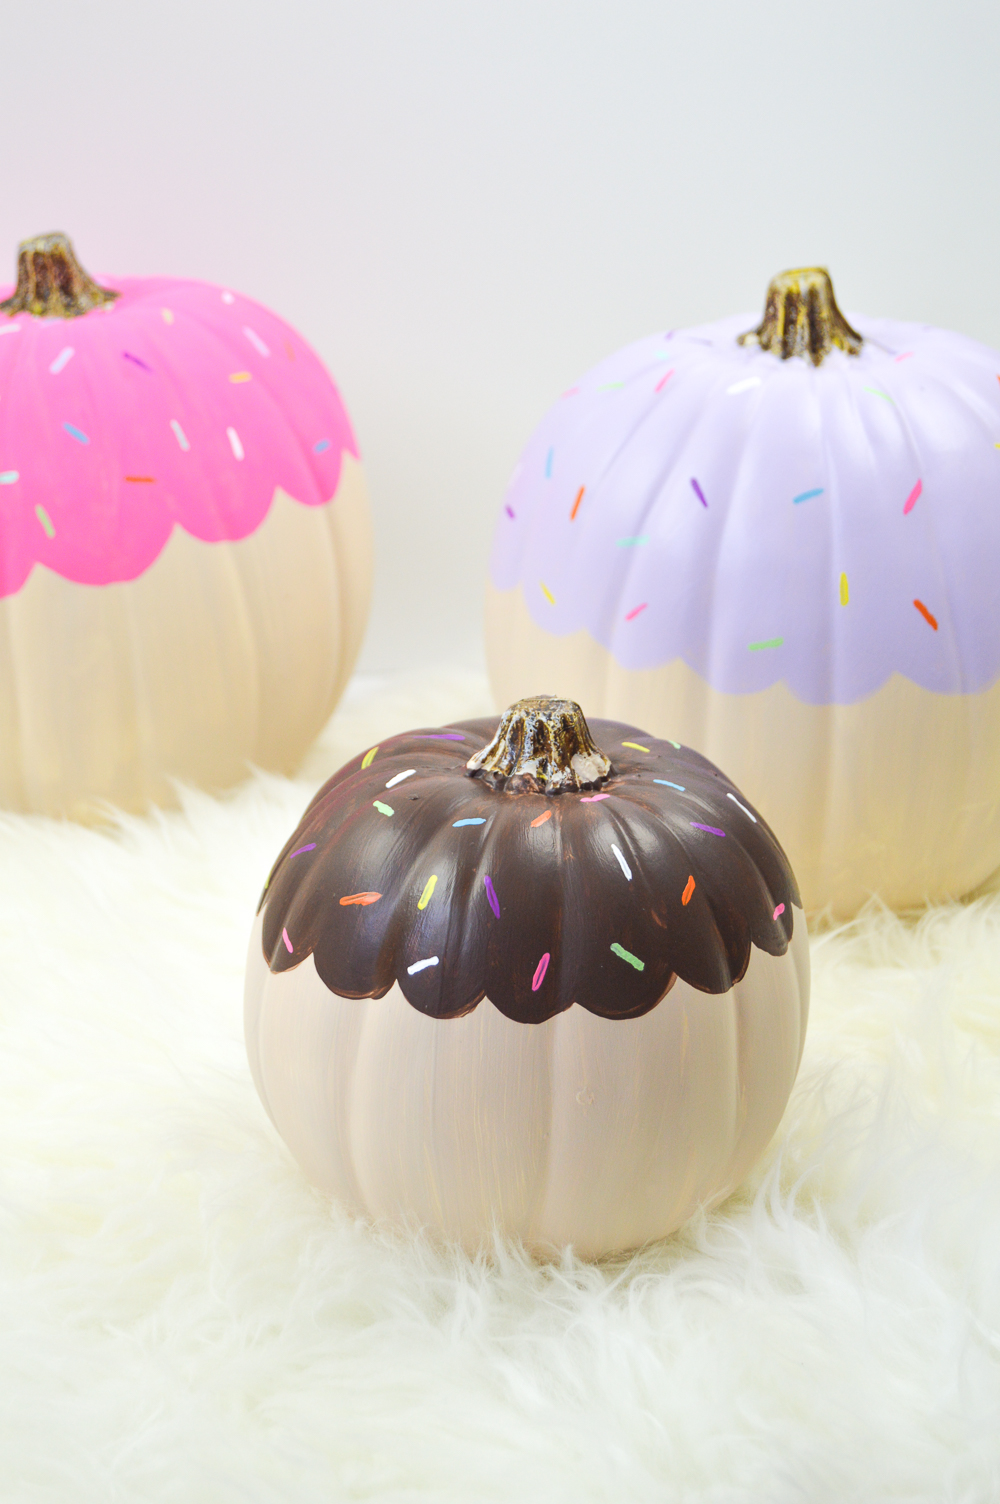
These cupcake inspired pumpkins are really easy to make with real or fake pumpkins and some colorful craft paint. A few coats later and you’ll have these sweet looking pumpkins you can place on your floor, porch or shelves! Right now, mine are stacked on a shelf in my living room (where my cats won’t knock them over). Sadly, my cats make decorating for holidays VERY difficult.
Andrew and I are still working on our costumes for Halloween, but I think this will be the first year we do a couples costume. Stay tuned!
Time: 20 minutes
Supplies:
- White pumpkins (real or fake)
- Cream colored paint
- Several bright colored paints
- Paint brushes
How to:
- Paint the entire pumpkin a cream color (I recommend fake pumpkins simply because they last longer)
- Once dry, paint a second coat if desired
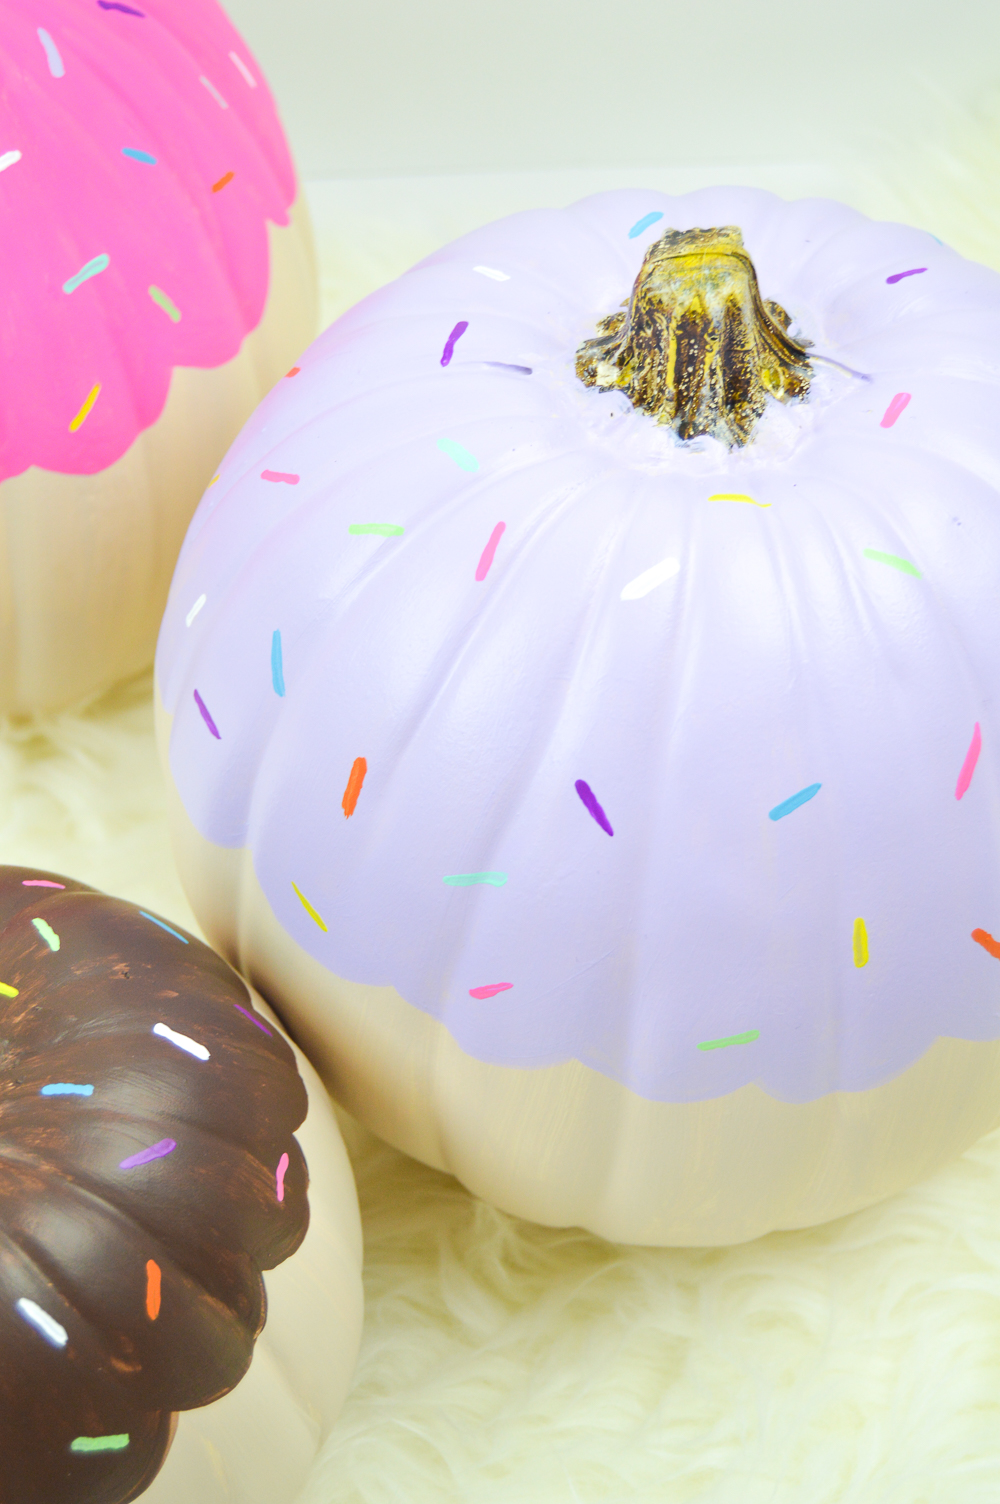
- Using a bright or pastel color, paint a scalloped pattern about 1/3 from the top of the pumpkin and fill it in up to the stem in order to make the “frosting”
- Paint a second coat once dry
- After the second coat has dried, use a smaller paint brush to paint various bright colored sprinkles all over the frosting of the pumpkin
- If desired, paint the stem, but I chose to leave it as is
- Let dry completely and use to decorate your home for fall and Halloween
Mix and match your colors and coordinate to your home if you’d like! These are just fun decorations to make, even if they aren’t the usual scary Halloween decorations. Happy crafting!