• HOME
  • SERVICES
  • PORTFOLIO
  • ABOUT
  • Club Crafted

  • CONTACT
  • BLOG
    • DIY
    • RECIPES
    • SPONSORSHIPS
  • SHOP

Club Crafted

DIY Tutorials
/
April 14, 2020

3 Ways to Tie Dye Handkerchiefs with Two-Minute Tie Dye

handkerchief tied to tote bag

The following post is sponsored by Tulip

With warm weather on the horizon, it’s the perfect time to start tie dyeing again! One of my favorite versatile accessories is handkerchiefs, so I wanted to share three ways to make tie dye handkerchiefs with different tie dye techniques. Using Tulip’s newest Berry Blast palette of its Two-Minute Tie Dye Kit, these handkerchiefs are a faster way to tie dye! Using your microwave, the projects are ready much quicker than average dye. Tulip tie dye kits make it easy to create beautiful patterns on various types of fabric clothing and accessories. I can’t wait to share many more tie dye ideas with you in the coming weeks!

Check out my last project with Two-Minute Tie Dye right here from Christmastime.

woman wearing handkerchief around neck
flatlay of three tie dye techniques

Three Tie Dye Techniques to Try

I’m always learning new ways to tie dye! In the next few weeks, you’ll see several more ways to tie dye various fabrics and accessories. First up, here are three ways to tie dye handkerchiefs that you can use as accessories!
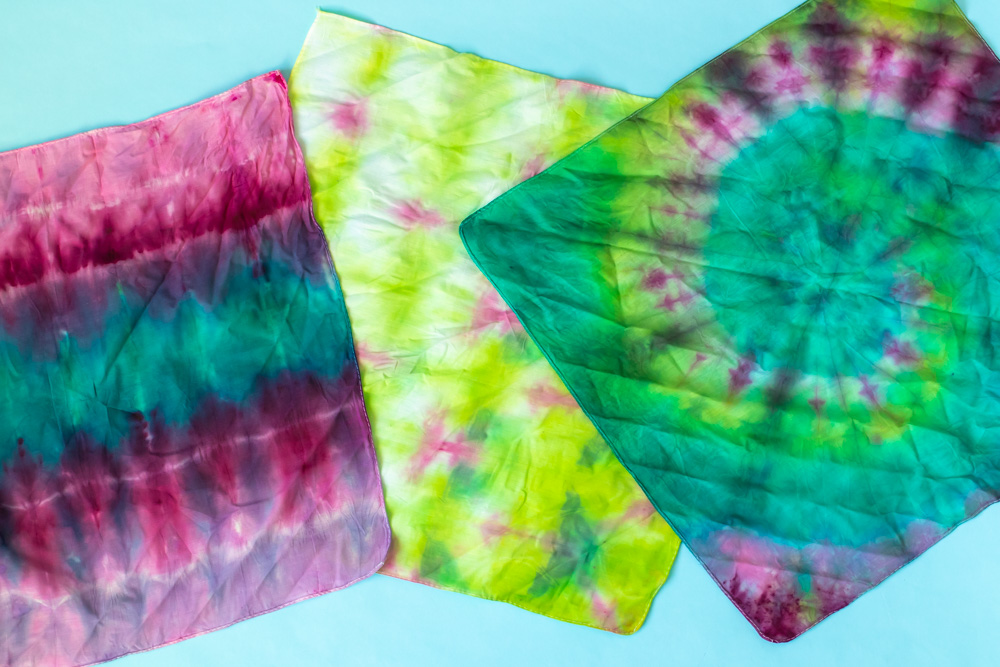
Spiral Pattern

For the spiral tie dye handkerchief, lay the wet fabric flat. From the middle, pinch the fabric and twirl it so that the sides come in. Then apply four rubber bands in a criss-cross shape. When dyeing, apply in distinct sections to create a spiral pattern.

Stripes Pattern

Stripes are probably the easiest tie dye technique! First, accordion fold the fabric. Then rubber band different sections of the fabric (I use four). Apply the dye in sections across the fabric, overlapping only slightly in some areas. This creates a vague stripe pattern once revealed.

Triangle Pattern

To make a triangle shape, accordion fold the fabric. Then fold one end up into a triangle shape. Repeat across the strip until you have a single triangle shape (similar to how you fold a flag). Rubber band two sides of the triangle, then dye. In this example, I used green and pink to create a watermelon-inspired tie dye look.

three tie dye handkerchiefs on clothesline

How to Tie Dye with Two-Minute Tie Dye

Supplies:

  • Cotton handkerchiefs, pre-washed
  • Tulip Two-Minute Tie Dye (Berry Blast) Kit
  • Plastic for covering work surface

Step 1: Either wash the handkerchiefs and leave wet OR soak dry handkerchiefs in water. Make sure they are completed saturated. Then wring out excess water.

Step 2: Mix the dye! Fill each Tulip dye bottle to the fill line, then secure the lid. Shake vigorously until the dye is completely dissolved. Repeat with all four colors in the Berry Blast package.

Step 3: Cover your work surface with plastic. For best results, make the tie dye handkerchiefs outdoors. Then lay a damp handkerchief on top of the plastic.

Step 4: Choose your desired tie dye technique (see above). Twist, fold and rubber band the fabric of the handkerchiefs.

Step 5: Wearing the provided gloves, apply the dye to select areas of the wet fabric. Because they are thin, they will saturate very quickly. Avoid too much overlap as the colors may appear “muddy.” Make sure to flip and dye both sides.

Step 6: Immediately place the dyed handkerchiefs inside of the Two-Minute Tie Dye containers. They should not be touching.

Step 7: Close and microwave the containers for 2-3 minutes. Then let cool with the lids closed 15 minutes. Open and cool an additional 5 minutes until cool to the touch. (Check package instructions for more information.)

Step 8: Then trim the rubber bands and carefully open the tie dye handkerchief to reveal the design. Rinse in cool water until it runs clear. Finally, wash separate and dry normally.

woman wearing tie dye handkerchief as headband

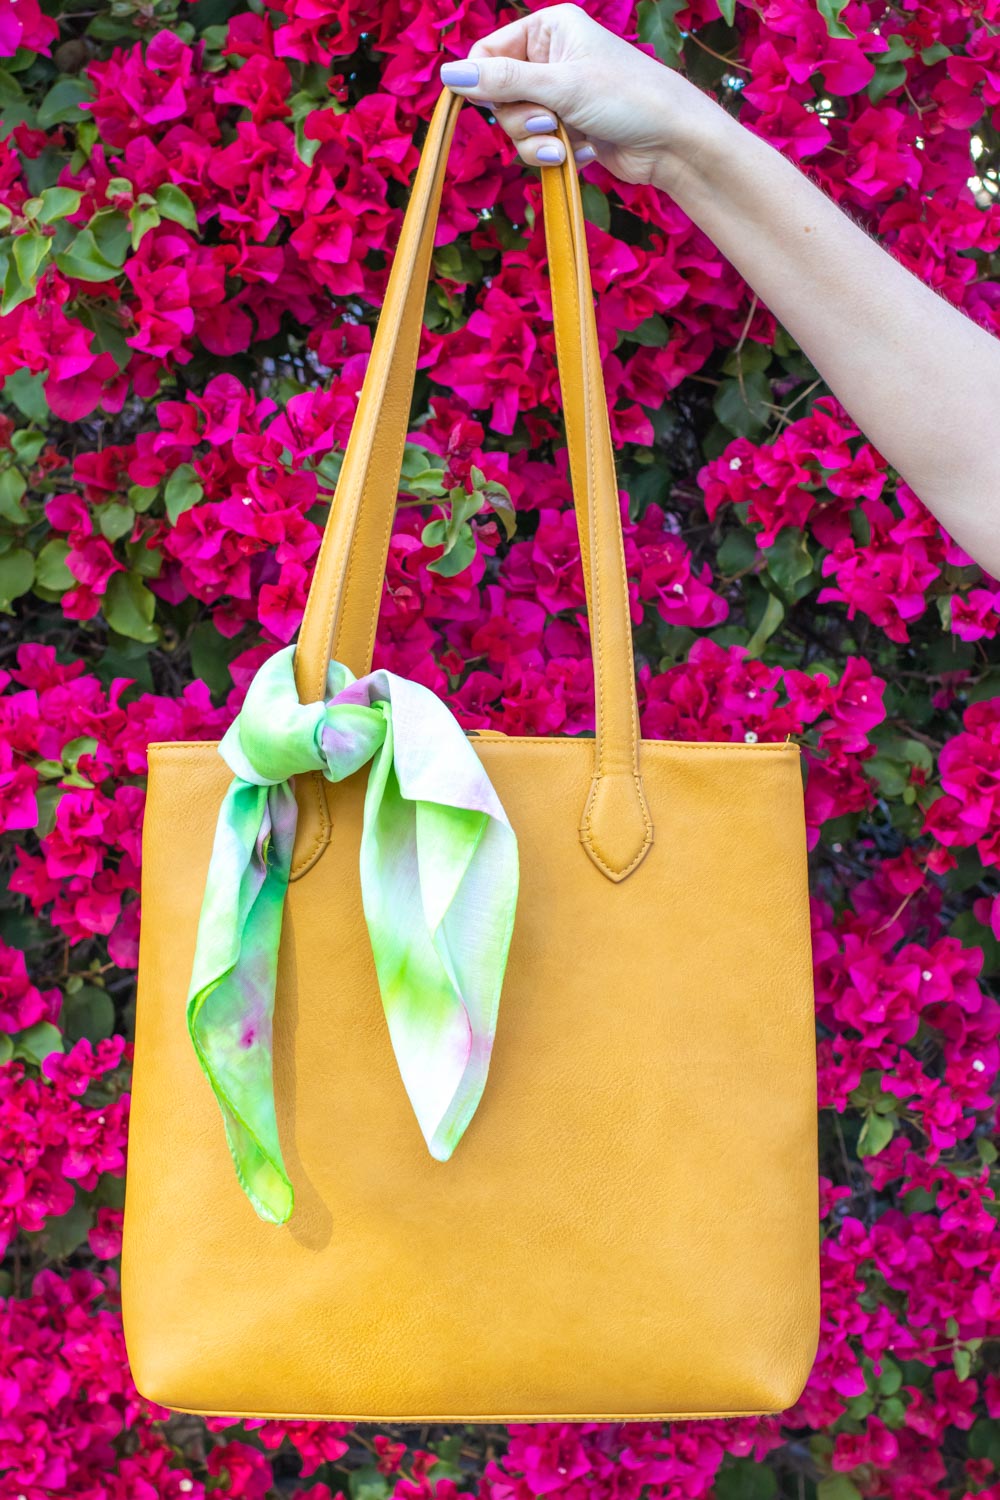
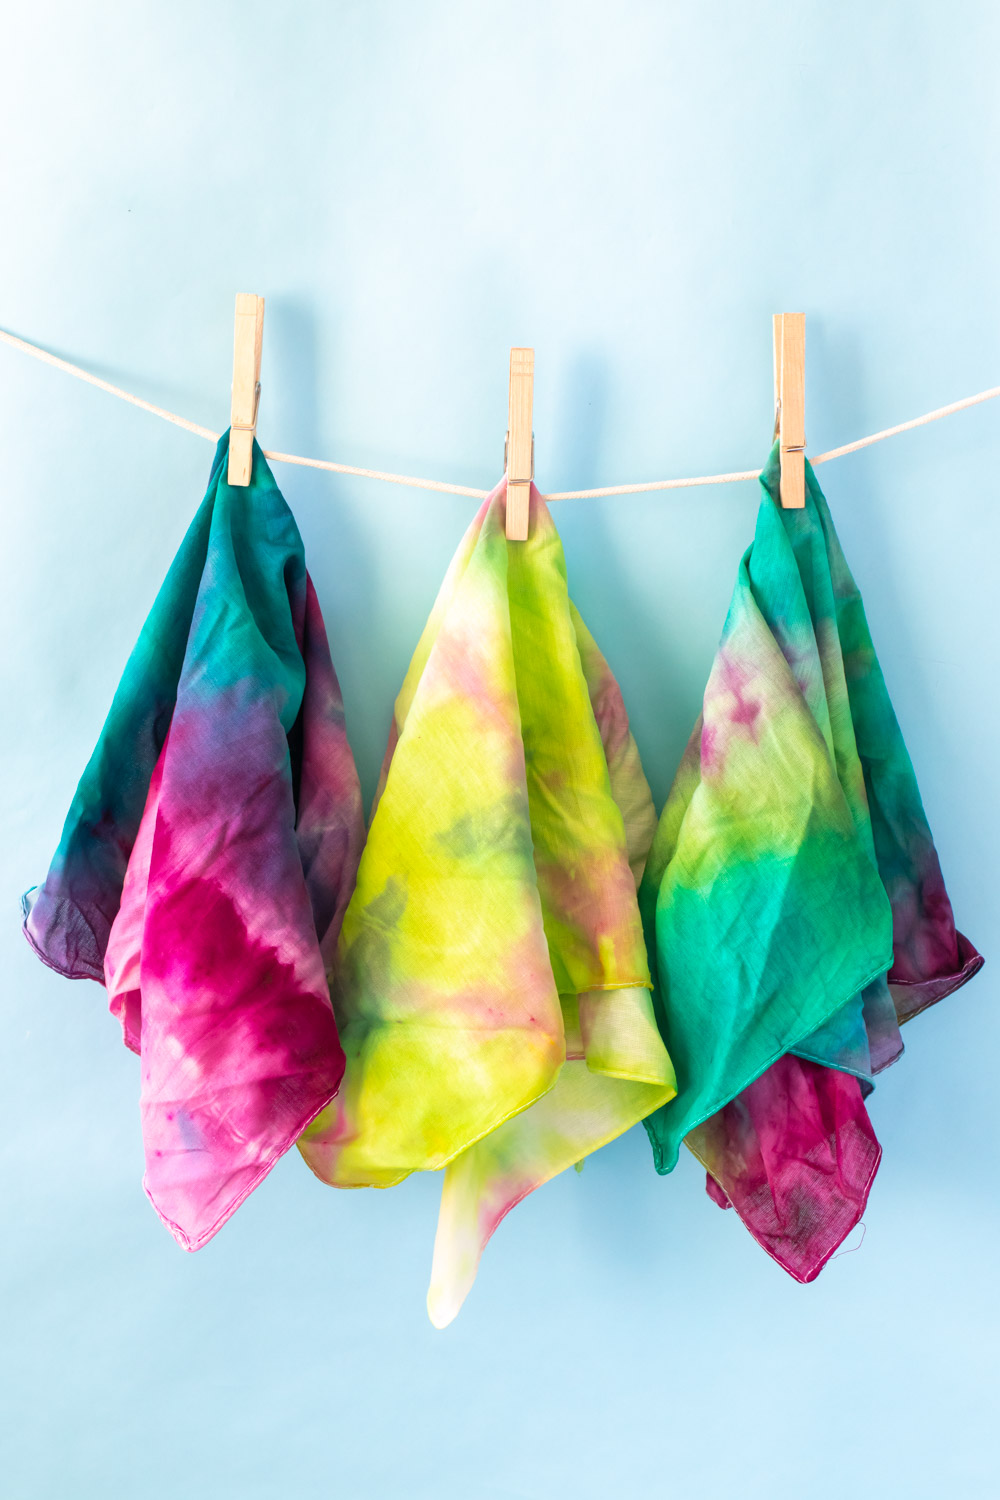
Then the tie dye handkerchiefs are ready to wear! All of these tie dye techniques are easy to recreate on a variety of products. Wear the dyed handkerchiefs as headbands, neck scarves, bag accessories, bracelets, etc!

Thank you to Tulip for generously sponsoring this post. All opinions are my own. Please note this post contains affiliate links from which I may collect a small profit should you choose to make a purchase. I only link to products I personally use or recommend. Thanks for supporting the brands that keep Club Crafted making and sharing!

TAGS:fabricfashionsponsoredstyletie dye

You May Also Like...

DIY Taco Headphone Organizer

January 17, 2017

Jewelry Storage: DIY Wood Earring Board

January 25, 2017

DIY Woven Paper Placemats for Summer

June 26, 2018

Leave a Reply Cancel Comment

Recipe Rating


Previous Post
Punny Easter Eggs // Hand Stamped Eggs
Next Post
Simple DIY Geometric Paper Wall Art

Hey there! I'm Holly and I like to make stuff.
  • Facebook
  • Instagram
  • Pinterest
  • Twitter
  • YouTube

LOOKING FOR SOMETHING?

TRY THESE FAVORITES!


RAINBOW PLACEMAT CLUTCH


RAINBOW FRINGE BLANKET


COSMIC BROWNIE FUDGE


IRIDESCENT PARTY HATS


WELL, I was going to post this photo and talk abou WELL, I was going to post this photo and talk about the new pins in the shop...but they SOLD OUT in 12 hours instead πŸ˜­πŸ™ Andrew and I are so overwhelmed with the love of the #FIPWarriors community. Thank you to anyone who's purchased a pin to support Milo's treatment! We're so close to the end now! One more batch of pins coming up soon 😽
What do you mean I have to take down my Christmas What do you mean I have to take down my Christmas decorations?! 😭 Half our neighbors already took down their Christmas lights, so I guess the only goal is to not be the LAST one with lights up. How long do you keep up your decorations?
Maybe next year I'll finally remember to do a holi Maybe next year I'll finally remember to do a holiday card before it's a week til Christmas, so we can actually send one πŸ€ͺ When we get Christmas cards, I always feel like a little kid getting mail again! Do you send a holiday card??⁠
⁠
(Grab this DIY card holder in the blog archives! πŸ‘‰)
More product is coming soon! πŸŽ‰ I'm honestly SHO More product is coming soon! πŸŽ‰ I'm honestly SHOCKED to see Milo's pins sell out so quickly. We made 50 with the expectation that we wouldn't sell very many, but I just put in an order for more inventory! 😭⁠
⁠
This time we'll be selling black and white cat "FIP Warrior" pins to help raise money for Milo's treatment. Stay tuned - a pre-sale is coming! Pins will ship again in early January. In the meantime, there's plenty of other products available in the shop! (Visit my @etsy via the link in my bio)
NEW LAUNCH! 😸 Thank you all so much for your su NEW LAUNCH! 😸 Thank you all so much for your support of Milo while he goes through FIP treatment! I designed a new enamel pin to help us raise the funds to pay for Milo's treatment...THEN we sold almost all of the pins in just in a few hours! I'm so thankful and in shock of the generosity of our FIP community 😭⁠
⁠
There are a few left and more on the way, so you can SHOP NOW on @etsy and here on IG!! If you want a pin and they are sold out, please tag yourself below! Visit the link in my bio to purchase πŸ›β 
⁠
"FIP Warrior" is the name we give to cats fighting FIP and the humans who help them, bringing awareness to the disease and possible treatments. Our Warrior Milo is almost halfway through his treatment and we couldn't be more grateful to see him getting better! Every purchase from my shop helps us to pay for his expensive treatments and is so, so appreciated πŸ™πŸΌ
🍁 I can't beLEAF it's been a whole month since 🍁 I can't beLEAF it's been a whole month since my last post (oops!) but I had to fit in my one obligatory fall photo before I dive straight into Christmas! If you caught my Stories recently, you may have already seen why I've been so absent...⁠
⁠
Last month, our sweet Milo was diagnosed with a disease called feline infectious peritonitis (FIP). It's very serious and has required our full attention to give him daily injections that should help him recover. The treatment is 84+ days long and has taken a huge emotional toll on us. You can learn more about Milo's FIP story in my profile Highlights!⁠
⁠
Long story short: I've been too emotionally drained from Milo's treatment, my regular work and the crazy world around us to even think about social media 😣 I truly don't know how you fellow creators do it! Hopefully the cheerfulness of Christmastime gives me the urge to create again! (πŸ“Έ cookies made for a project with @spectrumorganic)
  • ABOUT
  • SERVICES
  • CONTACT
  • BLOG

Copyright Holly Wade Β© 2019 Site Powered by Pix & Hue.