• HOME
  • SERVICES
  • PORTFOLIO
  • ABOUT
  • Club Crafted

  • CONTACT
  • BLOG
    • DIY
    • RECIPES
    • SPONSORSHIPS
  • SHOP

Club Crafted

DIY Tutorials
/
June 18, 2019

DIY Metal Stamped Washer Bracelets

DIY Metal Stamped Washer Bracelets (for Bridesmaid Gifts) | Club Crafted

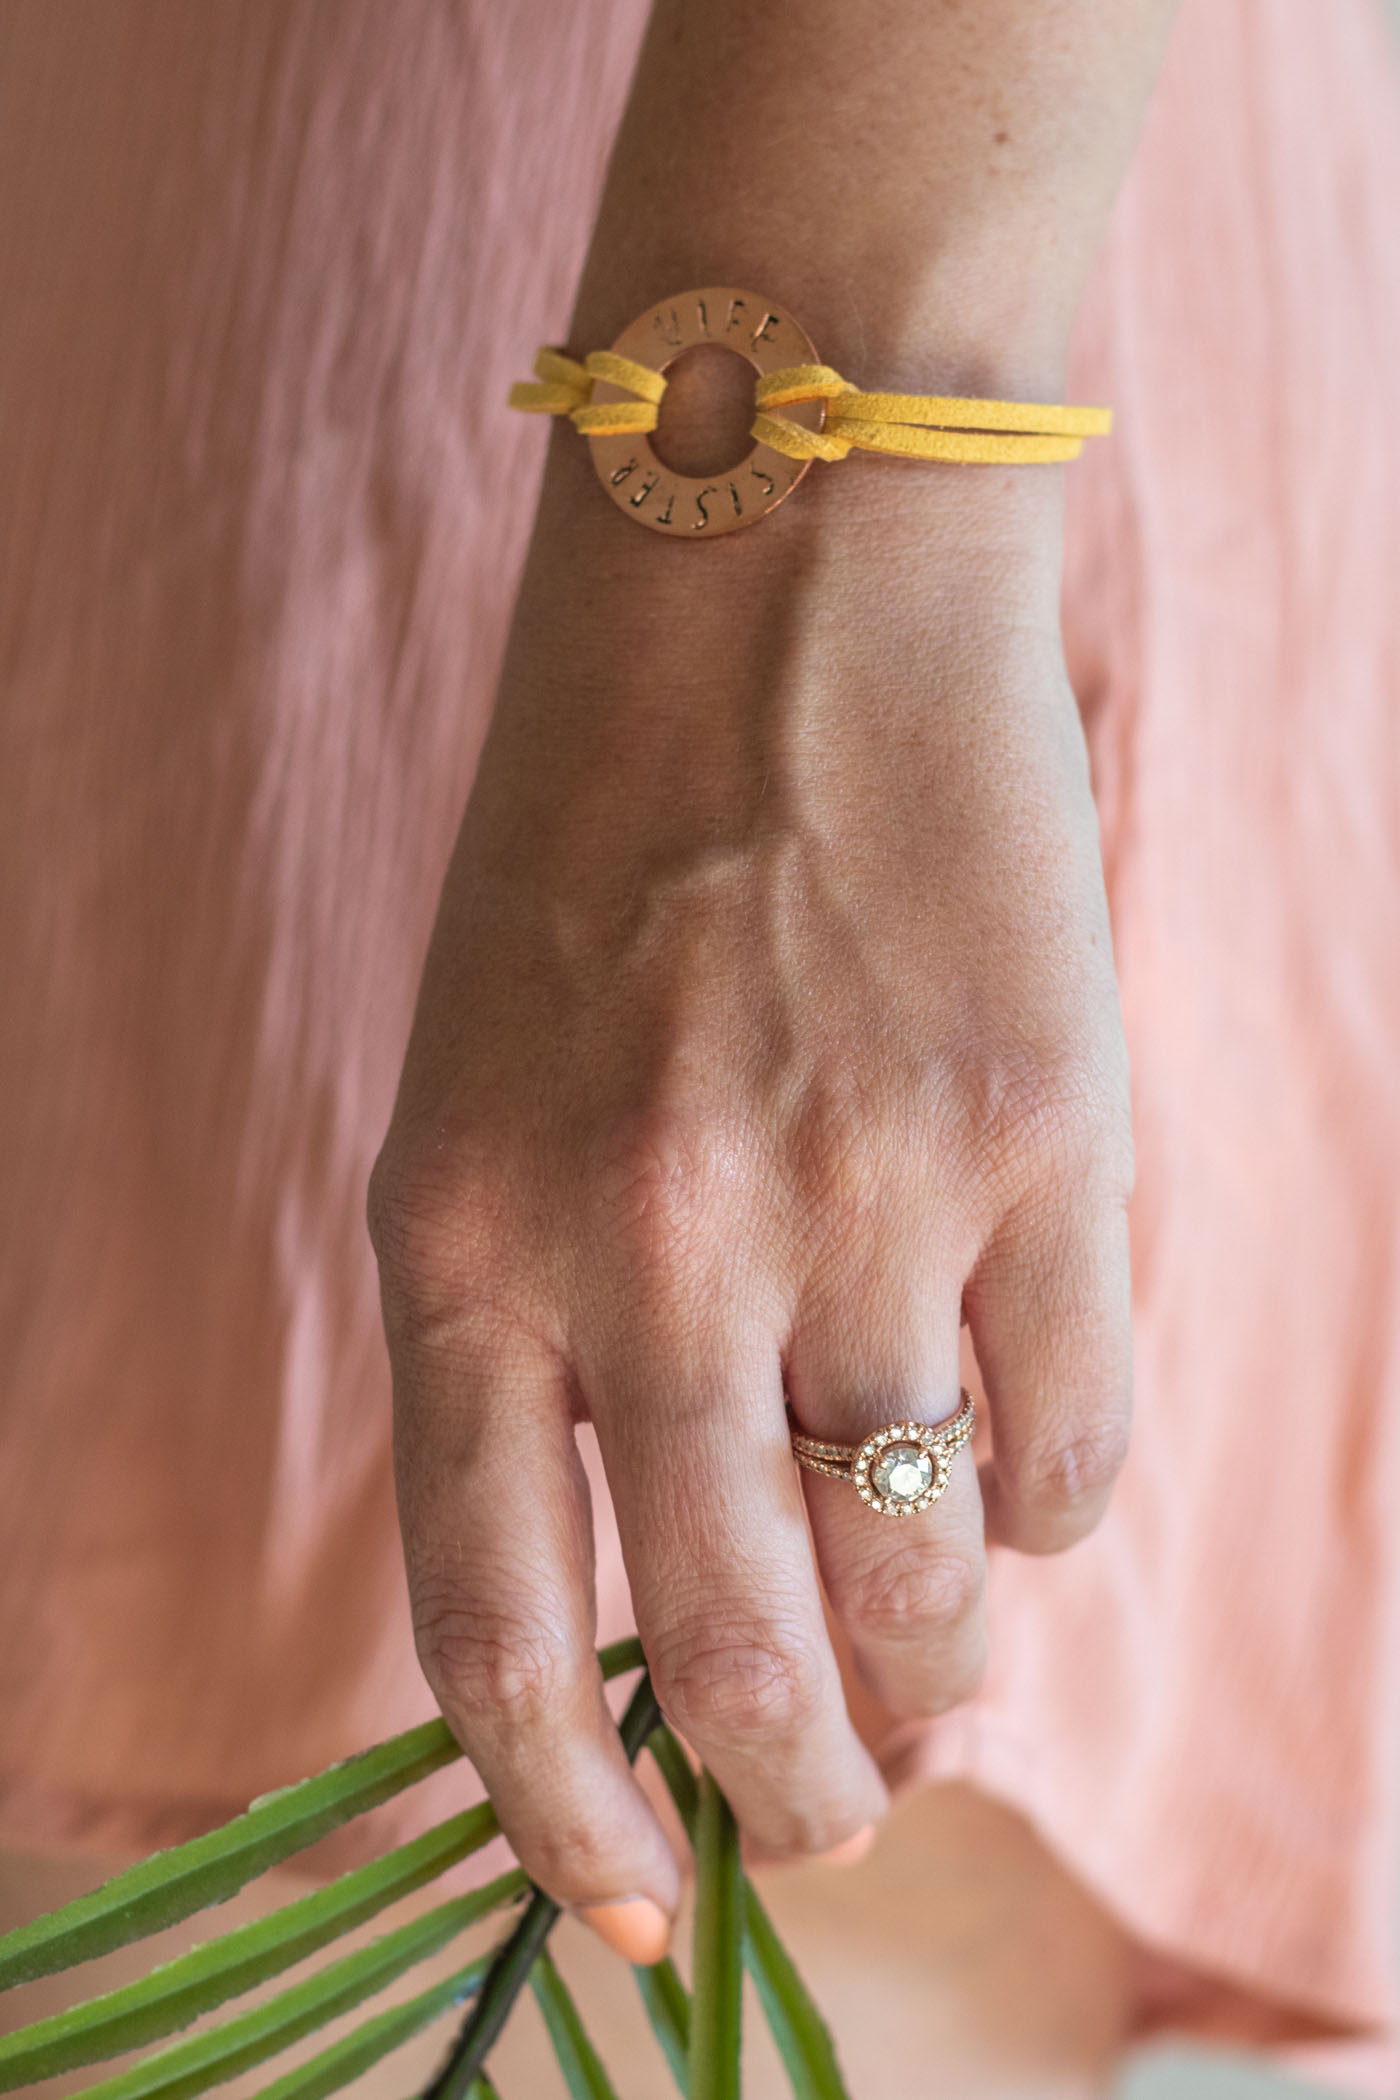
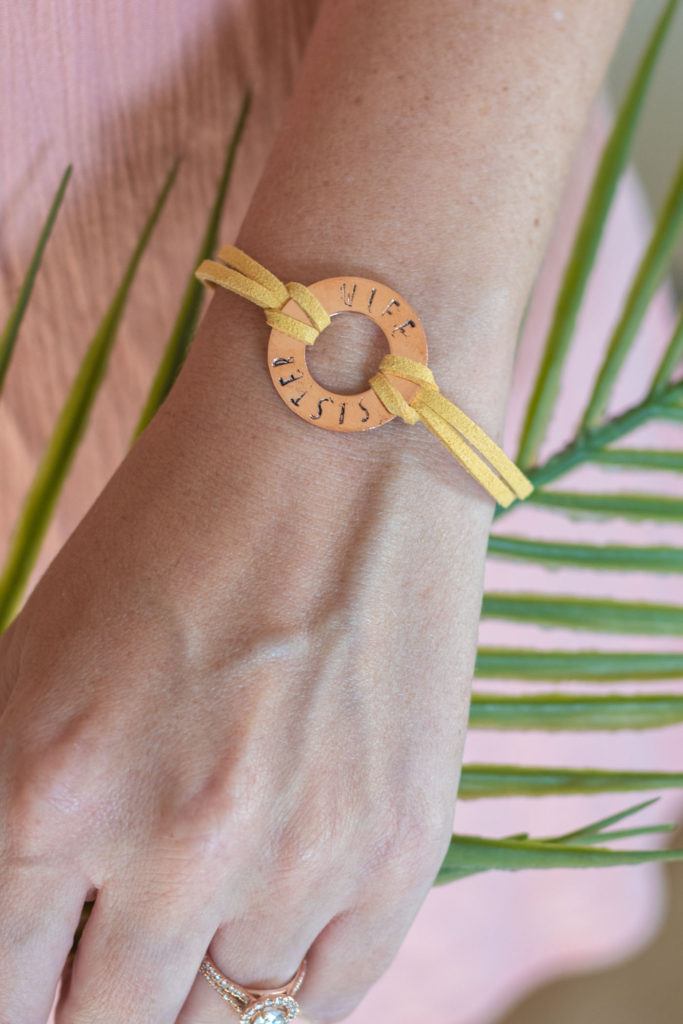
I recently received a metal stamping kit from my friends over at JOANN, and I’m excited to share these new DIY metal stamped washer bracelets I made using these key supplies by ImpressArt. This is not a sponsored post, but I enjoyed playing around with the products to make metal stamped bracelets I could give out as little homemade gifts. With all of this wedding planning kicking into full gear, I love the idea of making these metal stamped washer bracelets with words like “mother,” “sister,” “wife” and “friend” as a thank you gift for those who help me throughout this process! After all, we are never just one thing – we have many names, titles or identities.

DIY Metal Stamped Washer Bracelets (for Bridesmaid Gifts) | Club Crafted

Metal stamping is not overly complicated. However, when you look at the supplies in the store, it can seem overwhelming if you don’t know what each one does. So let me break it down! It’s actually quite straightforward.

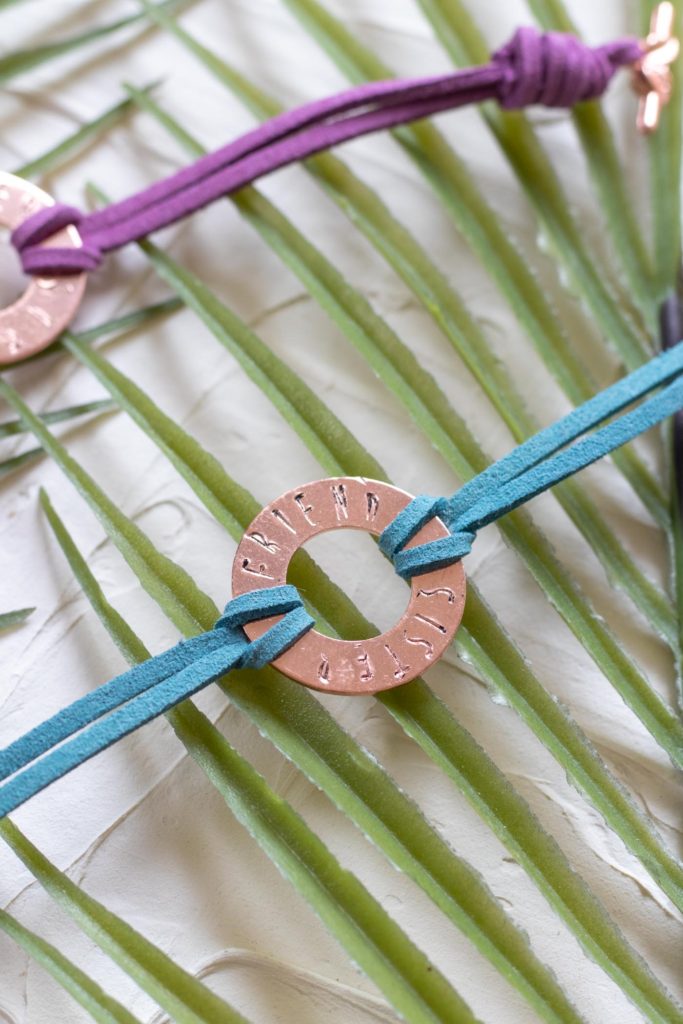
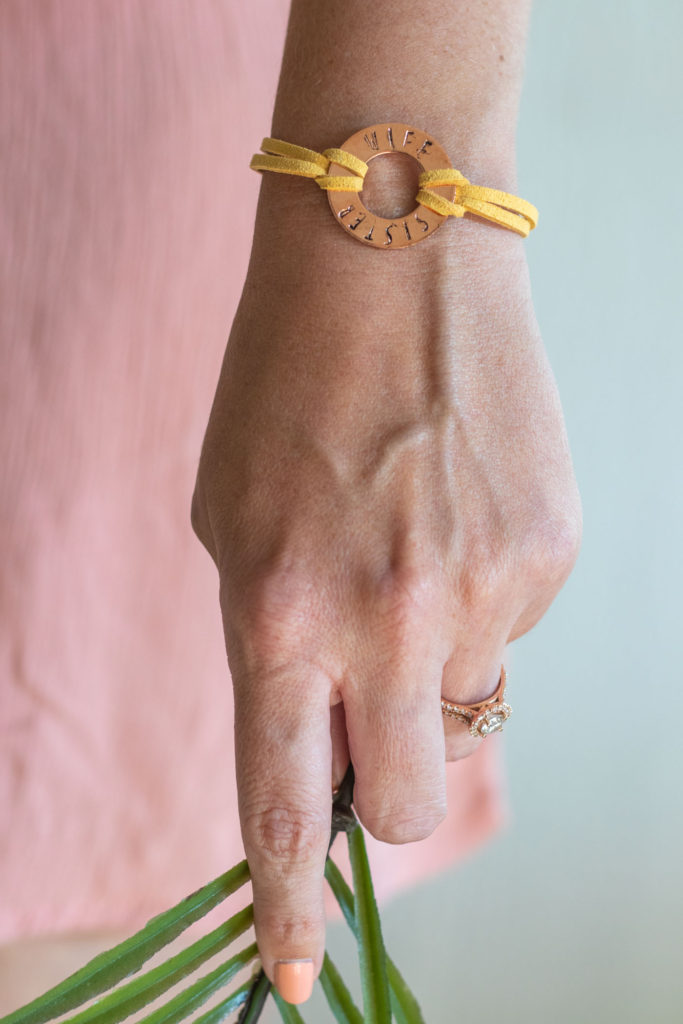
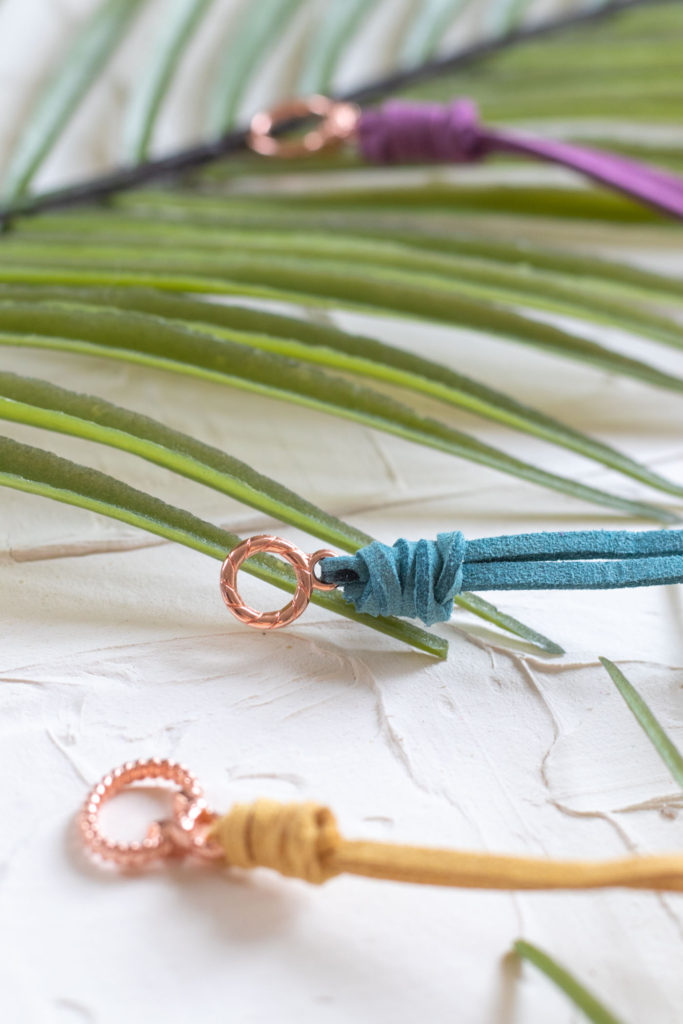
You can make these metal stamped washer bracelets with silver, copper or brass/gold washers. I loved this copper set! I chose colorful leather string for the bracelets, but you can use almost any type of string. Lastly, you can not only customize what each bracelet says but the font as well. I like this classic uppercase letter font from ImpressArt, but there are a lot of options available to choose from. It means that you can truly make each metal stamped bracelet unique for the person you’re making it for!
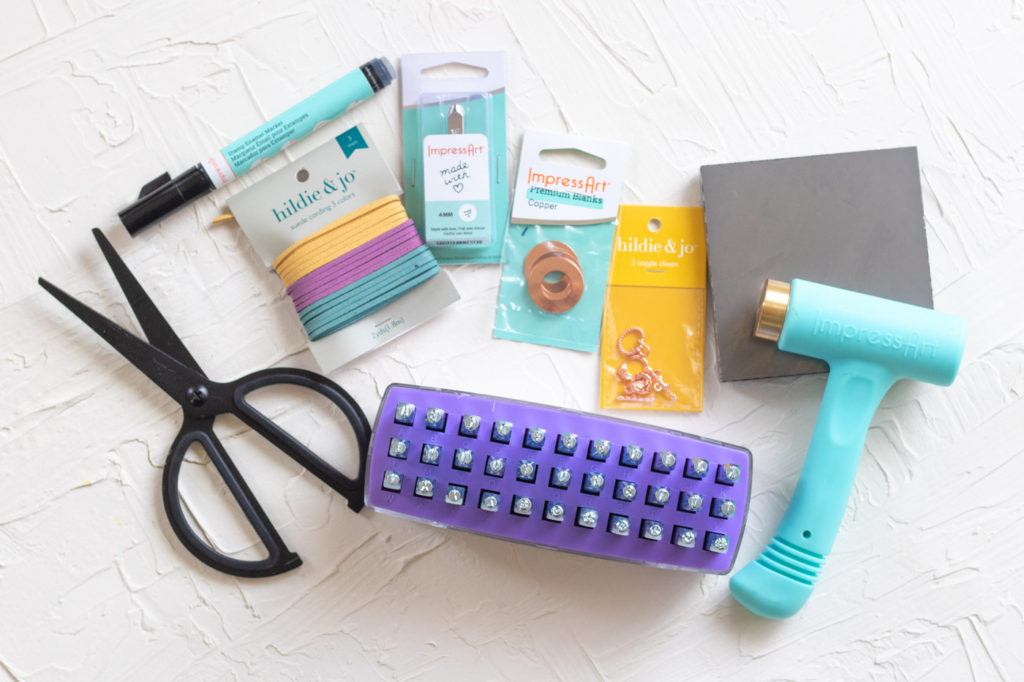
DIY Metal Stamped Washer Bracelets (for Bridesmaid Gifts) | Club Crafted

Supplies:

  • Metal washers
  • Alphabet metal stamps
  • Hammer
  • Metal stamping block
  • Stamping marker
  • Suede string
  • Scissors
  • Matching metal toggle clasps
  • Tape
DIY Metal Stamped Washer Bracelets (for Bridesmaid Gifts) | Club Crafted

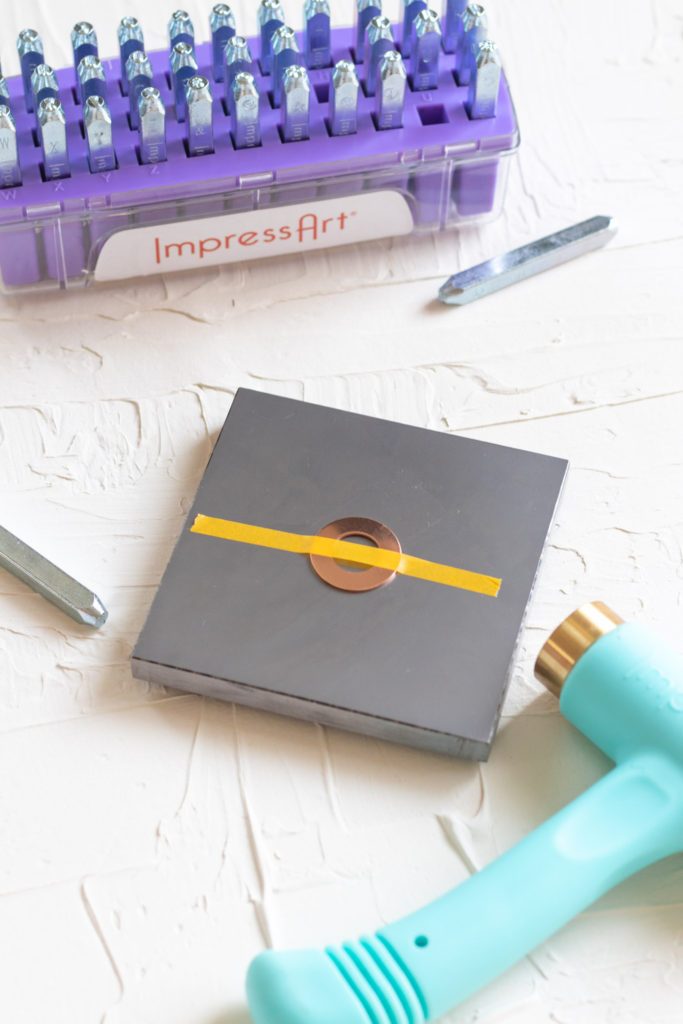
Step 1: Place the metal stamping block on a flat, hard surface. Use a piece of thin tape across the middle of a metal washer to stick it to the block.

Note, this is not completely necessary but does help hold the metal in place and also ensures you don’t stamp too much of the surface because you would cover it with the string of the bracelet.

DIY Metal Stamped Washer Bracelets (for Bridesmaid Gifts) | Club Crafted

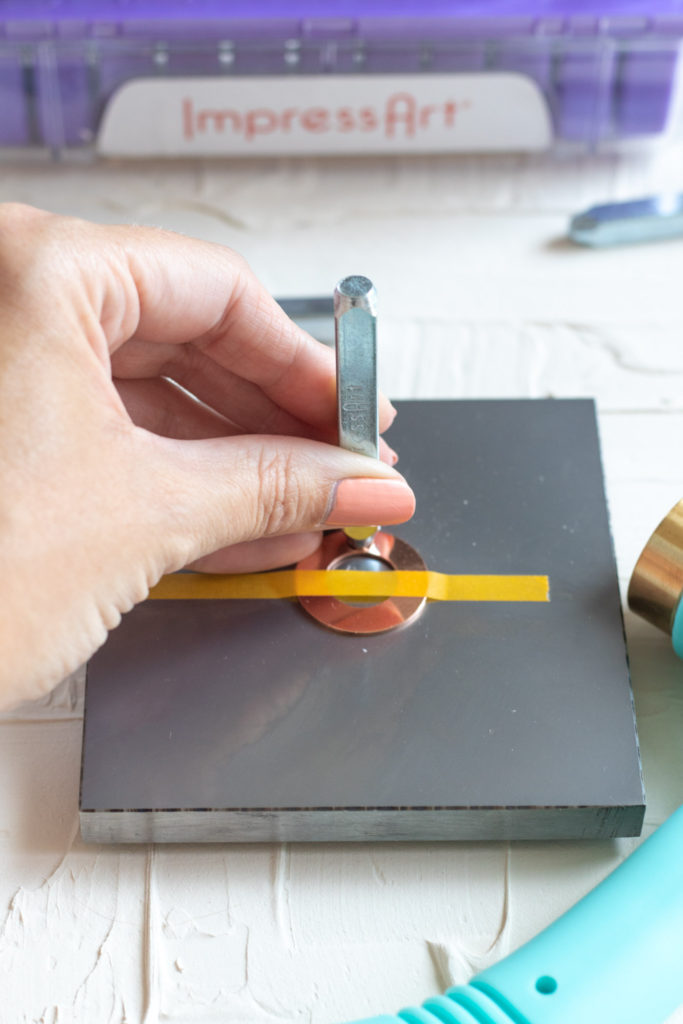
Step 2: Choose the letters you’ll need for your first word, such as mother, sister, wife or friend. Starting with the middle letter, position it on the top middle of the washer (note the direction of the letter!) and use the hammer to hammer the letter into the metal. You may need to hit a couple times depending on the strength – I hammered 2-3 times per letter.

DIY Metal Stamped Washer Bracelets (for Bridesmaid Gifts) | Club Crafted

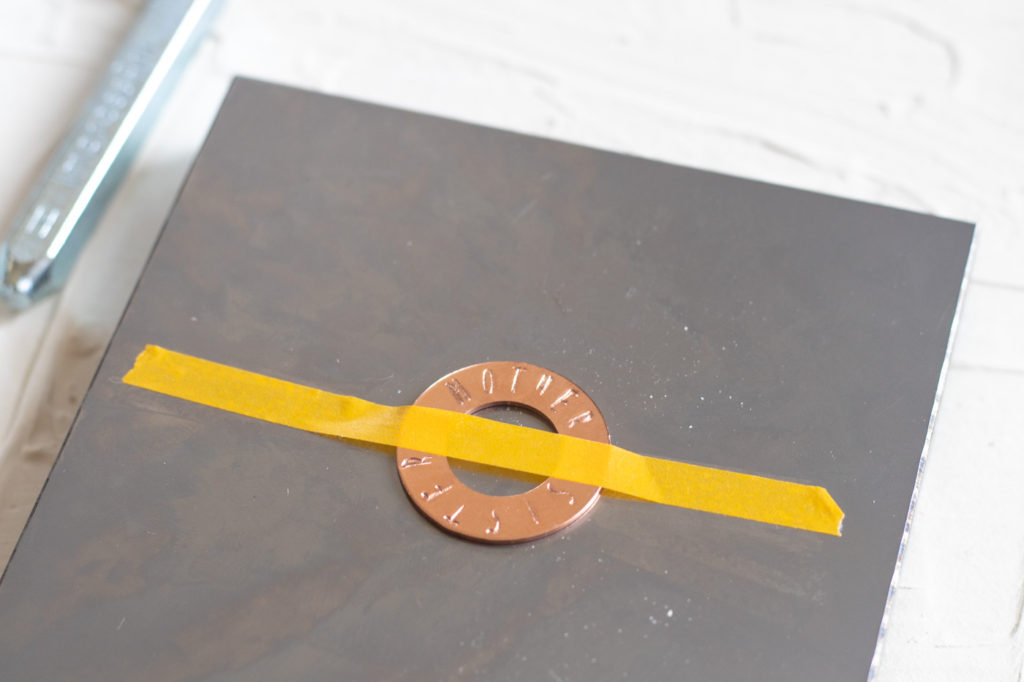
Step 3: Repeat with the remaining letters. Then flip the block around to hammer the letters on the other side of the washer.

DIY Metal Stamped Washer Bracelets (for Bridesmaid Gifts) | Club Crafted

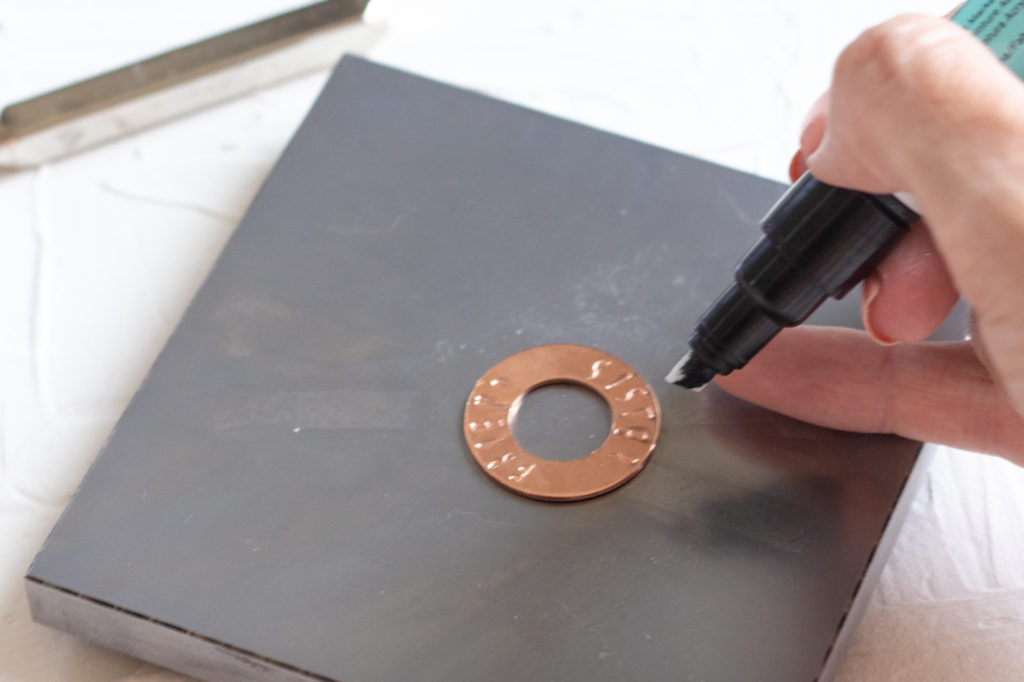
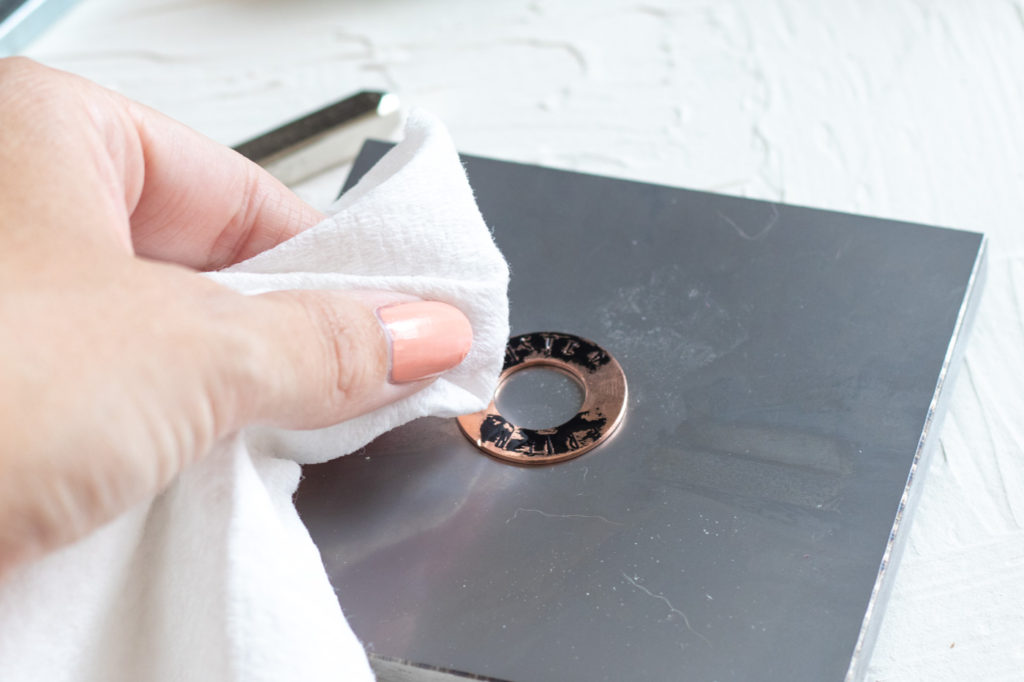
Step 4: To make the letters clearer, use a metal stamp marker (some people have also used Sharpies) to mark over the letters. Let stand for one minute, then use a paper towel to wipe away excess marker so that it only remains inside of the metal stamped spaces.

DIY Metal Stamped Washer Bracelets (for Bridesmaid Gifts) | Club Crafted

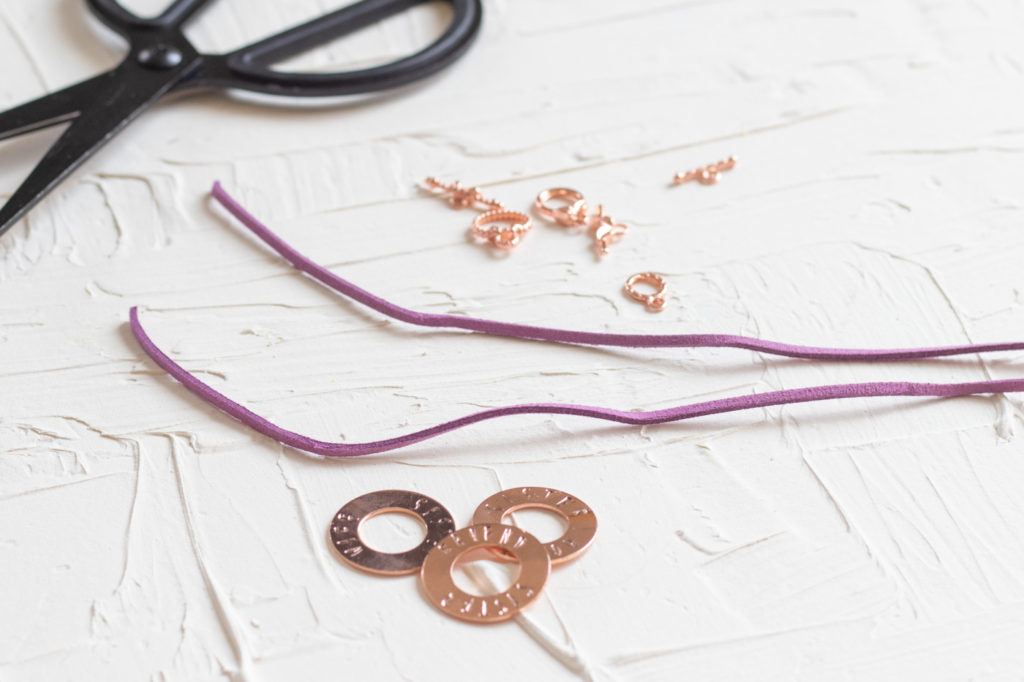
Step 5: Cut two pieces of suede string about 6-7 inches long.

DIY Metal Stamped Washer Bracelets (for Bridesmaid Gifts) | Club Crafted

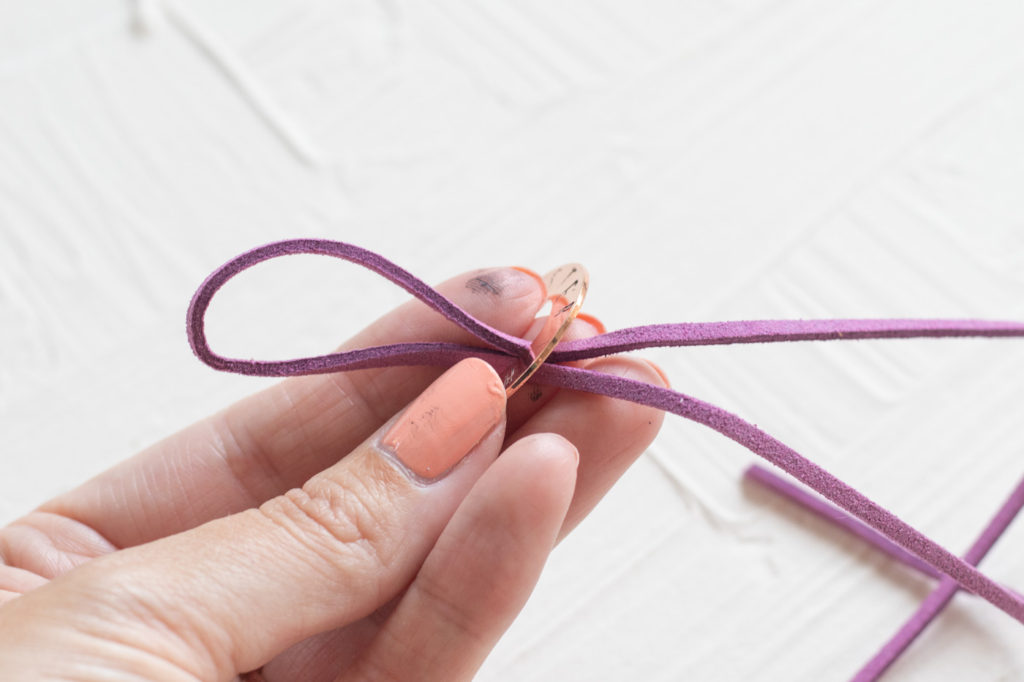
Step 6: Fold in half, thread through the middle of the finished metal stamped washer, then pull the strings through the loop. Repeat on both sides of the washer so that the string does not overlap the lettering.

DIY Metal Stamped Washer Bracelets (for Bridesmaid Gifts) | Club Crafted

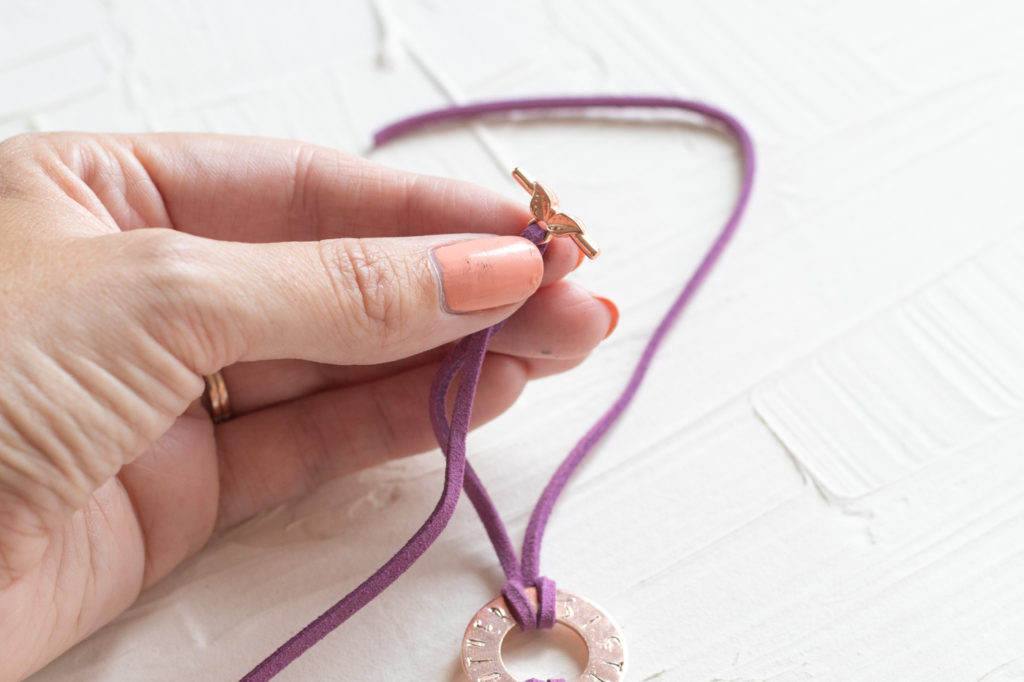
Step 7: Measure the bracelet around your wrist to determine the proper bracelet size. On one end, thread a piece of the string through the hook piece of the toggle clasp.

DIY Metal Stamped Washer Bracelets (for Bridesmaid Gifts) | Club Crafted

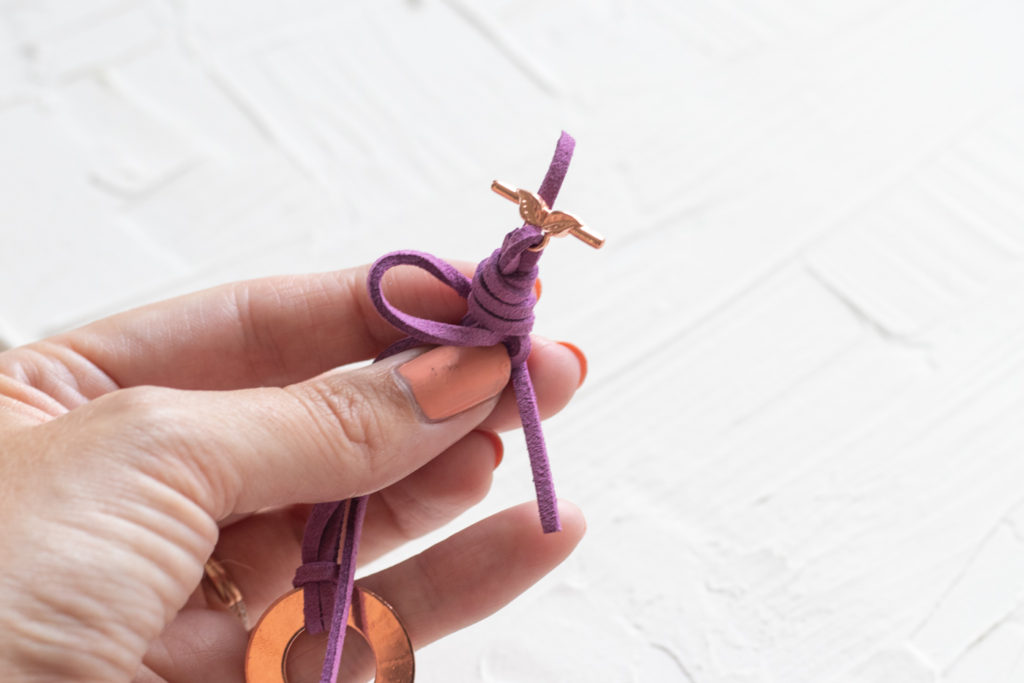
Step 8: Cut a separate piece of string about 4-5 inches long. Use it to make a gathering knot. Join the two bracelet strings together, and using the separate piece of string, make a U shape over them. Wrap the working end around all of the pieces 3-4 times to secure, then pull the string through the loop at the bottom. Pull tight on the top string (from the U) to pull the end into the knot. Then trim the ends.

For another visual, check out this video for tying a gathering knot.

DIY Metal Stamped Washer Bracelets (for Bridesmaid Gifts) | Club Crafted

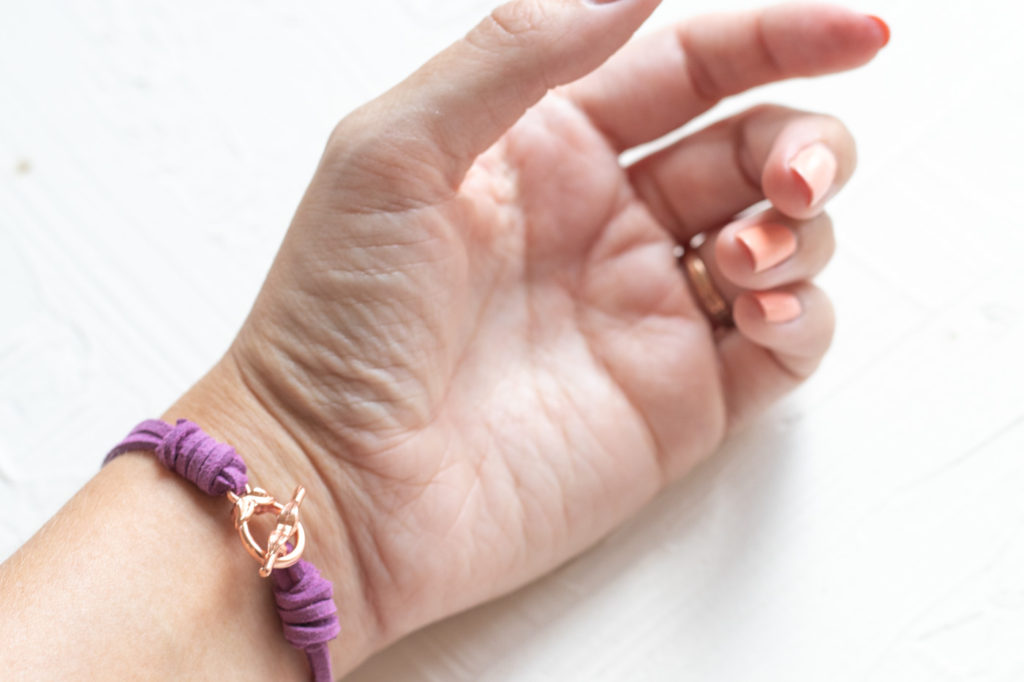
Step 9: Repeat on the other side of the bracelet with the loop end of the toggle clasp. Insert the bar into the loop to secure the metal stamped washer bracelet around your wrist!

DIY Metal Stamped Washer Bracelets (for Bridesmaid Gifts) | Club Crafted

I know it seems like a lot, but metal stamping just requires a bit of practice to get it right. I’m still learning too! I ruined at least one washer before I managed the keep the letters in the right places.

Psst, if you need to, you can flip over the washers and stamp the other side to practice your metal stamping! Who would you give one of these metal stamped washer bracelets to?!

TAGS:gift ideasjewelrymetal stamping

You May Also Like...

4 Last-Minute Idiom Halloween Costumes

October 24, 2017

DIY Cement Gem Push Pins

August 9, 2016

DIY Velvet Lips Pillow

March 7, 2018

Leave a Reply Cancel Comment

Recipe Rating


Previous Post
3 Free PRIDE Phone Wallpapers for Pride Month
Next Post
Magical Funfetti Cloud Cupcakes (Surprise-Inside Cupcakes)

Hey there! I'm Holly and I like to make stuff.
  • Facebook
  • Instagram
  • Pinterest
  • Twitter
  • YouTube

LOOKING FOR SOMETHING?

TRY THESE FAVORITES!


RAINBOW PLACEMAT CLUTCH


RAINBOW FRINGE BLANKET


COSMIC BROWNIE FUDGE


IRIDESCENT PARTY HATS


WELL, I was going to post this photo and talk abou WELL, I was going to post this photo and talk about the new pins in the shop...but they SOLD OUT in 12 hours instead πŸ˜­πŸ™ Andrew and I are so overwhelmed with the love of the #FIPWarriors community. Thank you to anyone who's purchased a pin to support Milo's treatment! We're so close to the end now! One more batch of pins coming up soon 😽
What do you mean I have to take down my Christmas What do you mean I have to take down my Christmas decorations?! 😭 Half our neighbors already took down their Christmas lights, so I guess the only goal is to not be the LAST one with lights up. How long do you keep up your decorations?
Maybe next year I'll finally remember to do a holi Maybe next year I'll finally remember to do a holiday card before it's a week til Christmas, so we can actually send one πŸ€ͺ When we get Christmas cards, I always feel like a little kid getting mail again! Do you send a holiday card??⁠
⁠
(Grab this DIY card holder in the blog archives! πŸ‘‰)
More product is coming soon! πŸŽ‰ I'm honestly SHO More product is coming soon! πŸŽ‰ I'm honestly SHOCKED to see Milo's pins sell out so quickly. We made 50 with the expectation that we wouldn't sell very many, but I just put in an order for more inventory! 😭⁠
⁠
This time we'll be selling black and white cat "FIP Warrior" pins to help raise money for Milo's treatment. Stay tuned - a pre-sale is coming! Pins will ship again in early January. In the meantime, there's plenty of other products available in the shop! (Visit my @etsy via the link in my bio)
NEW LAUNCH! 😸 Thank you all so much for your su NEW LAUNCH! 😸 Thank you all so much for your support of Milo while he goes through FIP treatment! I designed a new enamel pin to help us raise the funds to pay for Milo's treatment...THEN we sold almost all of the pins in just in a few hours! I'm so thankful and in shock of the generosity of our FIP community 😭⁠
⁠
There are a few left and more on the way, so you can SHOP NOW on @etsy and here on IG!! If you want a pin and they are sold out, please tag yourself below! Visit the link in my bio to purchase πŸ›β 
⁠
"FIP Warrior" is the name we give to cats fighting FIP and the humans who help them, bringing awareness to the disease and possible treatments. Our Warrior Milo is almost halfway through his treatment and we couldn't be more grateful to see him getting better! Every purchase from my shop helps us to pay for his expensive treatments and is so, so appreciated πŸ™πŸΌ
🍁 I can't beLEAF it's been a whole month since 🍁 I can't beLEAF it's been a whole month since my last post (oops!) but I had to fit in my one obligatory fall photo before I dive straight into Christmas! If you caught my Stories recently, you may have already seen why I've been so absent...⁠
⁠
Last month, our sweet Milo was diagnosed with a disease called feline infectious peritonitis (FIP). It's very serious and has required our full attention to give him daily injections that should help him recover. The treatment is 84+ days long and has taken a huge emotional toll on us. You can learn more about Milo's FIP story in my profile Highlights!⁠
⁠
Long story short: I've been too emotionally drained from Milo's treatment, my regular work and the crazy world around us to even think about social media 😣 I truly don't know how you fellow creators do it! Hopefully the cheerfulness of Christmastime gives me the urge to create again! (πŸ“Έ cookies made for a project with @spectrumorganic)
  • ABOUT
  • SERVICES
  • CONTACT
  • BLOG

Copyright Holly Wade Β© 2019 Site Powered by Pix & Hue.