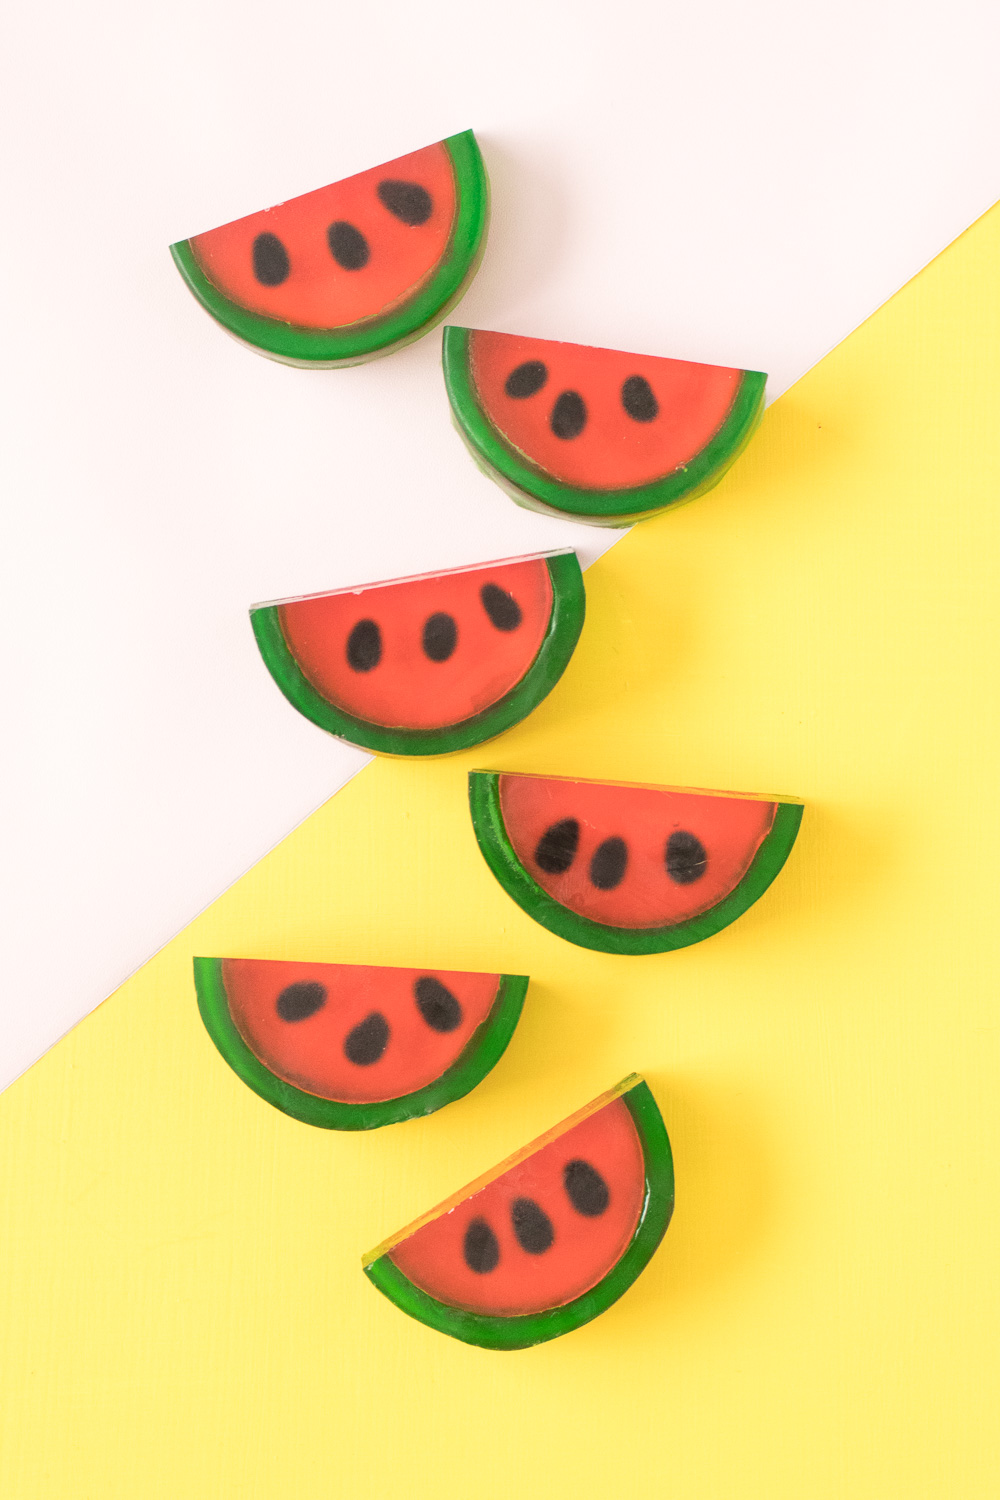
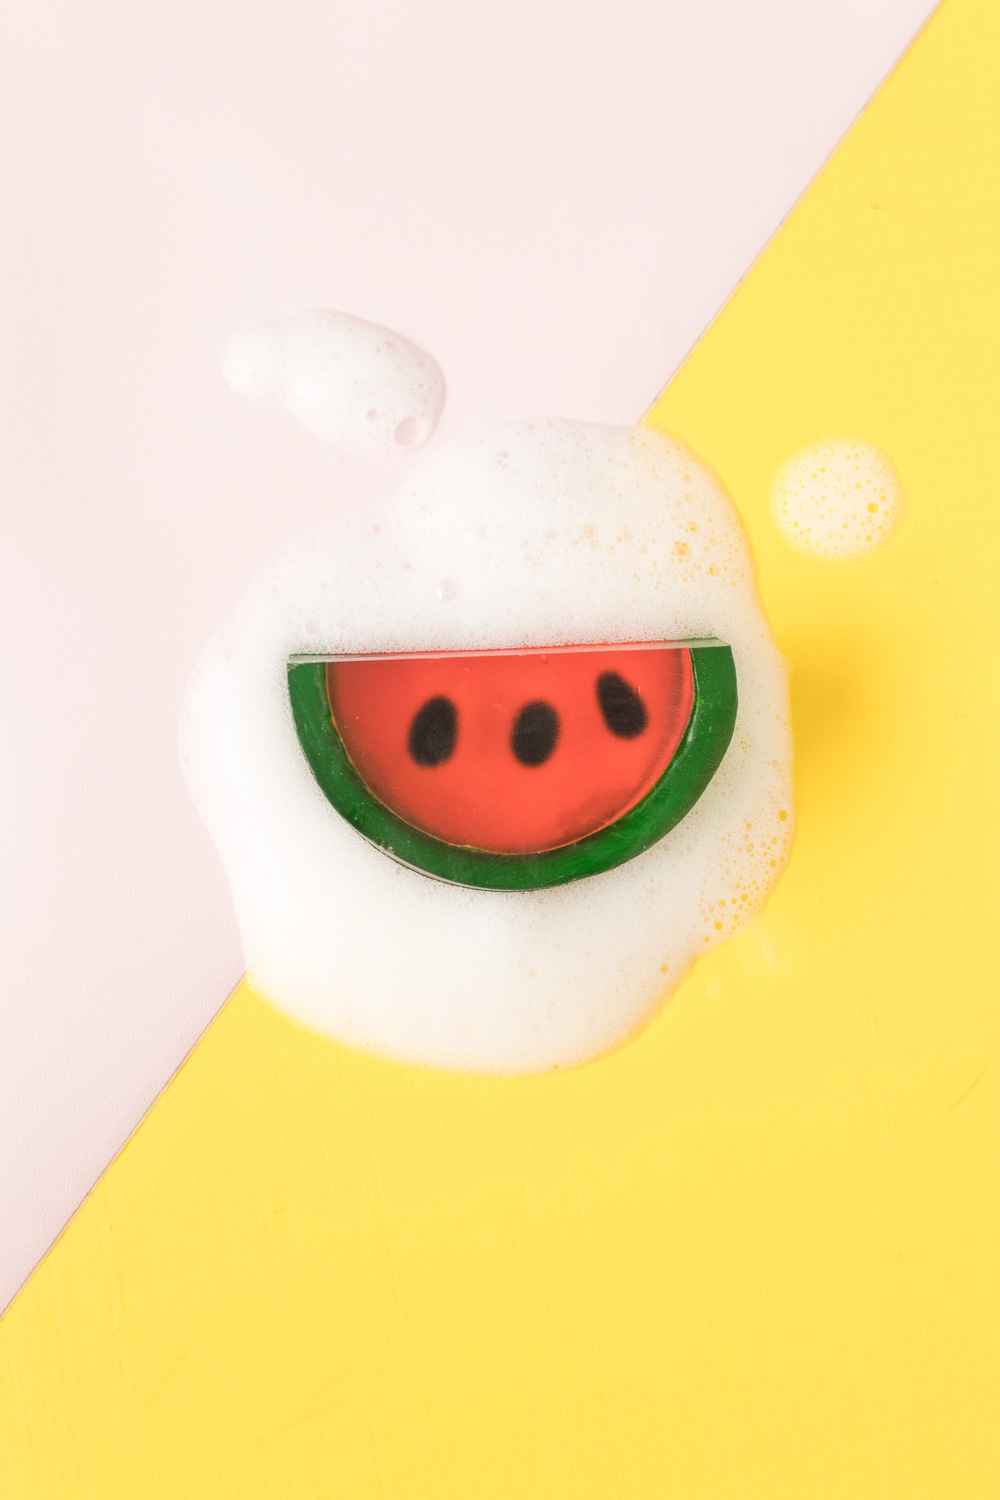
I’m amazed how close we are to summer now! In just a couple short months, it’ll be 90+ degrees and I’ll want to lay poolside all day. For now, I’m enjoying the temperate sunshine and making things that remind me of summer, like these simple DIY watermelon soaps! Made in a simple round soap mold, these cute little slices will make great gifts throughout spring and summer. Customize them with your favorite combination of essential oils, and enjoy washing your hands with a small little slice of watermelon.
This post was originally published on April 4, 2018.
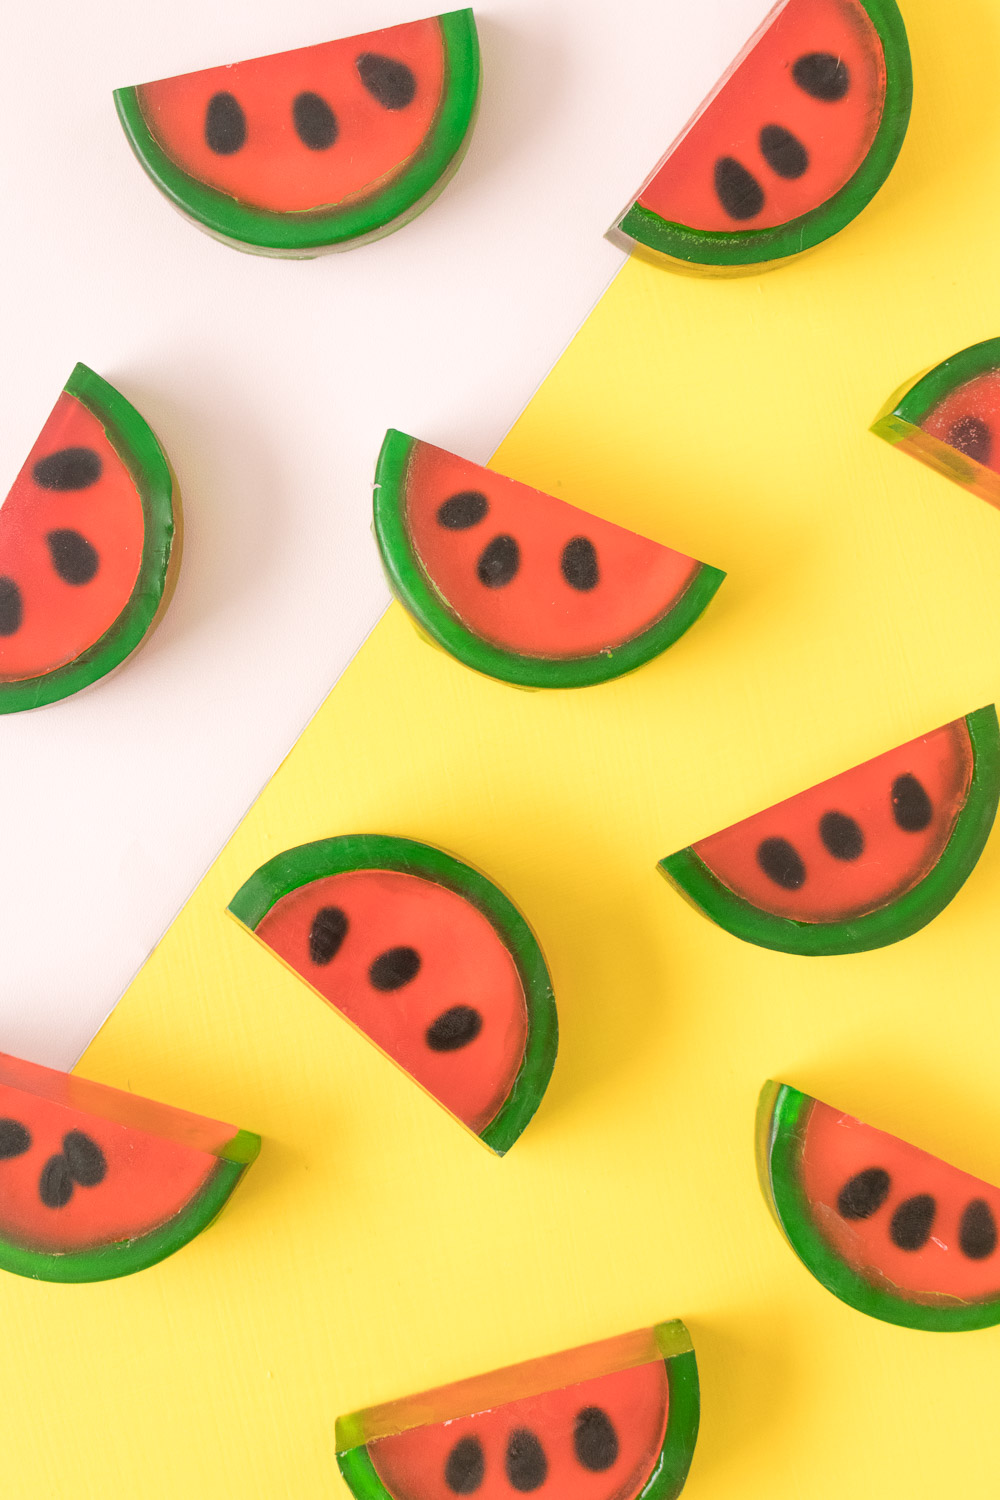
 Can you guess what those little black seeds are inside of the soaps? I bet not…they’re fondant! I know it sounds very strange to put fondant inside soap, but after considering using beads and attempting to make soap seeds (it was nearly impossible to achieve a dark black soap), I decided fondant was easy to shape and would somewhat dissolve with the soap. Overall, I was really happy with the result! These little watermelon slices of soap have defined seeds and sides, and it wasn’t nearly as difficult to make as I’d expect.
For the scent, I simply used a bit of lemon essential oil for that obvious clean smell. I would have loved to do watermelon, of course, but I was working with the essential oils I had instead of specific soap scents. Use any combination of your favorite essential oils to create a scent that you love. 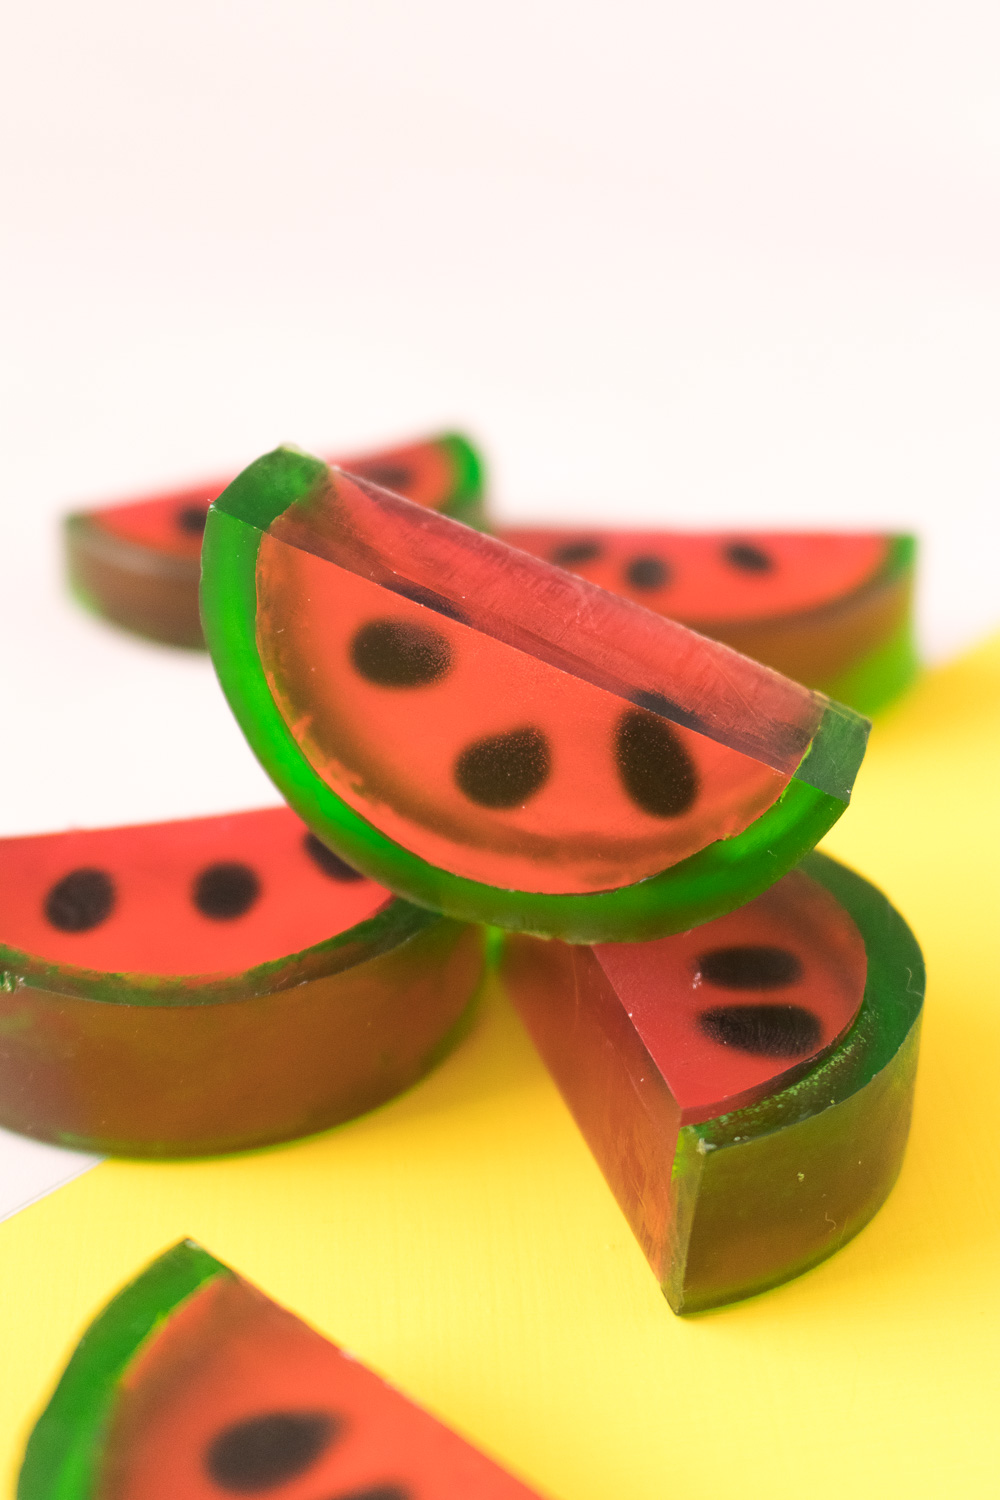
 Time: 30 minutes
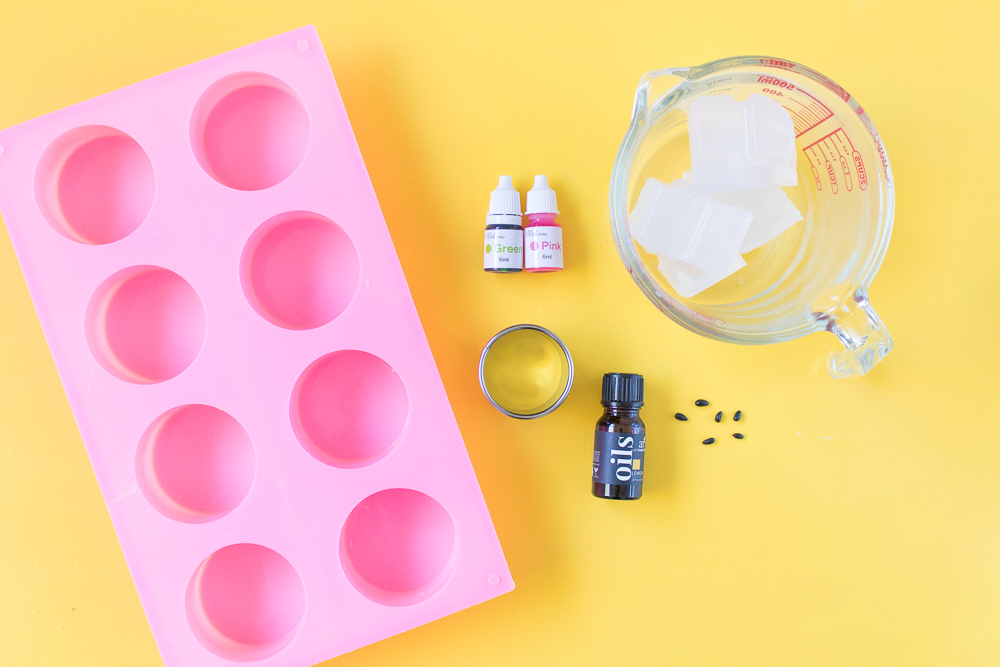
Supplies:
- Melt-and-pour glycerine soap
- Large glass measuring cup
- Round silicone soap mold
- Round cookie cutter, slightly smaller than mold
- Green and pink soap coloring
- Essential oils
- Black fondant
- Spray bottle of alcohol or hairspray
- Sharp knife
Step 1: Roll tiny pieces of black fondant between your fingers and then pinch slightly to create a seed shape. Make enough to have 6 seeds in each circular cavity.
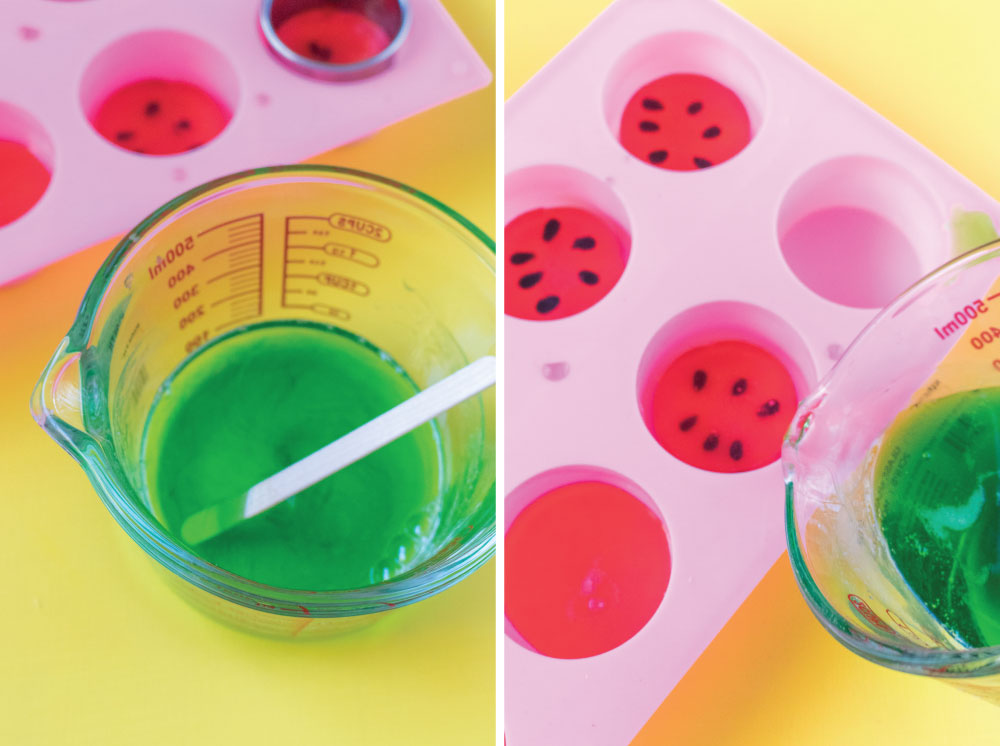
Step 2: Place about half of the soap in a large glass measuring cup and microwave for about 40 seconds. Check it and microwave in 10 second increments until the soap is melted.
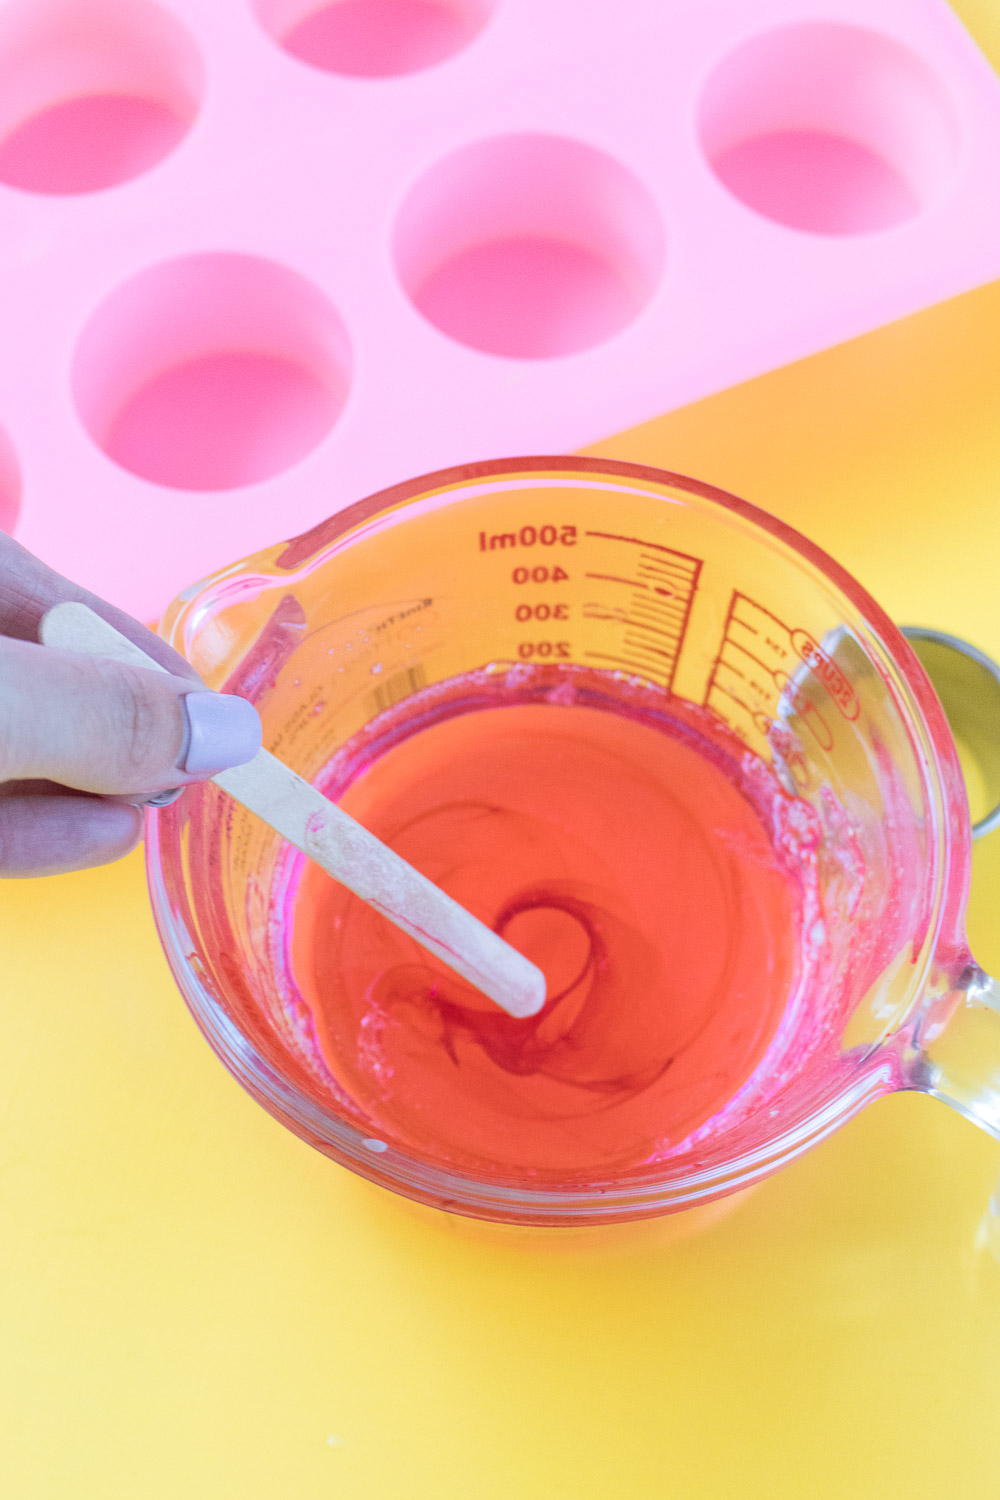 Step 3: Stir in pink soap coloring.
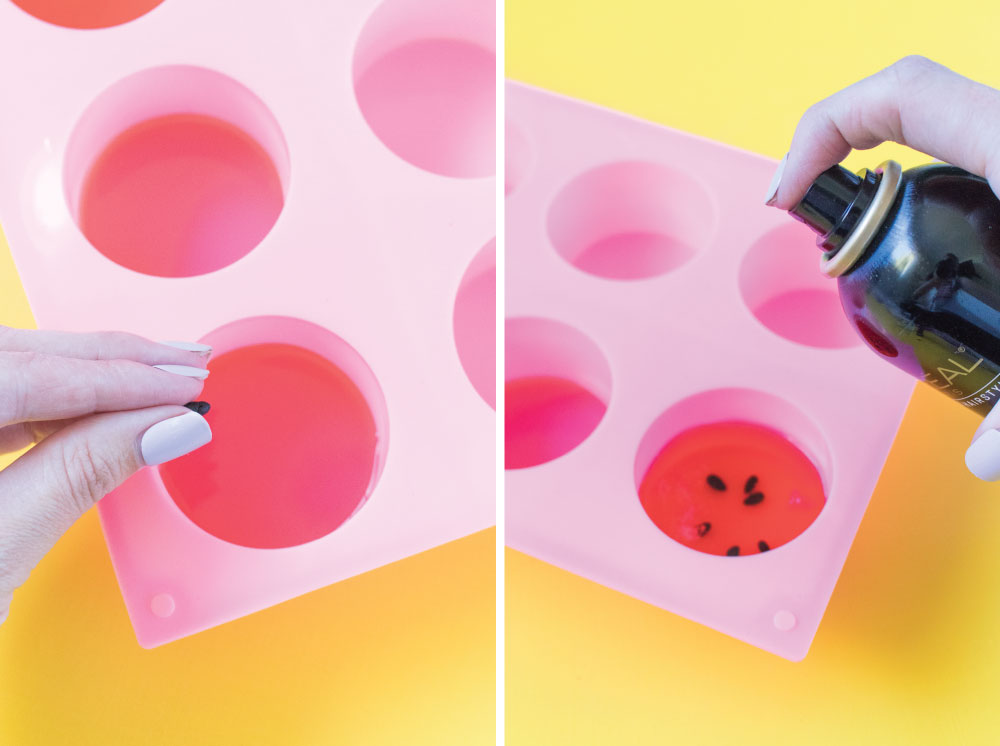 Step 4: Pour a little pink soap into each circle mold (just about 1/4 inch) and top with 3 seeds on each side. Keep in mind you’ll be cutting these in half to create slices.
Step 5: Top with remaining soap so that each cavity is filled at least 1-inch. Lightly spray the top with alcohol or hairspray (I love this trick!) to remove any air bubbles formed on top.
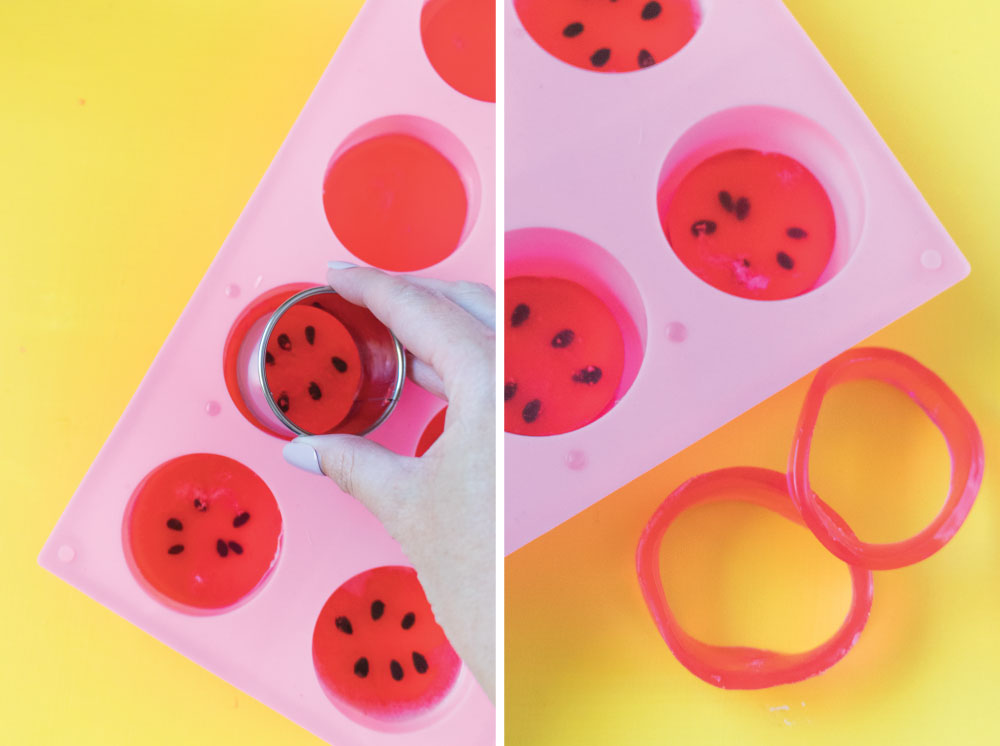 Step 6: Let the soap set for about 30-40 minutes. Then carefully press the round cutter into the mold and remove the outside circle of soap. Leave the rest in the mold – it should be firmly positioned in the middle of the cavity.
Note, you can save the extra pieces of soap to re-melt for later use.
 Step 7: Heat the remaining soap in a clean glass measuring cup and stir green coloring into the melted soap.
Step 8: Then carefully pour the green soap around the edge of the mold until it is the same height as the pink soap. Don’t stress if a little lands on top because you can cut it away later. Set aside to harden again for at least 40 minutes.
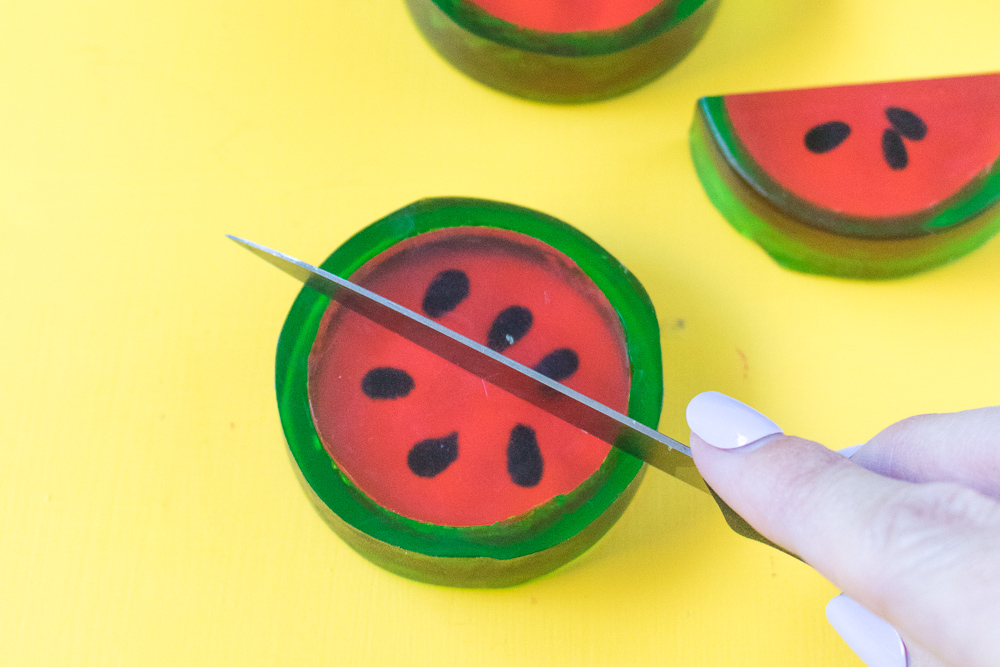 Step 9: Remove the soaps from their molds and cut each one in half with a sharp knife. If any green has spilled over onto the front or back of the soap, simply cut it away.
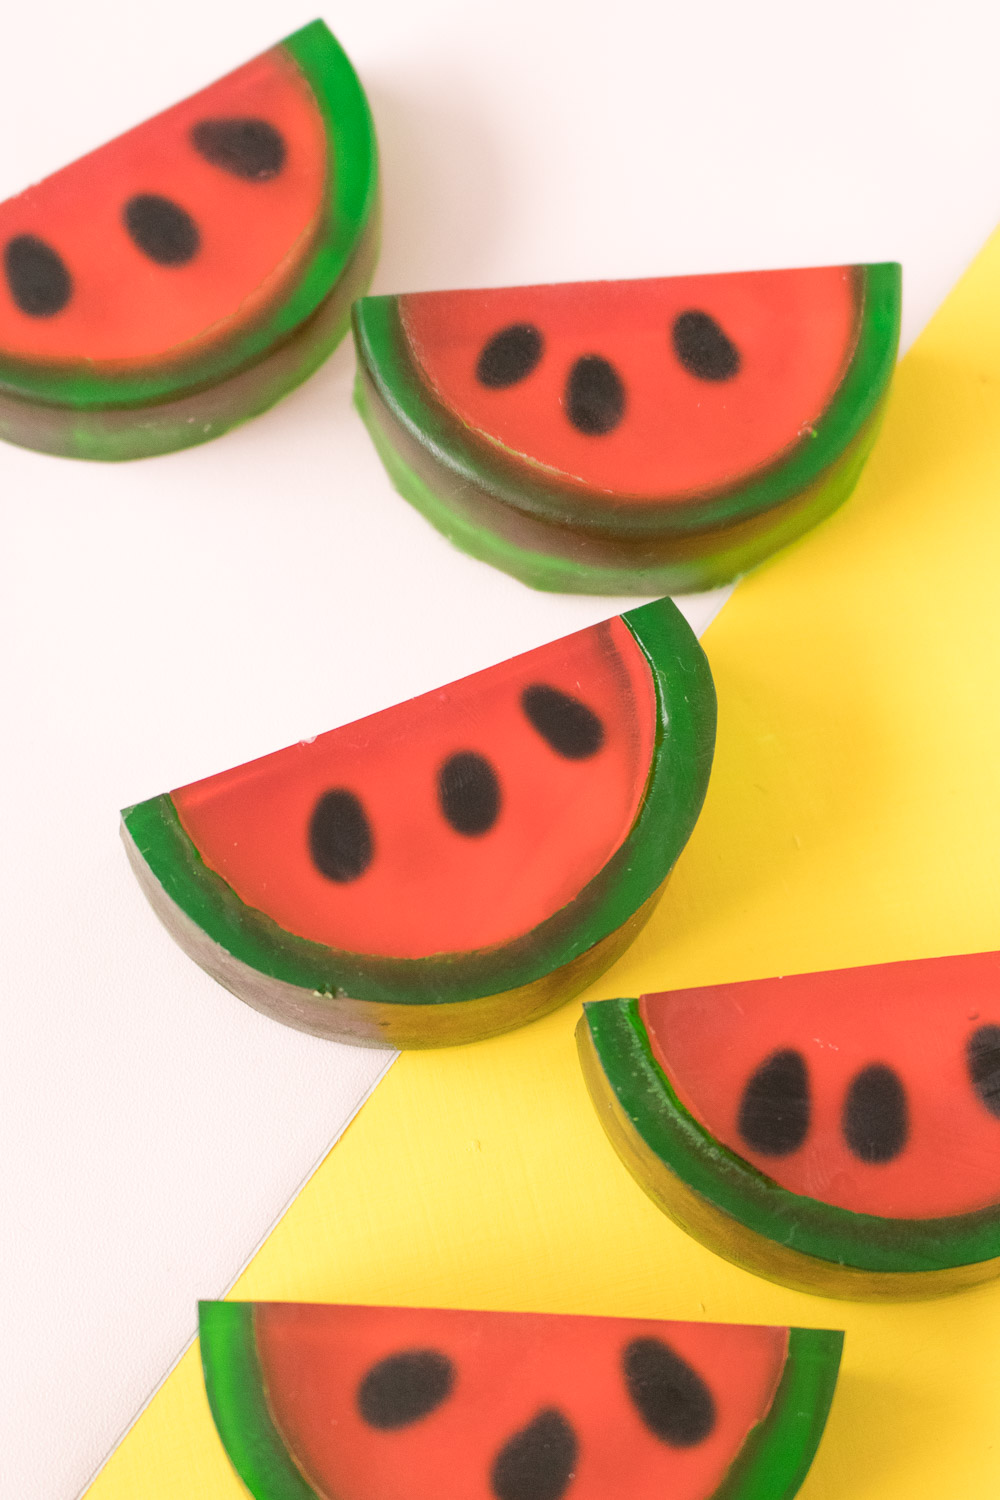 Now your soaps are ready to use! These make me so excited for summer to come!
Thyra
Very nice, thank you
marble inlay
These are very simple instructions that even I think I can make one. Thanks for posting it!
Holly Wade
marble inlayThanks, so glad you liked the post!
Gregory Bergman
Holly Wadecould you please tell me where you got the ingredients.
Holly Wade
Gregory BergmanHi Gregory! All supplies were from Amazon and can also be found in craft stores like JOANN or Michaels