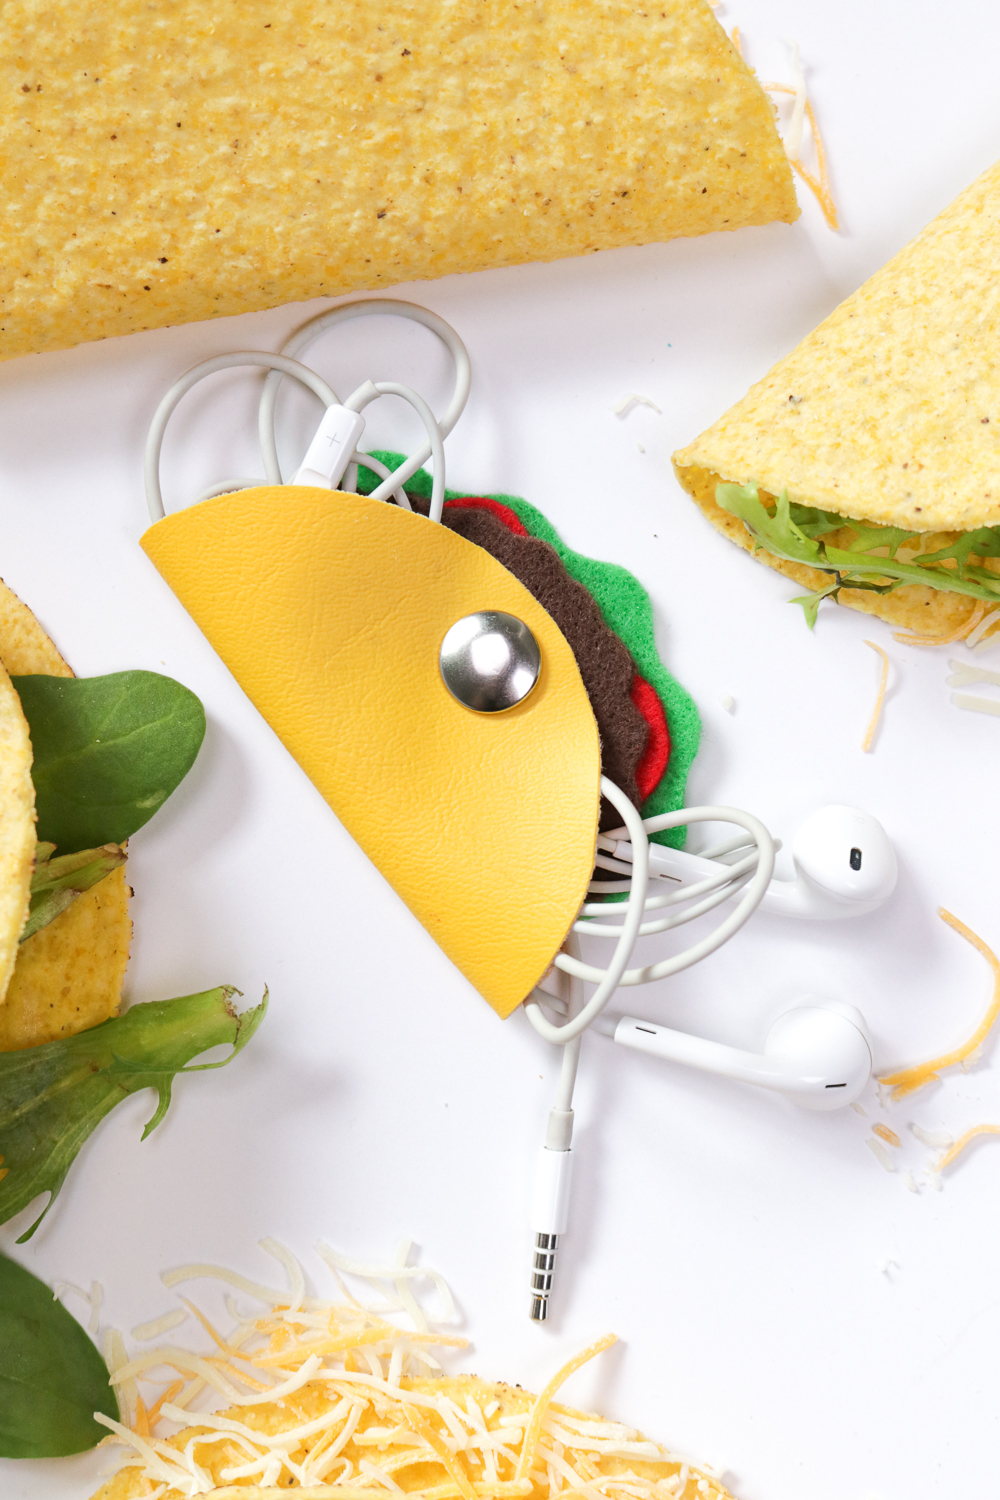
I wish I could explain to you guys just HOW excited I was to make today’s project. As someone whose headphones end up tangled at the bottom of my purse on a daily basis, I probably should have invested in a simple headphone organizer a lot sooner, but I’m glad I held out because what would I do without my DIY taco headphone organizer?! I couldn’t believe how easy it was to make these!
 I’ve recently developed an interest in turning things into food and emojis, so I might as well keep it going! These are just so fun to make and make goofy little gifts for friends. I haven’t spent too much time working with leather before, so I did invest in some basic leather supplies and fasteners to make this project (linked below), but don’t worry, they are not very expensive and they’re good supplies to have on hand for future products.
Time: 15 minutes
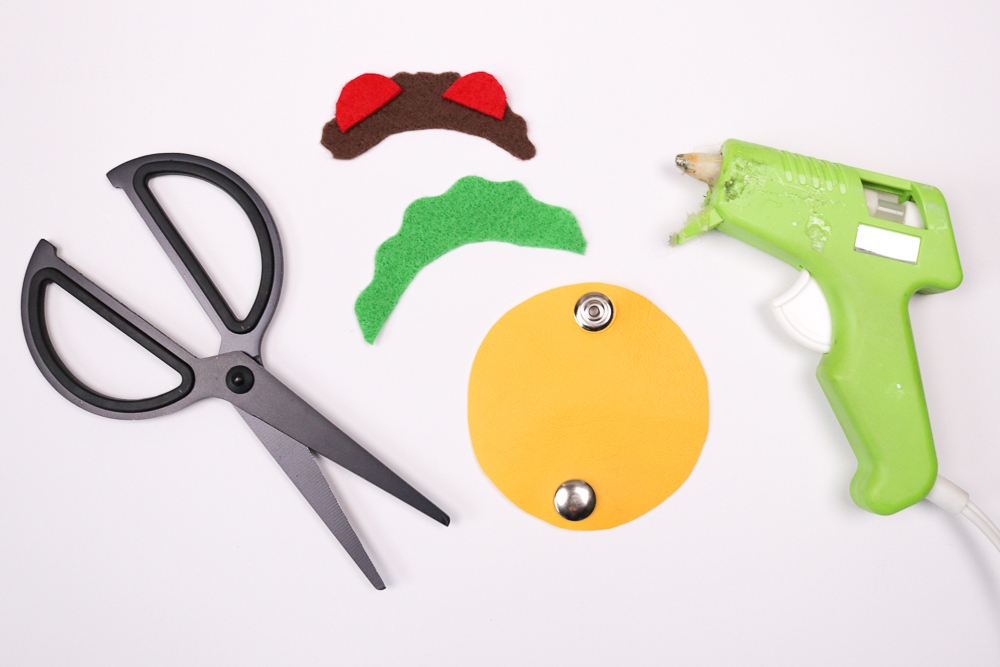
Supplies:
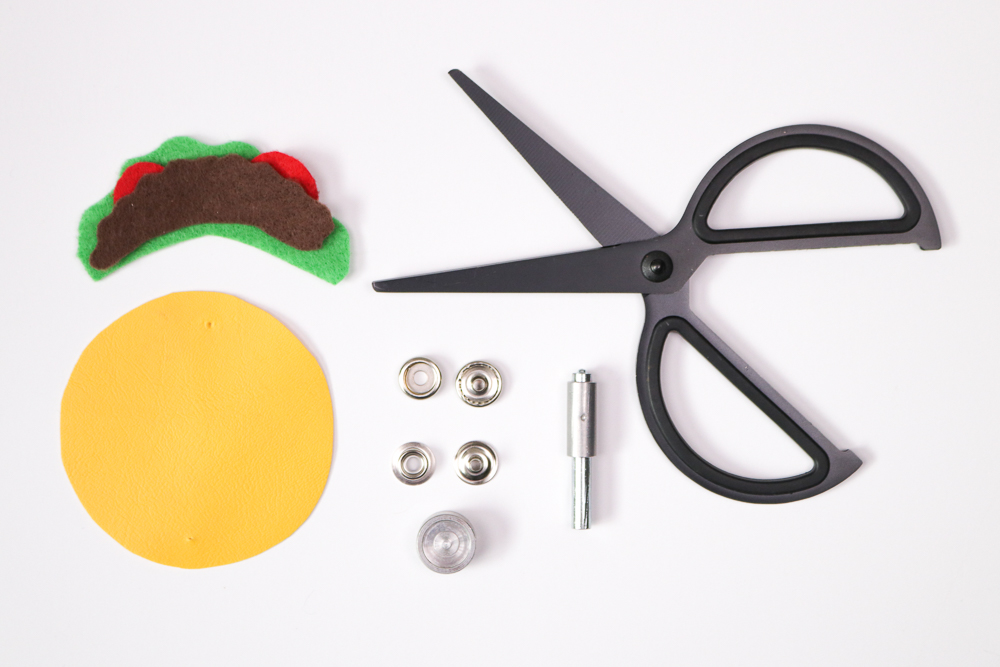
- Yellow leather
- Scissors
- Metal snap fasteners (4 pieces)
- Rotary hole punch or other small punching tool
- Snap setter and anvil
- Small hammer
- Green felt
- Brown felt
- Red felt
- Hot glue gun
 Step 1: Use a stencil or cup to outline a circle on the yellow leather about 4 inches wide and cut it out. Fold in half (yellow side facing outward).
Step 2: Position the rotary hole punch along the curved edge about 1/2 inch from the edge and punch a hole through both sides. Unfold the leather.
Step 3: Each metal snap fastener contains 4 pieces (see above). Yellow side facing up, poke the tube of the snap cap through one of the holes – it does not matter which. On the backside, place the socket on top of the tube. Place the cap (yellow side) on top of the anvil, insert the snap setter tool in the tube of the socket and hammer lightly to secure it to the leather.
*It’s important that the caps always be on the yellow side of the leather because this will be the outward facing part of the piece
Step 4: Now turn to the other hole. Backside facing up, insert the tube of the eyelet. On the yellow side, the stud fits over the tube. With the yellow side facing down, place the cap in the curve of the anvil and once again use the setter tool and hammer to tap the fastener in place.
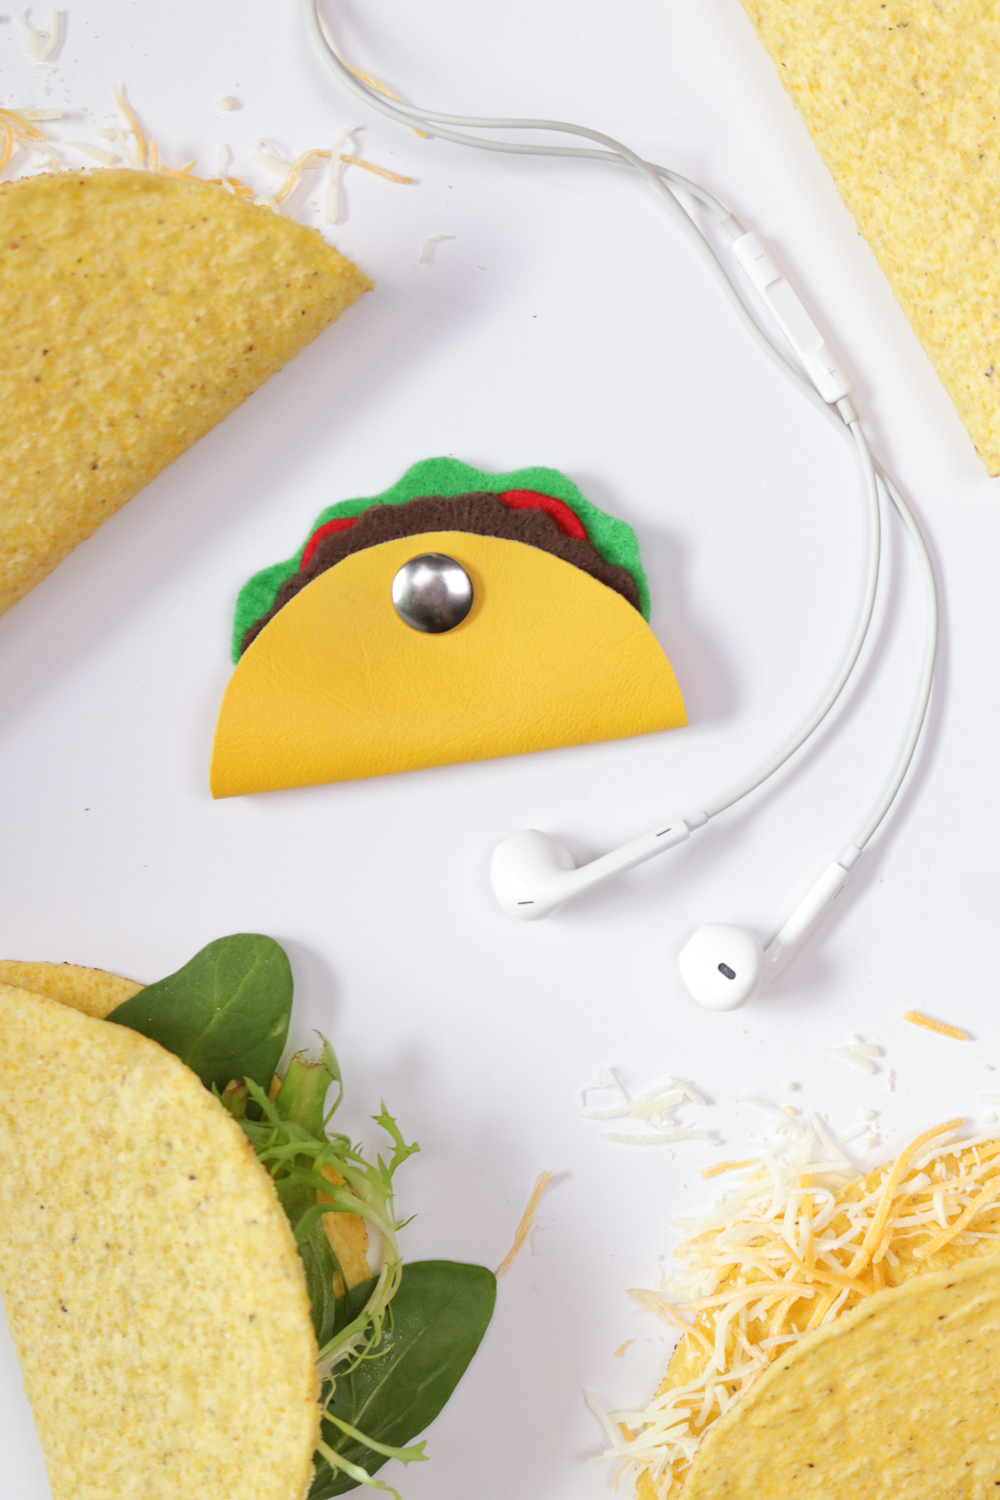
Step 5: Now you should be able to snap the two pieces together with ease, creating a taco-shaped piece.
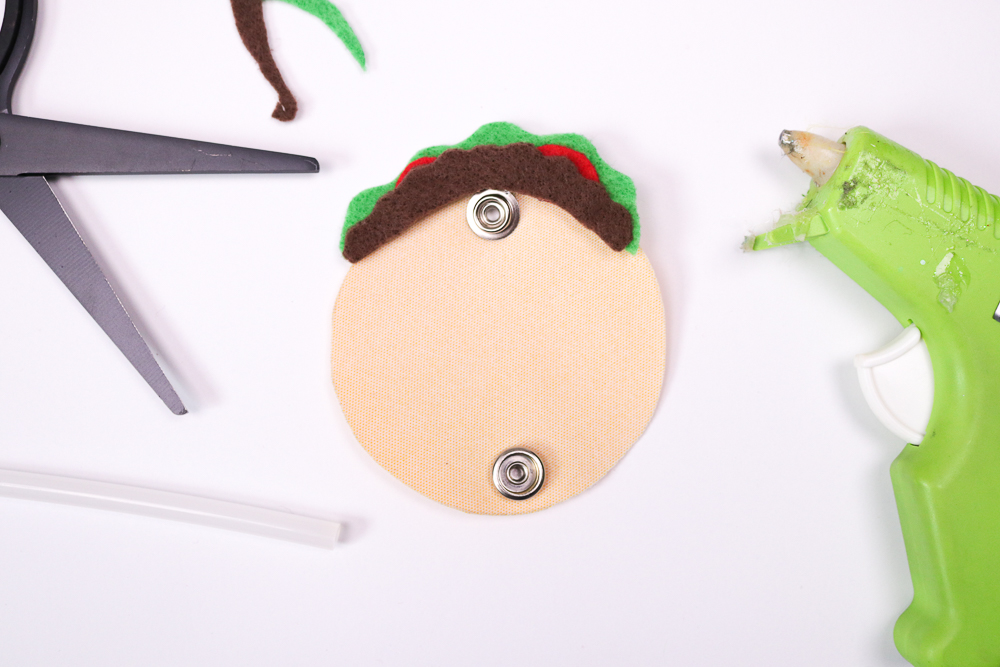
 Step 6: Cut small (about 1-inch) half circles out of the red felt. Cut a curved squiggly shape out of the green and brown felts as well. These will make the taco “ingredients” so you can customize this however you want.
Step 7: Unsnap the yellow leather but keep the piece curled so you can see what you’re doing. With your glue gun, glue the felt pieces to the inside of the leather taco so they stick out slightly but do not interfere with the snap. Trim felt as needed to achieve the right look.
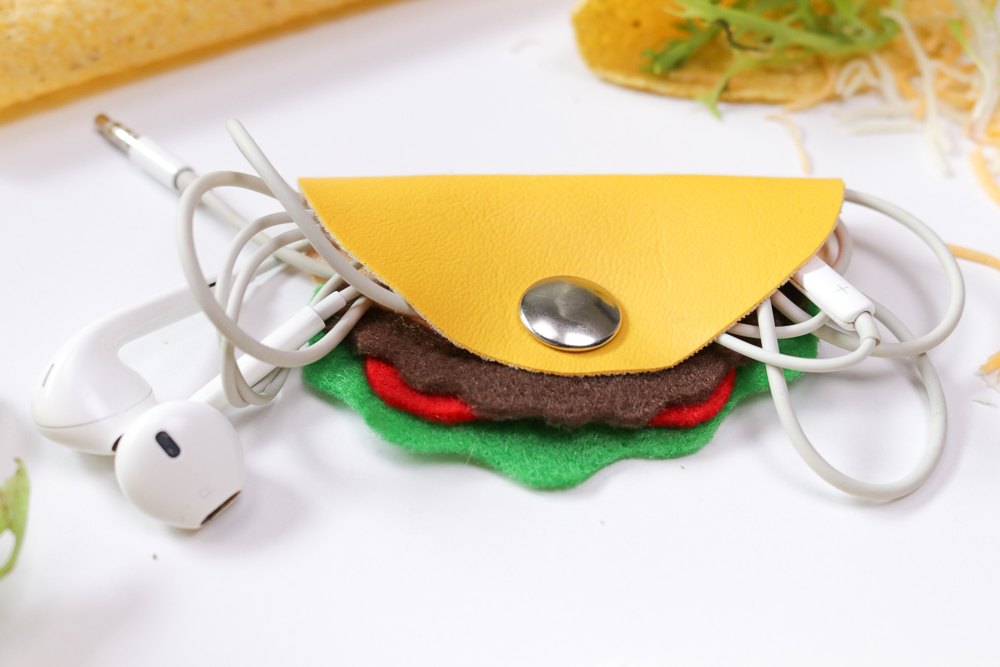
 Step 8: Once all your ingredients have been secured, remove any glue strings. Wrap your headphones and snap the taco headphone organizer around them to keep them from getting tangled.
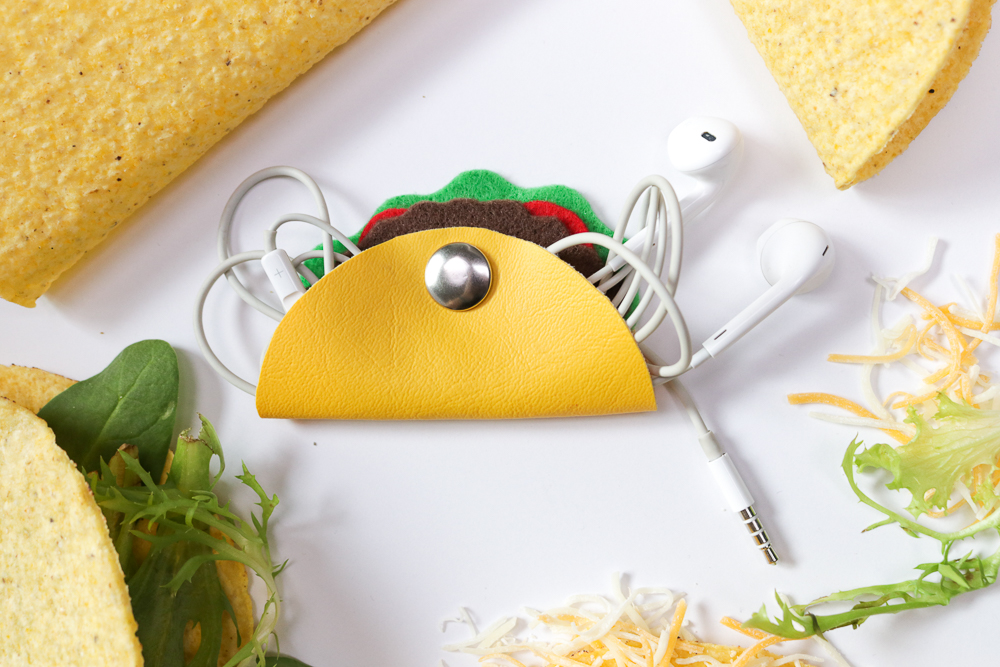 I’ve been using mine for about 2 weeks now, and it’s definitely helped keep my headphones in check! Who knew something so simple could make a difference? It helps that it looks like a taco though…even if it makes me hungry. Happy crafting!
*Please note this post may contain affiliate links to the products I used to create this craft
Katie M
These really are adorable. My girls are planning to make them in their “craft club” tomorrow. Thanks for the very clear tutorial. I’ll let you know how they get on.
Holly Wade
Katie MThat’s so great to hear! I hope they turn out well.