I’m kind of a hypocrite. Once upon a time, I disliked emojis and preferred not to use them until one day I suddenly started and now I consider myself an emoji over-user. When it comes to being a hypocrite, I guess there are worse things, but still, oops.
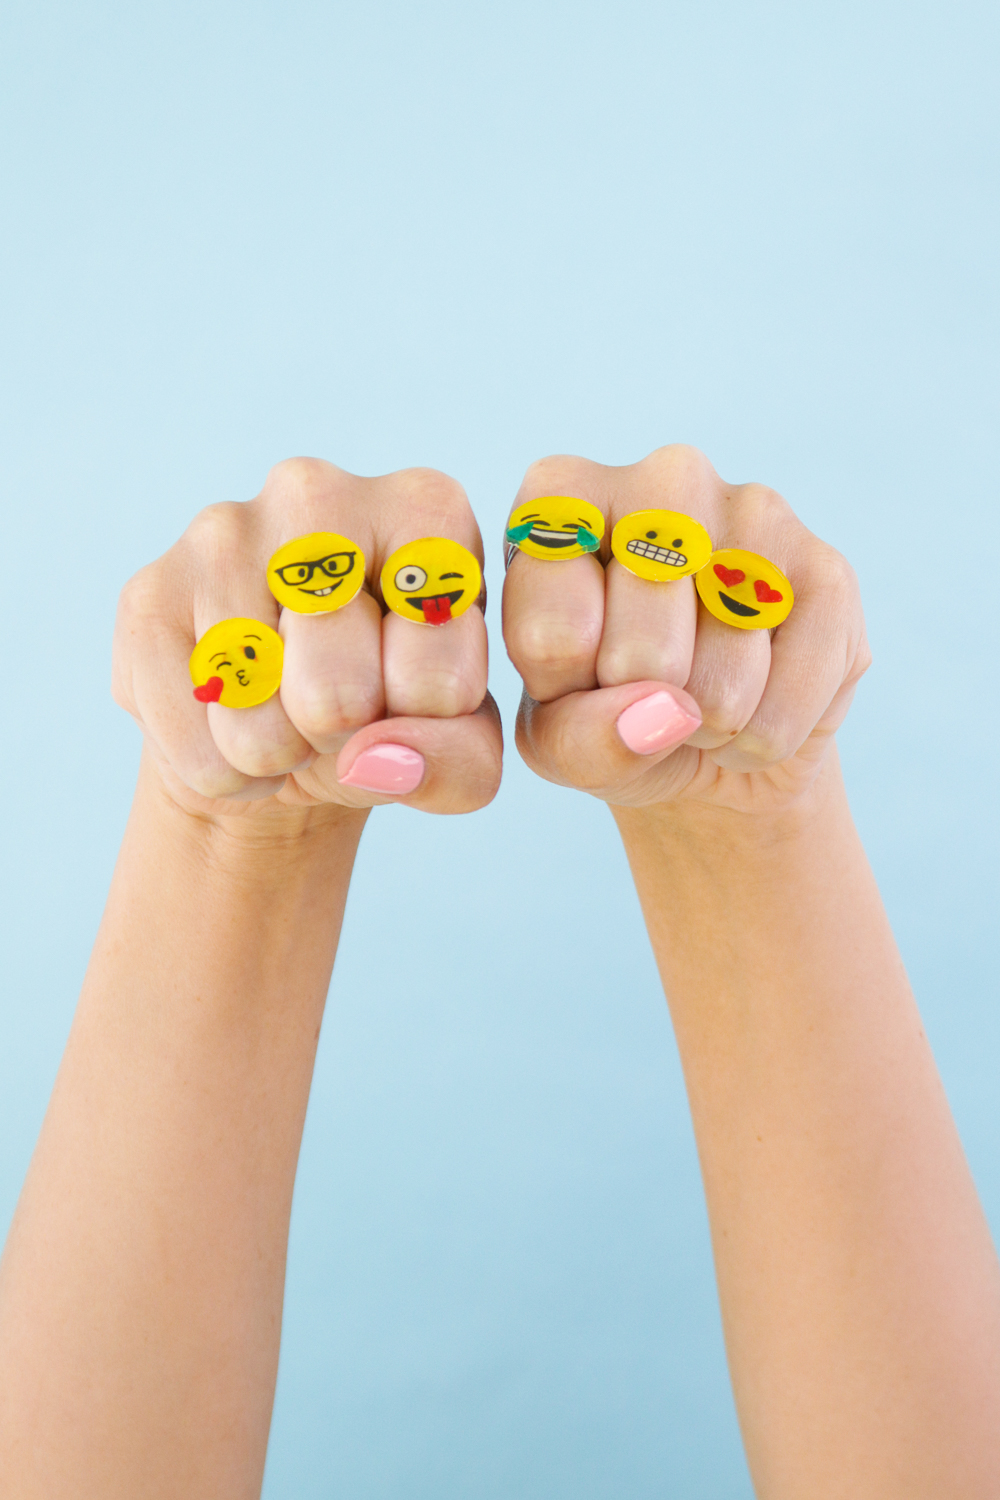
When we were in Florida last year, we played some arcade games and I was able to use some of my tickets to win an emoji ring that I thought was too cute too pass up. Well, here I am more than a year later ready to make my own emoji rings!
 You can make your own emoji rings using your favorite face or character in very little time! The magic supply here is shrink film. Remember Shrinky Dinks? I absolutely loved that as a kid, and when I learned that they still make shrink film, I was quick to snag a package to make these rings. If you’ve never used shrink film before, prepare to be very impressed.
I recommend the clear sheets (linked below) because you can trace your designs, making it much easier for people like me who cannot draw. When using clear sheets for this project, you do need to paint the backs once shrunk, otherwise the design is too see-through to attach to the rings. You can purchase white shrink film to eliminate this step, but then you will not be able to trace the design.
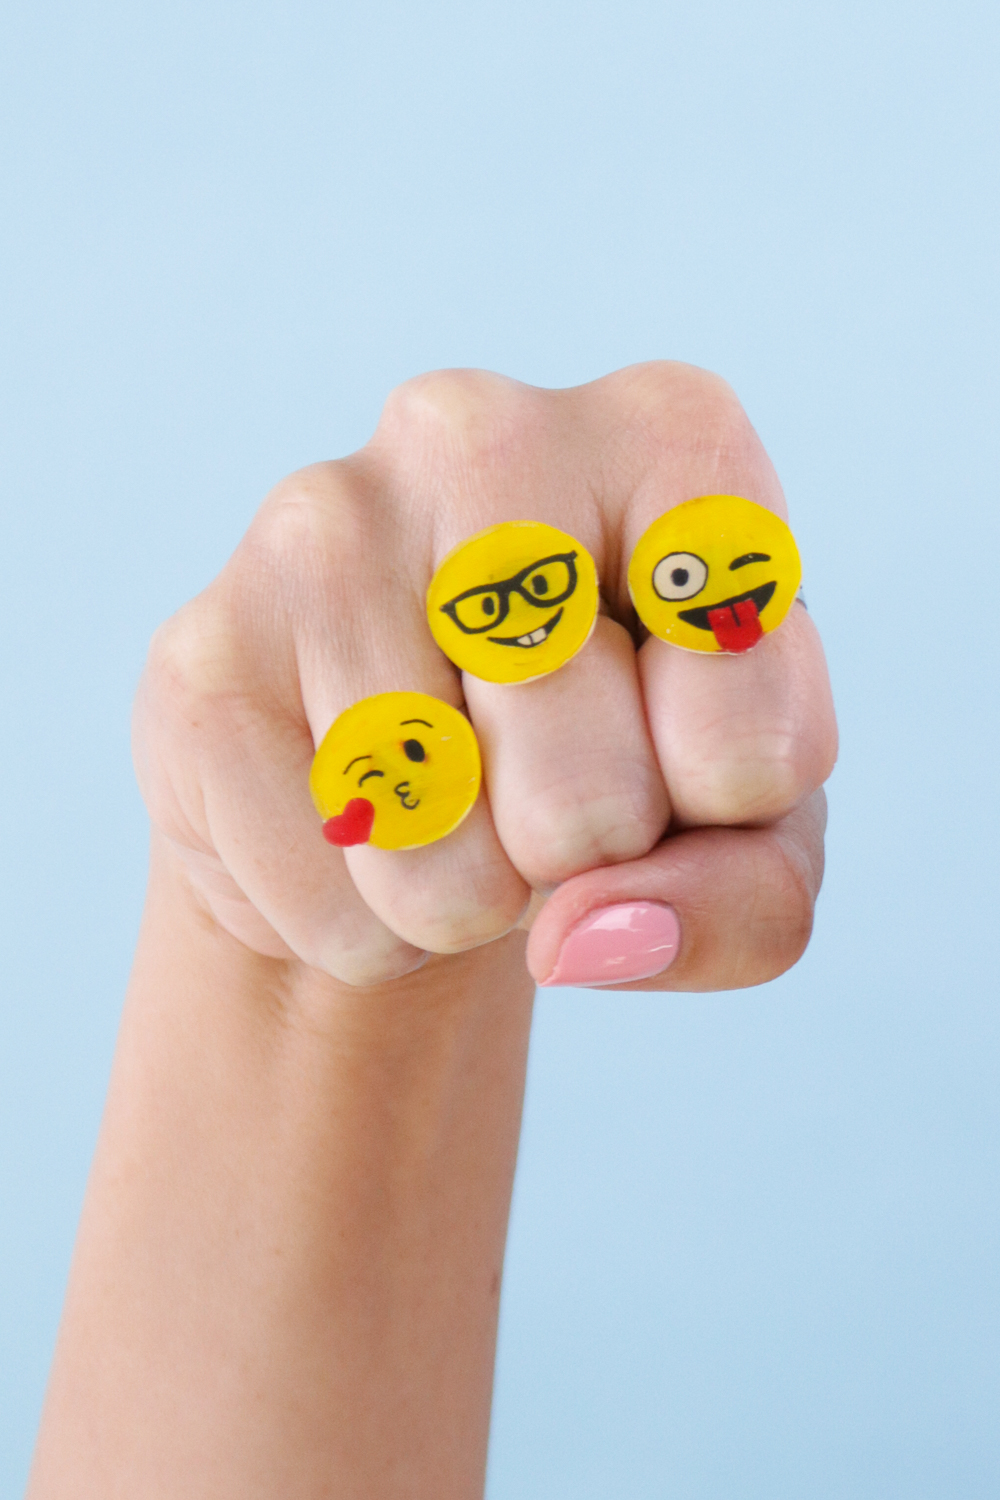
OK, here’s how to make your own emoji rings! I think my favorite is still the kissy face, or maybe the one with it’s tongue out!
 Time: 15 minutes
Supplies:
- Clear shrink film
- Emojis printed on standard paper, about 2 inches wide
- Markers
- Scissors
- White paint
- Small paint brush
- Ring blanks
- E6000 glue or similar
Step 1: Print out the emojis you want to trace. Because they will shrink when baked, the printed versions should be about 2 inches around. Copy/paste emojis into a document and print.
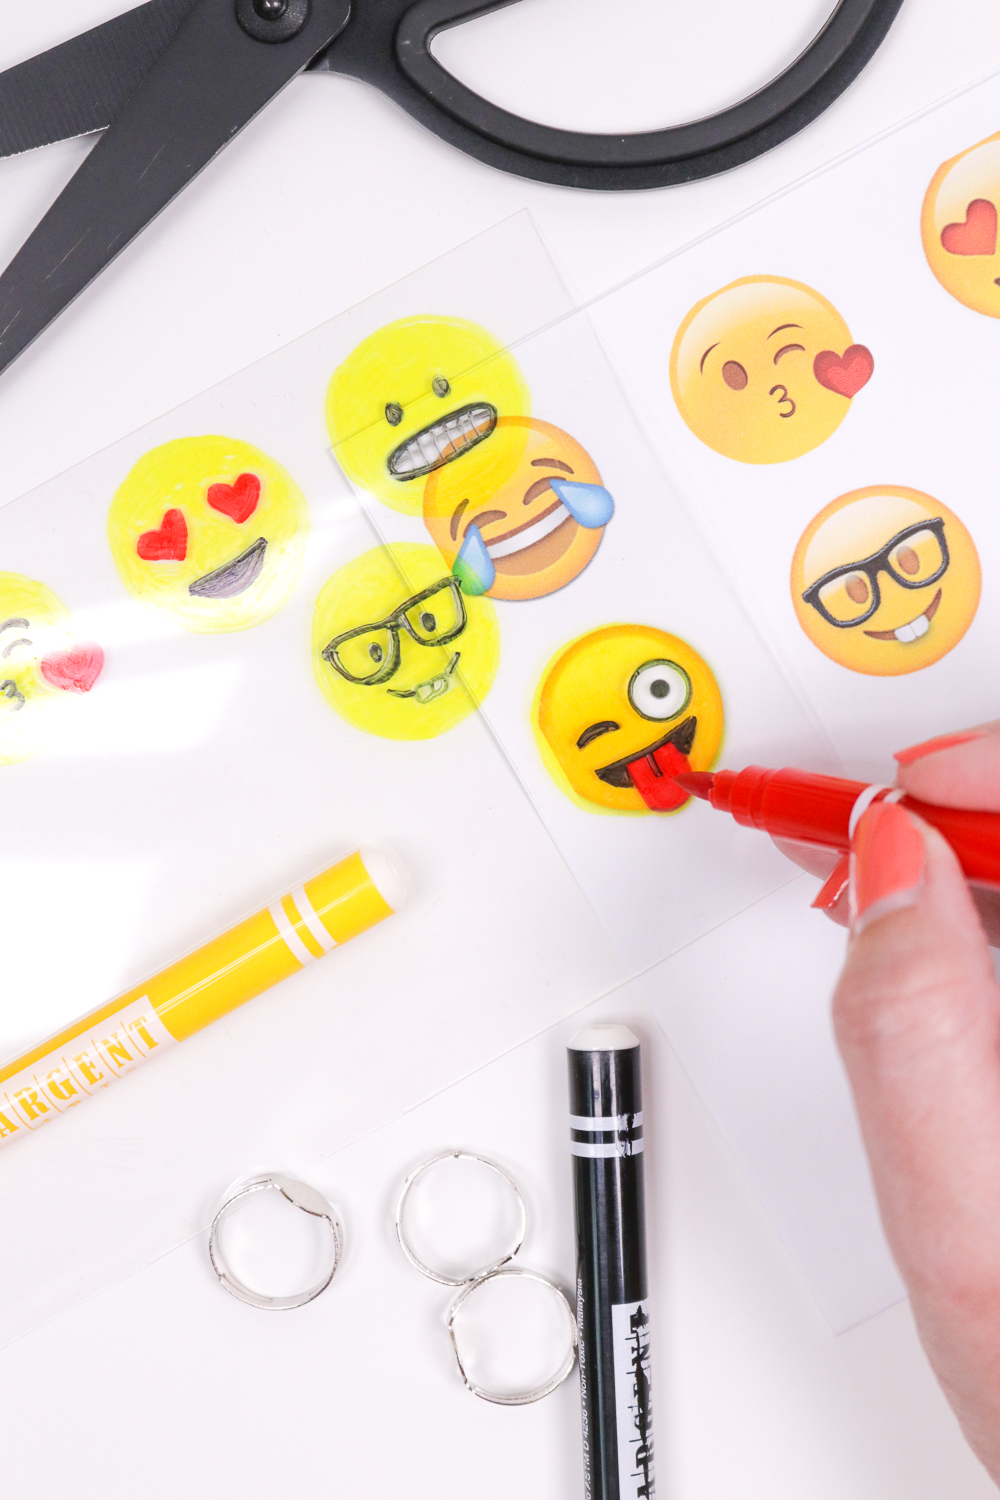 Step 2: Place shrink film over the printed emojis. Trace with markers (generally yellow, red, black and blue).
Note, you can use all types of ink on this film and the colors will become much bolder once baked. You can also use colored pencils, but you must sand down the film first, so I recommend using markers instead.
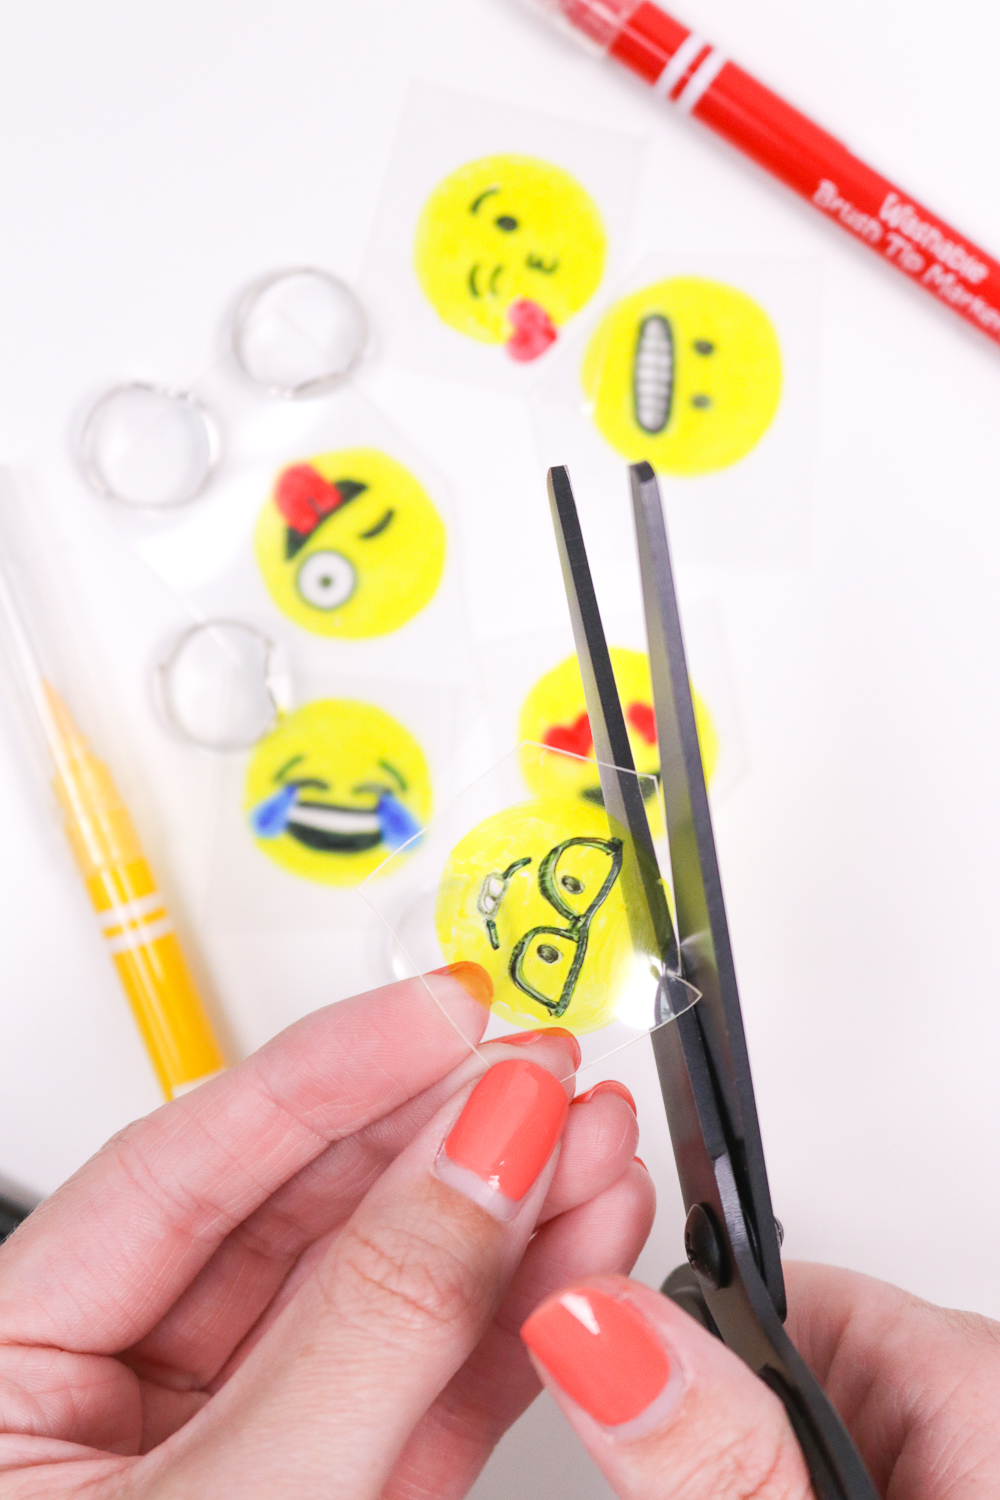 Step 3: Once completely traced, cut out each emoji.
Step 4: Check package for alternative instructions first. Preheat standard conventional oven or microwave oven to 300 degrees F and line a baking sheet with parchment paper.
Step 5: Place the cut emojis on the parchment and bake for 2-3 minutes, watching carefully. The film is done baking when the pieces have shrunk, thickened and lying flat. Remove and let cool.
Step 6: Paint one coat of white paint on the marked side of the emoji pieces (yes, this means emojis will be inverted once on the rings but it keeps the pieces from chipping).
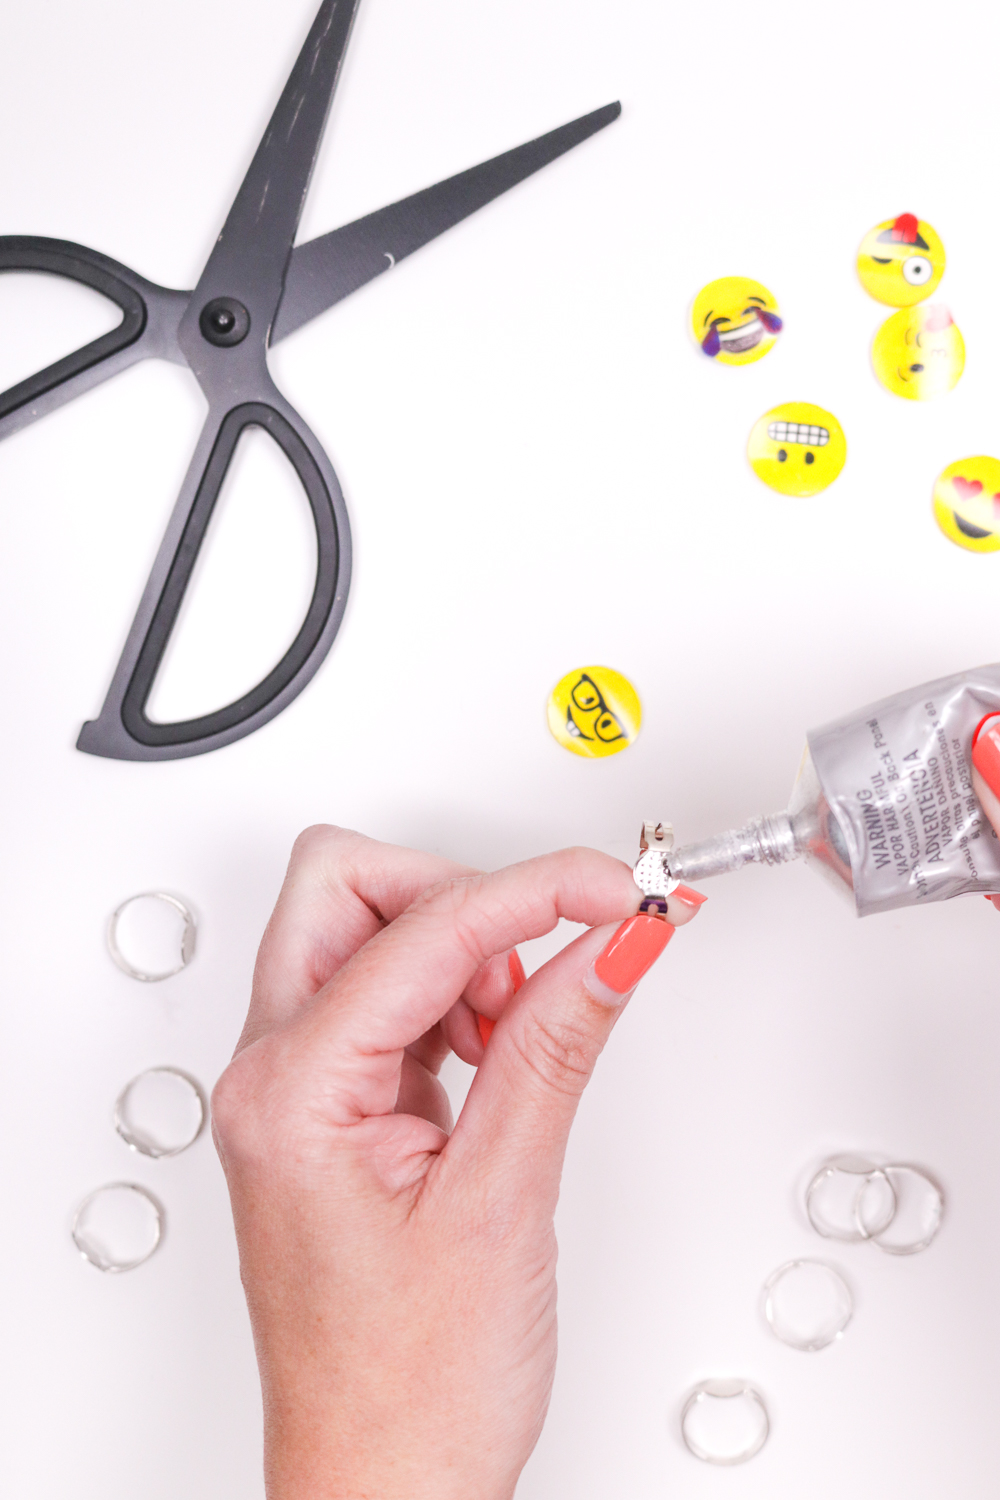 Step 7: Once the paint has dried, use a small amount of E6000 glue to attach the white side of the pieces to the ring blanks and allow the glue a few minutes to dry.
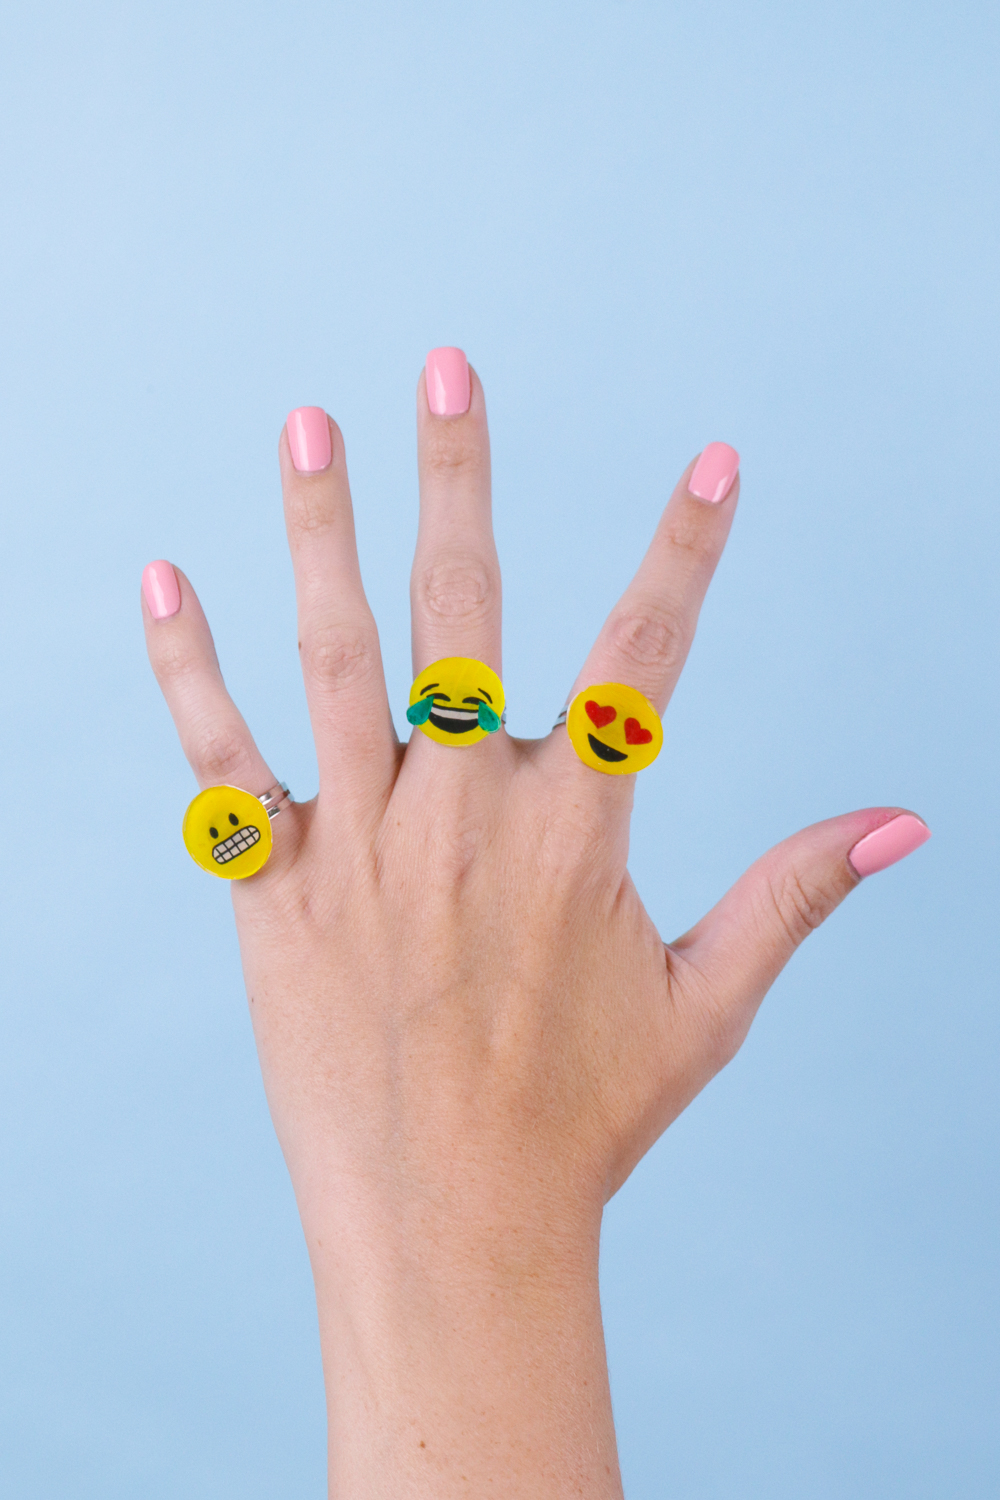
Then you’re all done! Mix and match emoji rings and enjoy!
Please note that this post may contain affiliate links.