• HOME
  • SERVICES
  • PORTFOLIO
  • ABOUT
  • Club Crafted

  • CONTACT
  • BLOG
    • DIY
    • RECIPES
    • SPONSORSHIPS
  • SHOP

Club Crafted

DIY Tutorials, Home Decor
/
July 21, 2020

DIY Stenciled Side Table Update with Vinyl

stenciled side table with books and plant in living room

This is a sponsored post written by me on behalf of Cricut. All opinions are 100% mine.

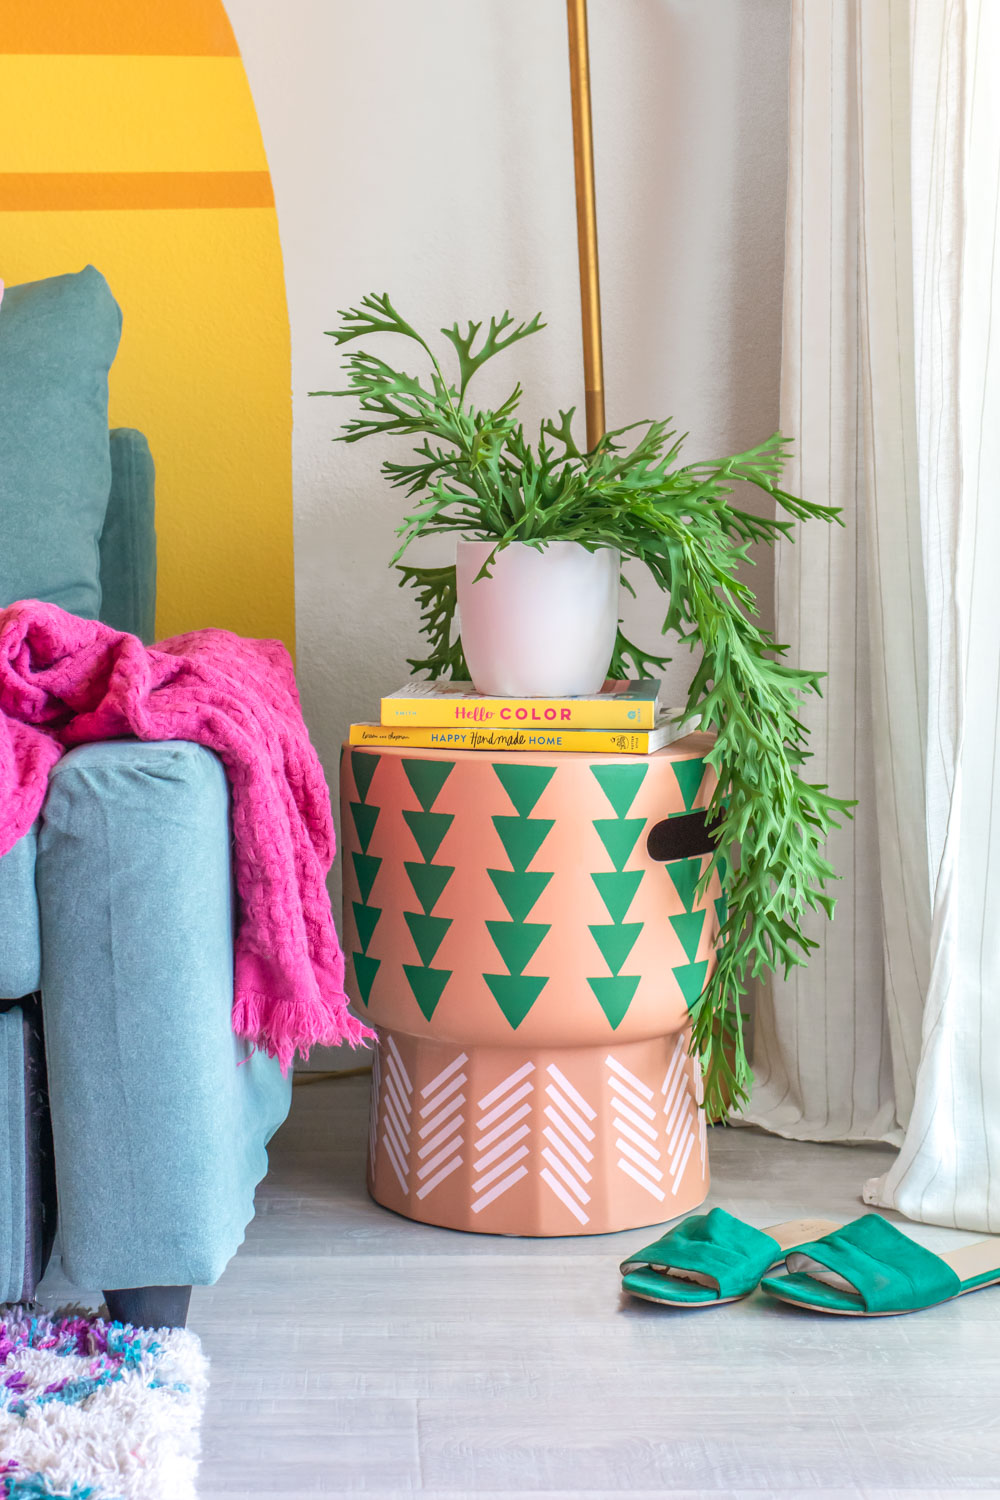
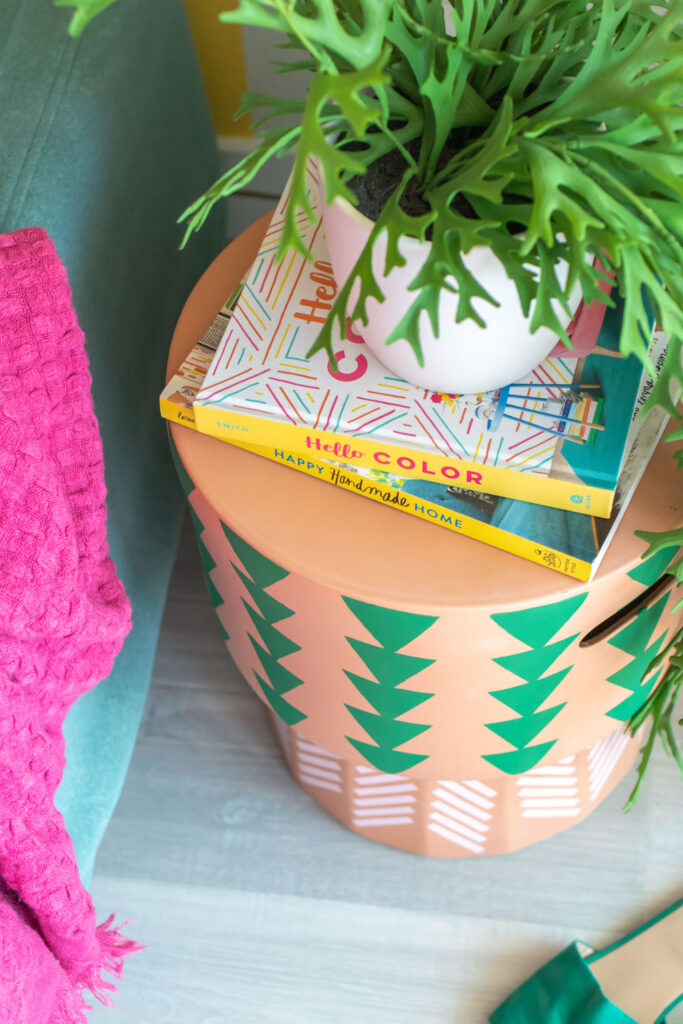
With all of this time at home, I’ve been focusing my energy on making our home feel more comfortable. Earlier this year, I snagged a terracotta side table or stool from a discount store that has been sitting unused in our garage. It was time for a makeover! Using my Cricut Joy, I quickly cut out southwestern-inspired patterns from Cricut Joy Smart Vinyl to make this stenciled side table update in less than an hour! The greatest benefit of using Cricut Joy (I think) is the use of Smart Materials. No mats needed! It makes cutting really fast, so I can get right to the stenciling portion of my project. Then I can reuse the stencils multiple times without compromising my designs. Keep reading for all the details!

side view of stenciled stool with triangle pattern
overhead view of DIY side table update with books and plant

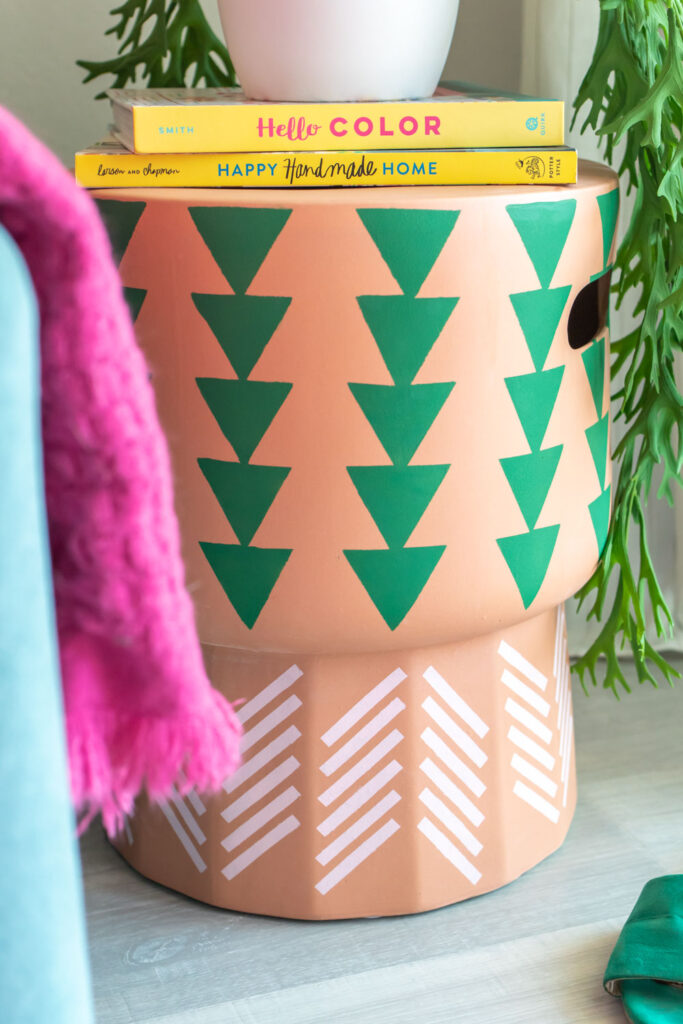
Because I used a terracotta table as my base, I went for a southwestern design with triangles and herringbone. Making your own stencils with Cricut only takes about 5 minutes! Sometimes, my Cricut Explore Air 2 is the best machine for the job, but in this case, the Cricut Joy is more suitable. It offered the sizes and ease of use I needed to get the stencils cut quickly. I keep my machines on a bookshelf, and the Cricut Joy is more portable to move around my room, so I actually use it more often.

Here’s how to make a stenciled side table (or stenciled stool) using homemade vinyl stencils!

Cricut Joy with vinyl and craft supplies for making stenciled side table

How to Make Vinyl Stencils with Cricut Joy in Minutes
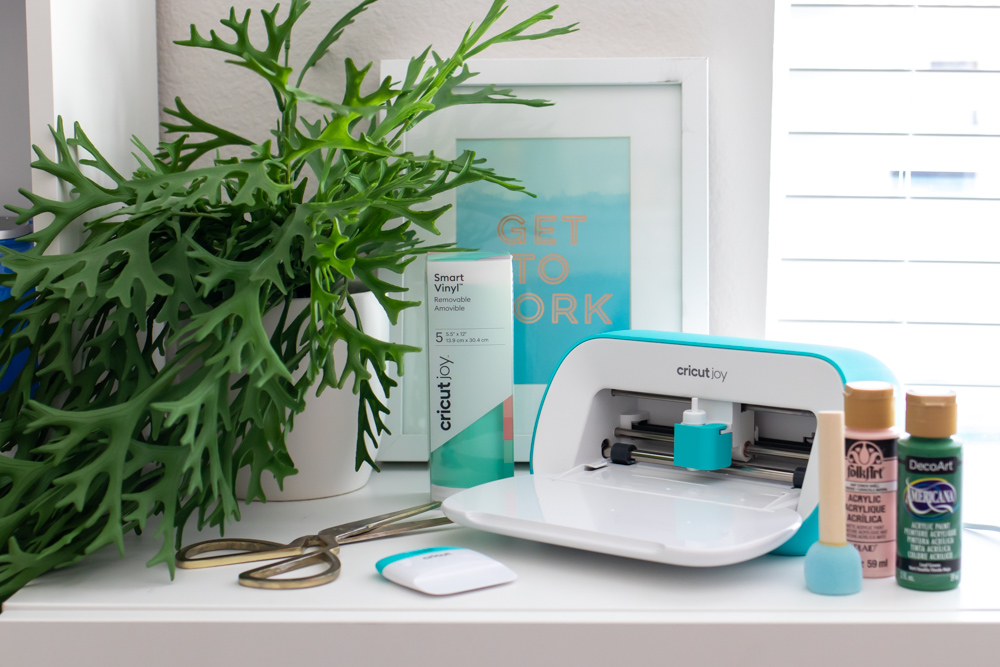
Supplies:

  • Cricut Joy
  • Cricut Joy Smart Vinyl, Removable
  • Scissors
  • Cricut smoothing tool
  • Cricut weeding tool
  • Acrylic paint, 2 colors
  • Sponge brushes

Be sure to sign up for Cricut Access to use all of the pre-made designs available!

Step 1: Make your designs in Cricut Design Space. You can find my southwestern-inspired geometric patterns for the stenciled side table here. Adjust the shapes to the desired size for your table or stool.

formatting design in Cricut Design Space

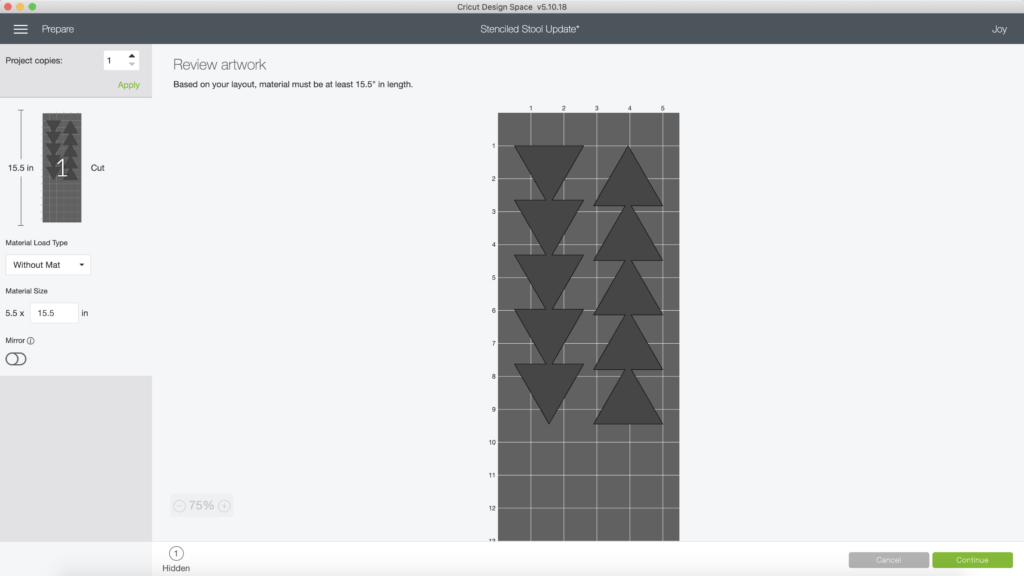
Step 2: Click “Make It” to proceed. Choosing “Without Mat” if using Smart Vinyl and confirm the length of your material. Then click “Continue.”

choosing vinyl in Cricut Design Space

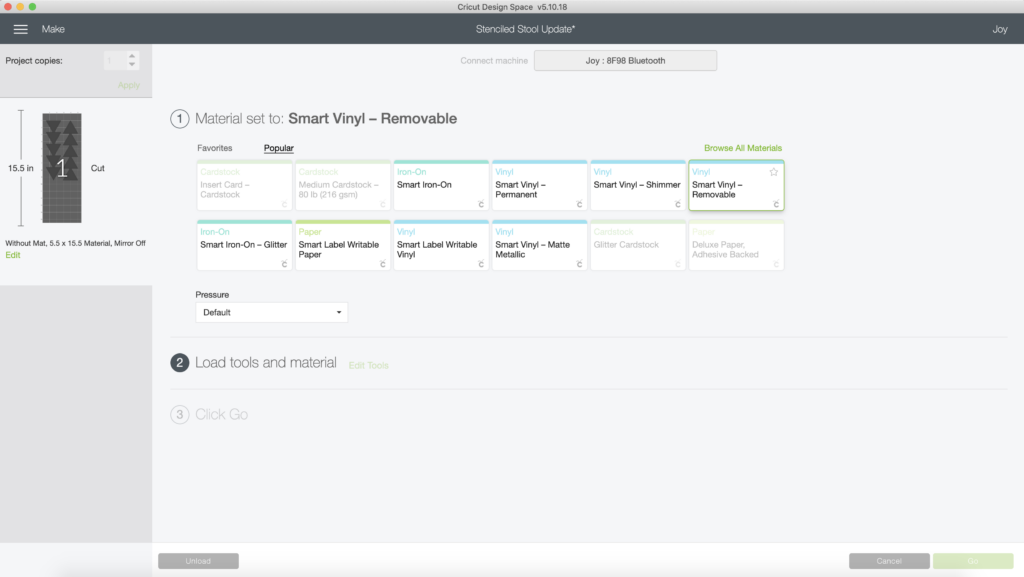
Step 3: Under “Materials,” select the “Smart Vinyl” option for removable or permanent vinyl. I used removable to ensure it would be easy to reuse as a stencil.

loading blue vinyl into cutting machine

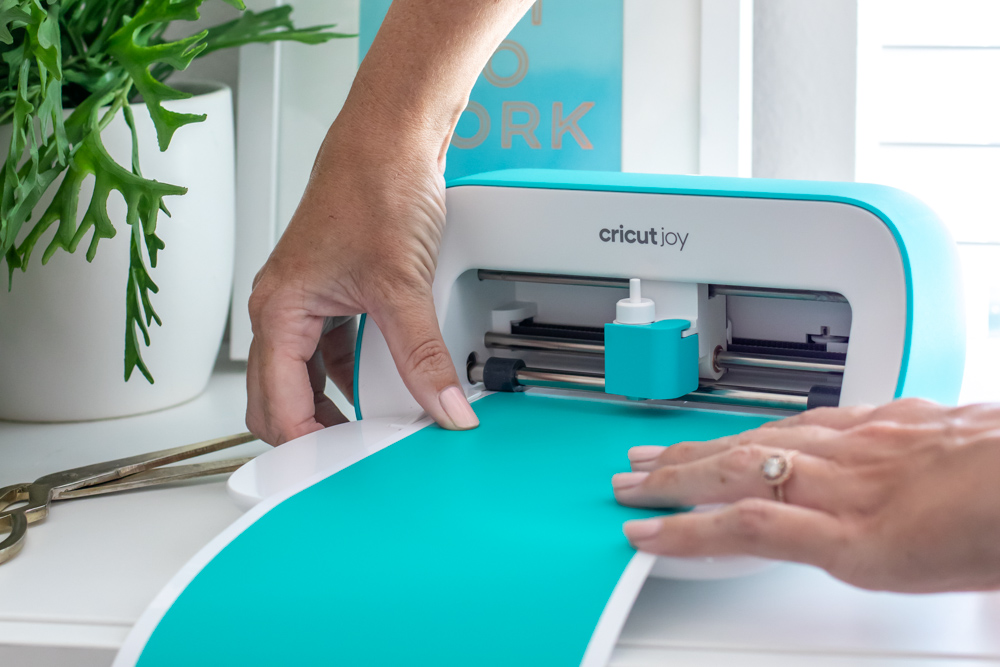
Step 4: Then load the vinyl into Cricut Joy. The sensors do it automatically as you feed it through! Once loaded, click “Cut” on your computer or mobile device and let the machine do the rest.

removing triangle pattern for vinyl stencil
weeding tool removing vinyl pieces

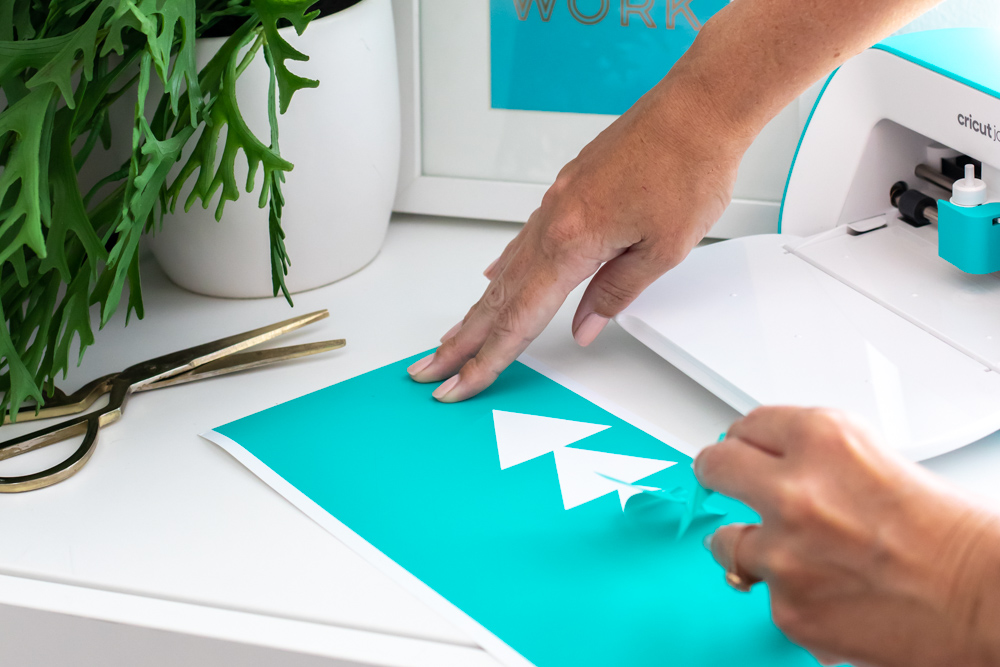
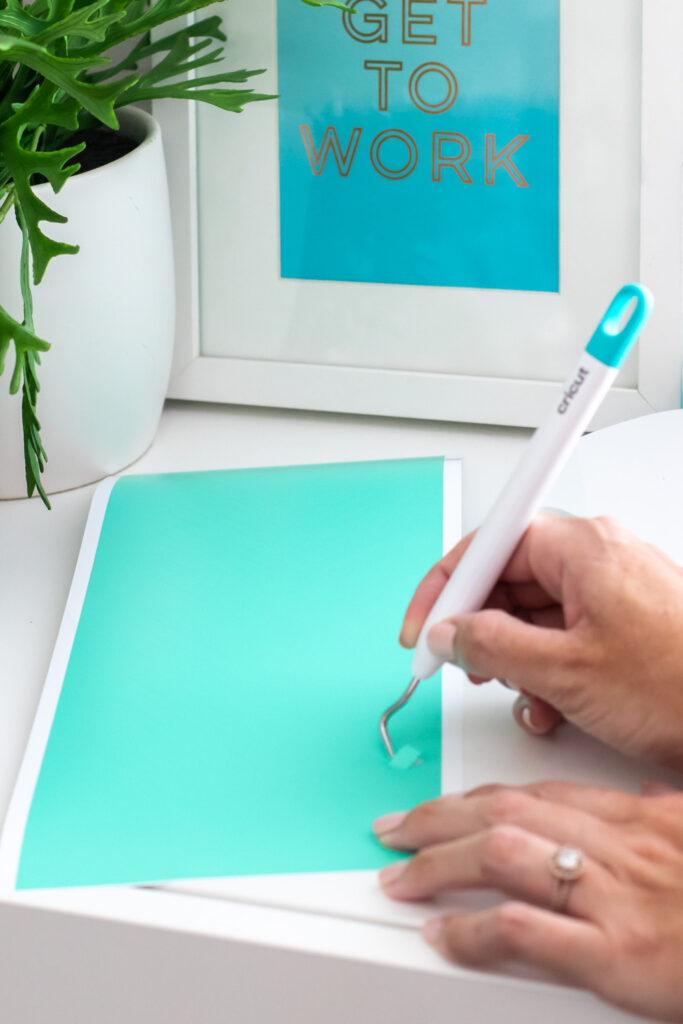
Step 5: For larger patterns like the triangles, you can simply remove the pattern with your fingers. More intricate stencils require the weeding tool to remove the design. You’ll be left with the negative design as a stencil.

geometric cutouts from color vinyl with Cricut Joy
smoothing vinyl onto stool for stenciling

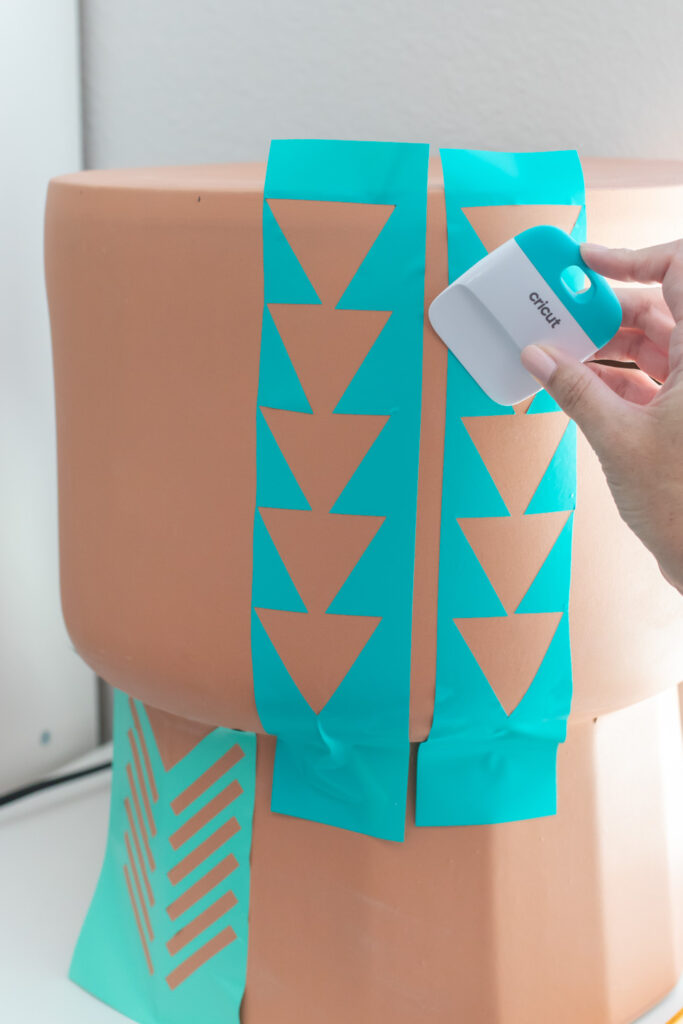
Step 6: If there is more than one design to a sheet of vinyl, cut them apart. Then carefully peel the vinyl away from the backing and apply to the side table or stool for stenciling. Press with the smoothing tool to ensure you have a tight seal. I like that the triangle pattern is a bit imperfect because of my southwestern theme, but you can also use Cricut Transfer Tape to ensure the design is perfectly even.

How to Paint a Stenciled side Table with Vinyl

dabbing paint onto geometric vinyl stencil for making stenciled side table
removing vinyl stencil on terracotta stool

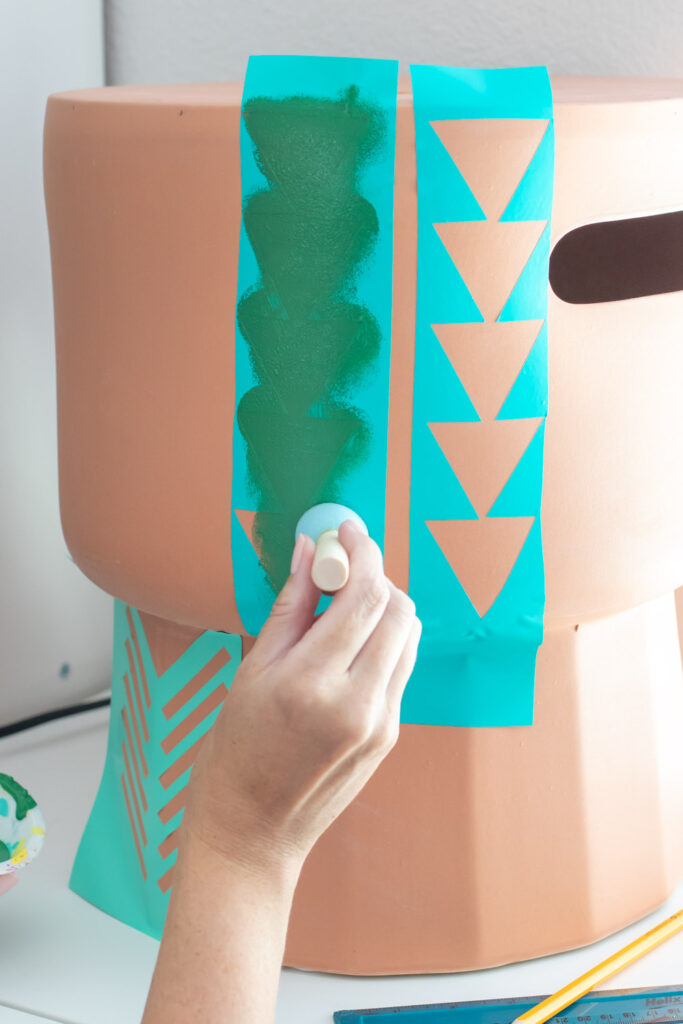
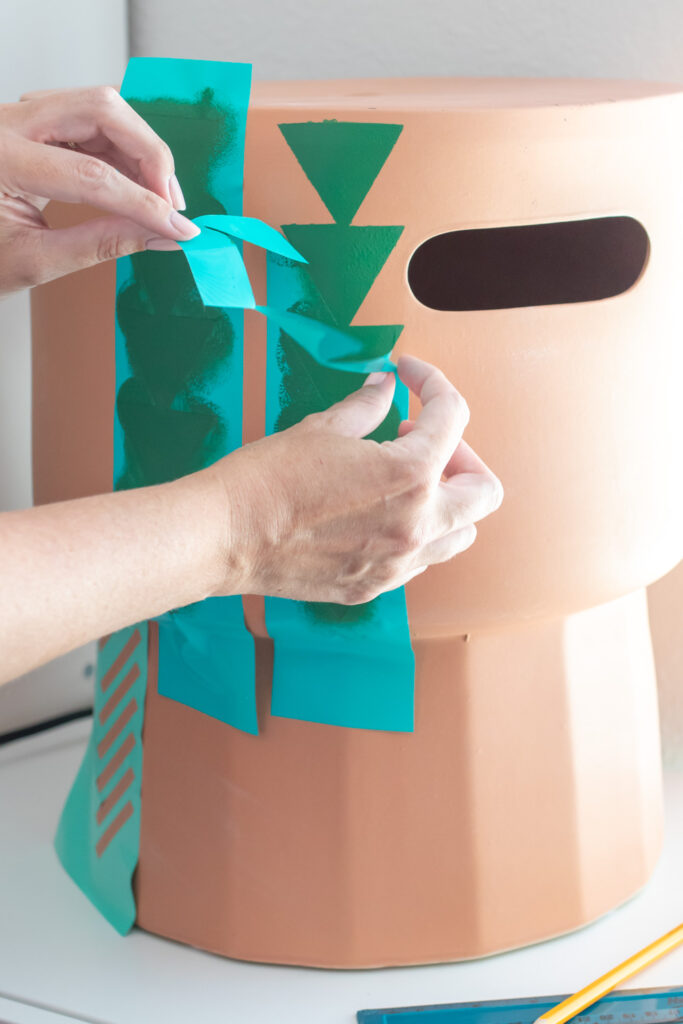
Step 7: Dab the paint over the vinyl stencil. Then carefully peel it away while the paint is still wet. You can reuse each stencil multiple times without compromising the design. I had four stencils in total with minimal bleeding. In this case, you can use a ruler and a pencil to make sure the stencil is evenly spaced around the table.

closeup of geometric pattern on stenciled side table

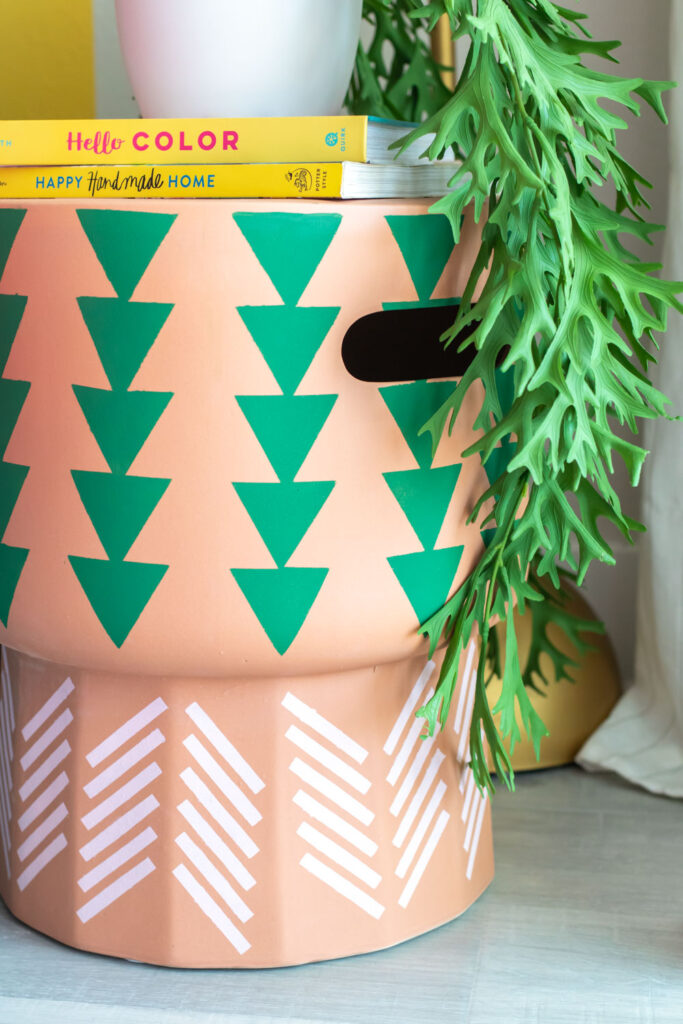
Step 8: Repeat all over the table with multiple vinyl stencils and paint colors. Then use a small paintbrush to make any necessary touch-ups. Now your stenciled side table is ready to add to your decor!

What patterns would you use for a stenciled table or stool makeover?!

PS, see more ideas for how to use your Cricut machines here! Find even more inspiration on the Cricut Blog.

Thank you to Cricut for generously sponsoring this post. All opinions are my own. Please note this post contains affiliate links from which I may collect a small profit should you choose to make a purchase. Thanks for supporting the brands that keep Club Crafted making!

TAGS:cricuthome decorpaintsponsoredvinyl

You May Also Like...

DIY Pom Pom Edged Napkins

March 8, 2017

DIY Bubble Bath

January 19, 2017

Paper Ornament Lanterns for Christmas Decor

December 10, 2019

Leave a Reply Cancel Comment

Recipe Rating


Previous Post
Rainbow Tie Dye Socks
Next Post
Waffles, Weddings and Kittens: A Mid-COVID Life Update

Hey there! I'm Holly and I like to make stuff.
  • Facebook
  • Instagram
  • Pinterest
  • Twitter
  • YouTube

LOOKING FOR SOMETHING?

TRY THESE FAVORITES!


RAINBOW PLACEMAT CLUTCH


RAINBOW FRINGE BLANKET


COSMIC BROWNIE FUDGE


IRIDESCENT PARTY HATS


WELL, I was going to post this photo and talk abou WELL, I was going to post this photo and talk about the new pins in the shop...but they SOLD OUT in 12 hours instead πŸ˜­πŸ™ Andrew and I are so overwhelmed with the love of the #FIPWarriors community. Thank you to anyone who's purchased a pin to support Milo's treatment! We're so close to the end now! One more batch of pins coming up soon 😽
What do you mean I have to take down my Christmas What do you mean I have to take down my Christmas decorations?! 😭 Half our neighbors already took down their Christmas lights, so I guess the only goal is to not be the LAST one with lights up. How long do you keep up your decorations?
Maybe next year I'll finally remember to do a holi Maybe next year I'll finally remember to do a holiday card before it's a week til Christmas, so we can actually send one πŸ€ͺ When we get Christmas cards, I always feel like a little kid getting mail again! Do you send a holiday card??⁠
⁠
(Grab this DIY card holder in the blog archives! πŸ‘‰)
More product is coming soon! πŸŽ‰ I'm honestly SHO More product is coming soon! πŸŽ‰ I'm honestly SHOCKED to see Milo's pins sell out so quickly. We made 50 with the expectation that we wouldn't sell very many, but I just put in an order for more inventory! 😭⁠
⁠
This time we'll be selling black and white cat "FIP Warrior" pins to help raise money for Milo's treatment. Stay tuned - a pre-sale is coming! Pins will ship again in early January. In the meantime, there's plenty of other products available in the shop! (Visit my @etsy via the link in my bio)
NEW LAUNCH! 😸 Thank you all so much for your su NEW LAUNCH! 😸 Thank you all so much for your support of Milo while he goes through FIP treatment! I designed a new enamel pin to help us raise the funds to pay for Milo's treatment...THEN we sold almost all of the pins in just in a few hours! I'm so thankful and in shock of the generosity of our FIP community 😭⁠
⁠
There are a few left and more on the way, so you can SHOP NOW on @etsy and here on IG!! If you want a pin and they are sold out, please tag yourself below! Visit the link in my bio to purchase πŸ›β 
⁠
"FIP Warrior" is the name we give to cats fighting FIP and the humans who help them, bringing awareness to the disease and possible treatments. Our Warrior Milo is almost halfway through his treatment and we couldn't be more grateful to see him getting better! Every purchase from my shop helps us to pay for his expensive treatments and is so, so appreciated πŸ™πŸΌ
🍁 I can't beLEAF it's been a whole month since 🍁 I can't beLEAF it's been a whole month since my last post (oops!) but I had to fit in my one obligatory fall photo before I dive straight into Christmas! If you caught my Stories recently, you may have already seen why I've been so absent...⁠
⁠
Last month, our sweet Milo was diagnosed with a disease called feline infectious peritonitis (FIP). It's very serious and has required our full attention to give him daily injections that should help him recover. The treatment is 84+ days long and has taken a huge emotional toll on us. You can learn more about Milo's FIP story in my profile Highlights!⁠
⁠
Long story short: I've been too emotionally drained from Milo's treatment, my regular work and the crazy world around us to even think about social media 😣 I truly don't know how you fellow creators do it! Hopefully the cheerfulness of Christmastime gives me the urge to create again! (πŸ“Έ cookies made for a project with @spectrumorganic)
  • ABOUT
  • SERVICES
  • CONTACT
  • BLOG

Copyright Holly Wade Β© 2019 Site Powered by Pix & Hue.