Is there anything better than donuts?
Nope. Except maybe cake. And ice cream.
As a true donut lover, I spend most days wishing my breakfast was three cream filled donuts when its actually a bowl of oatmeal. On the weekends, I tend to give in and enjoy a donut or two, but this time I made my own! I’ve baked donuts a few times before, but I think this was one of my more successful recipes and it resulted in very light cake-like donuts. I like to pretend they’re healthier than fried donuts, but who am I kidding?
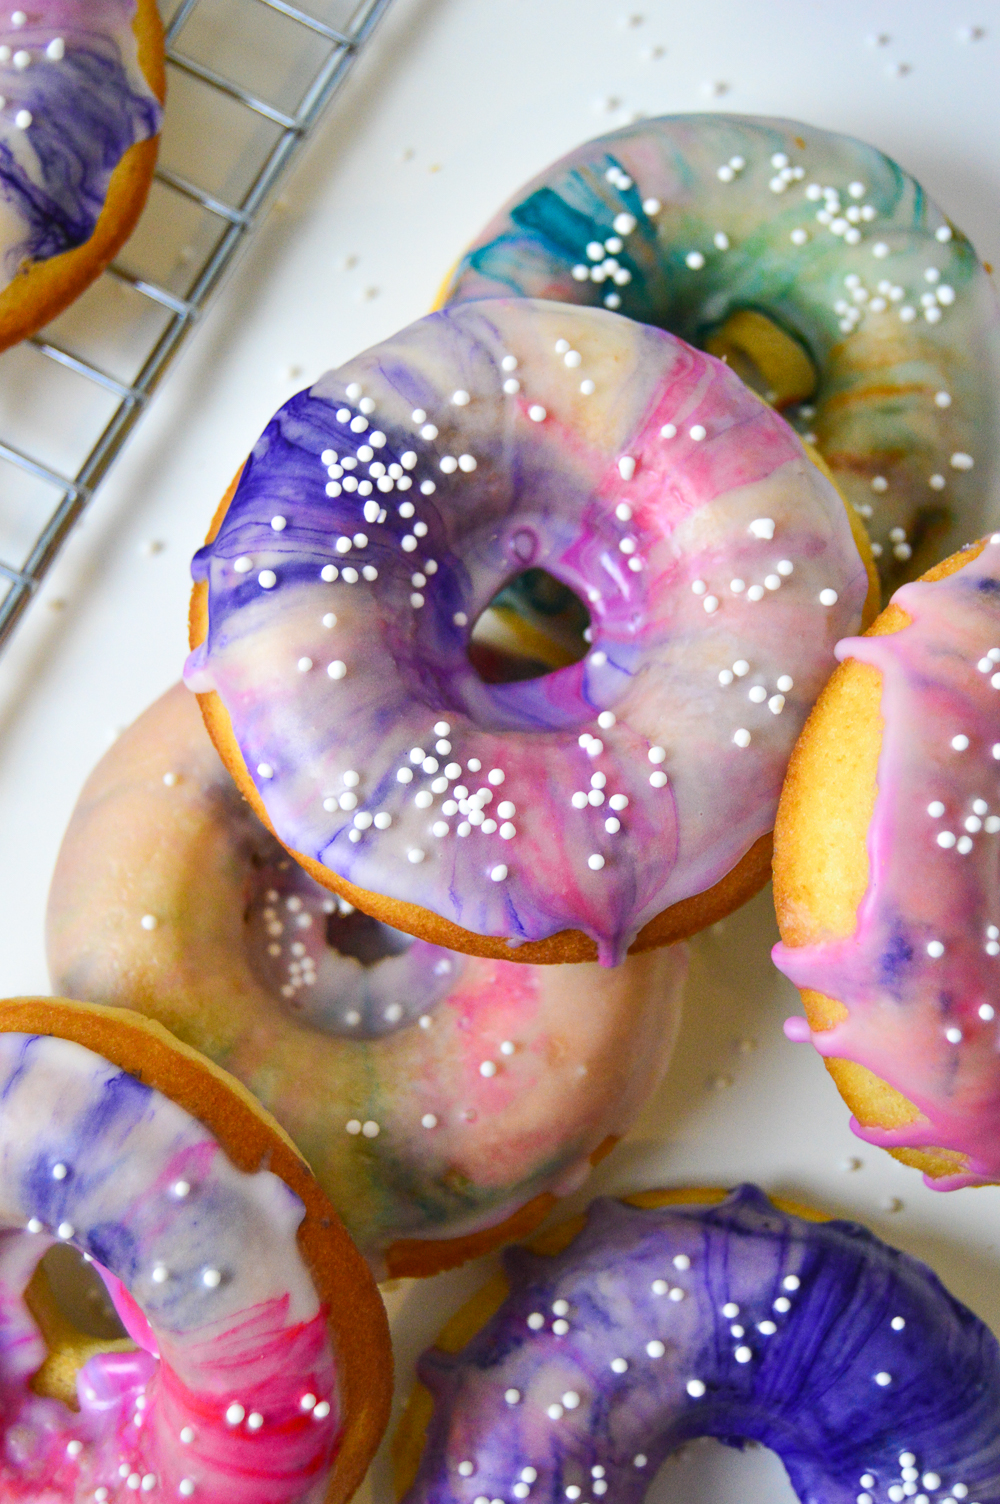
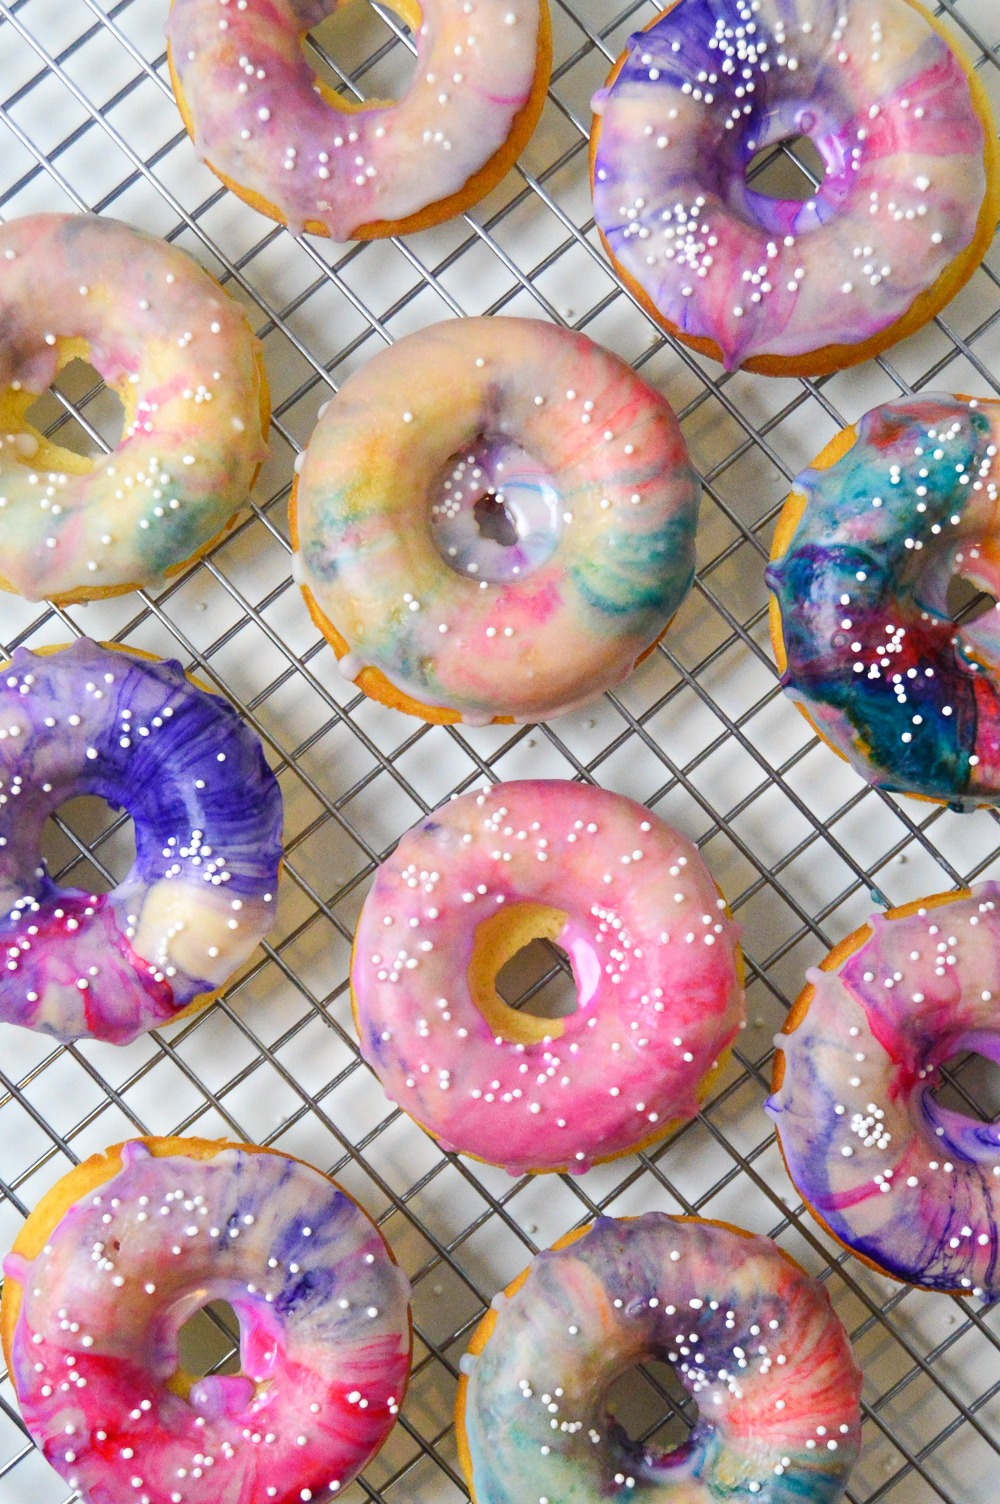
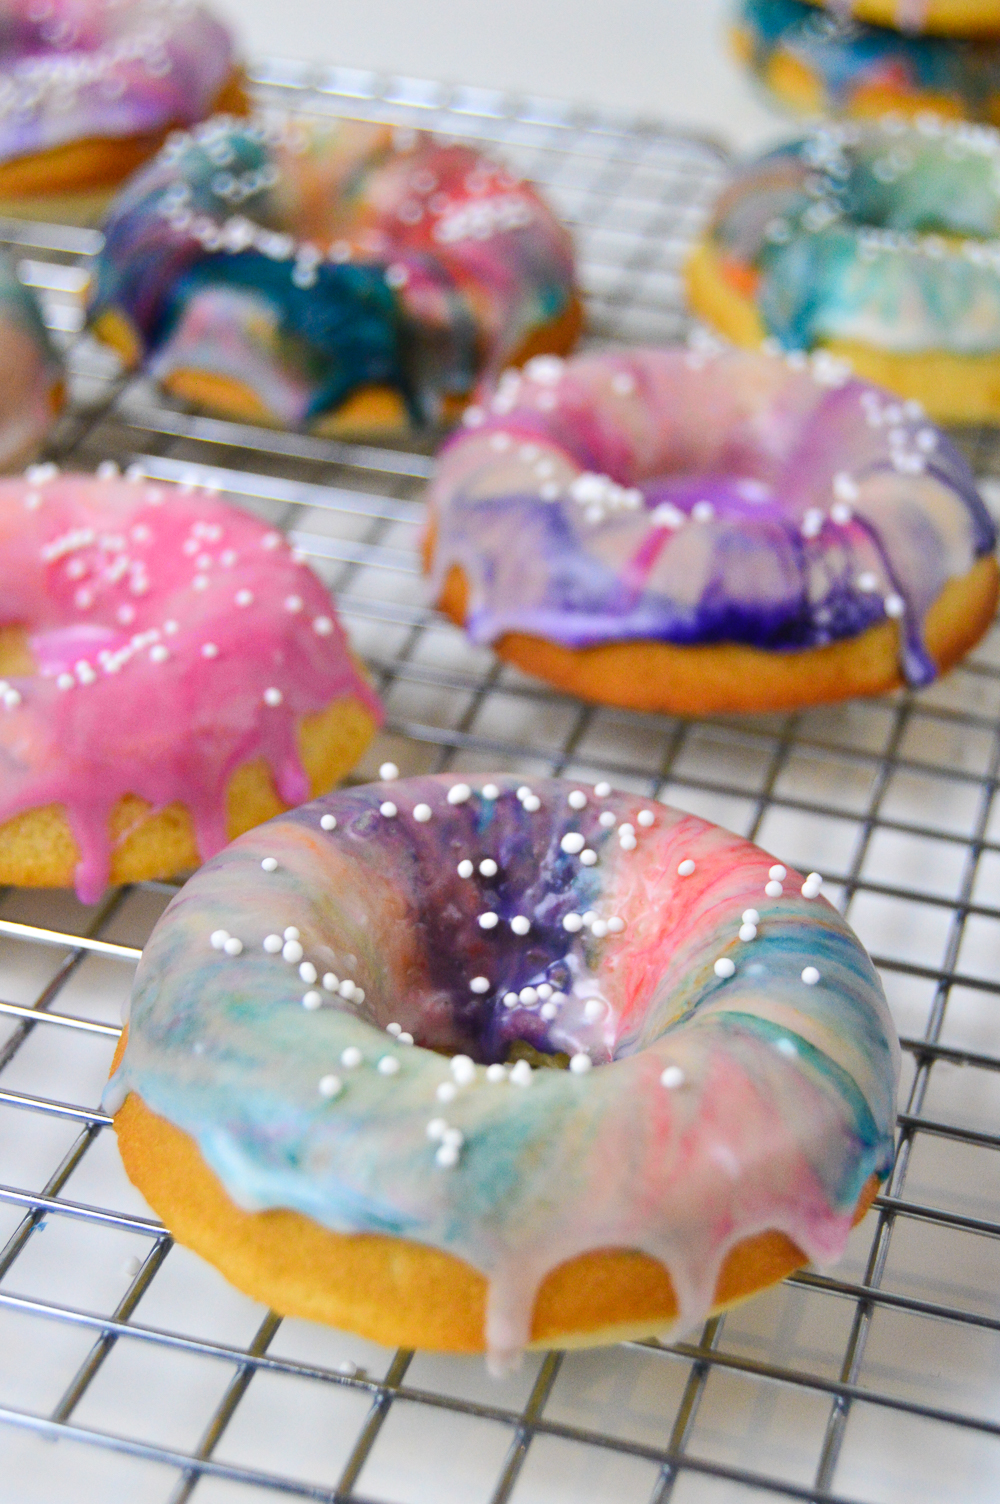
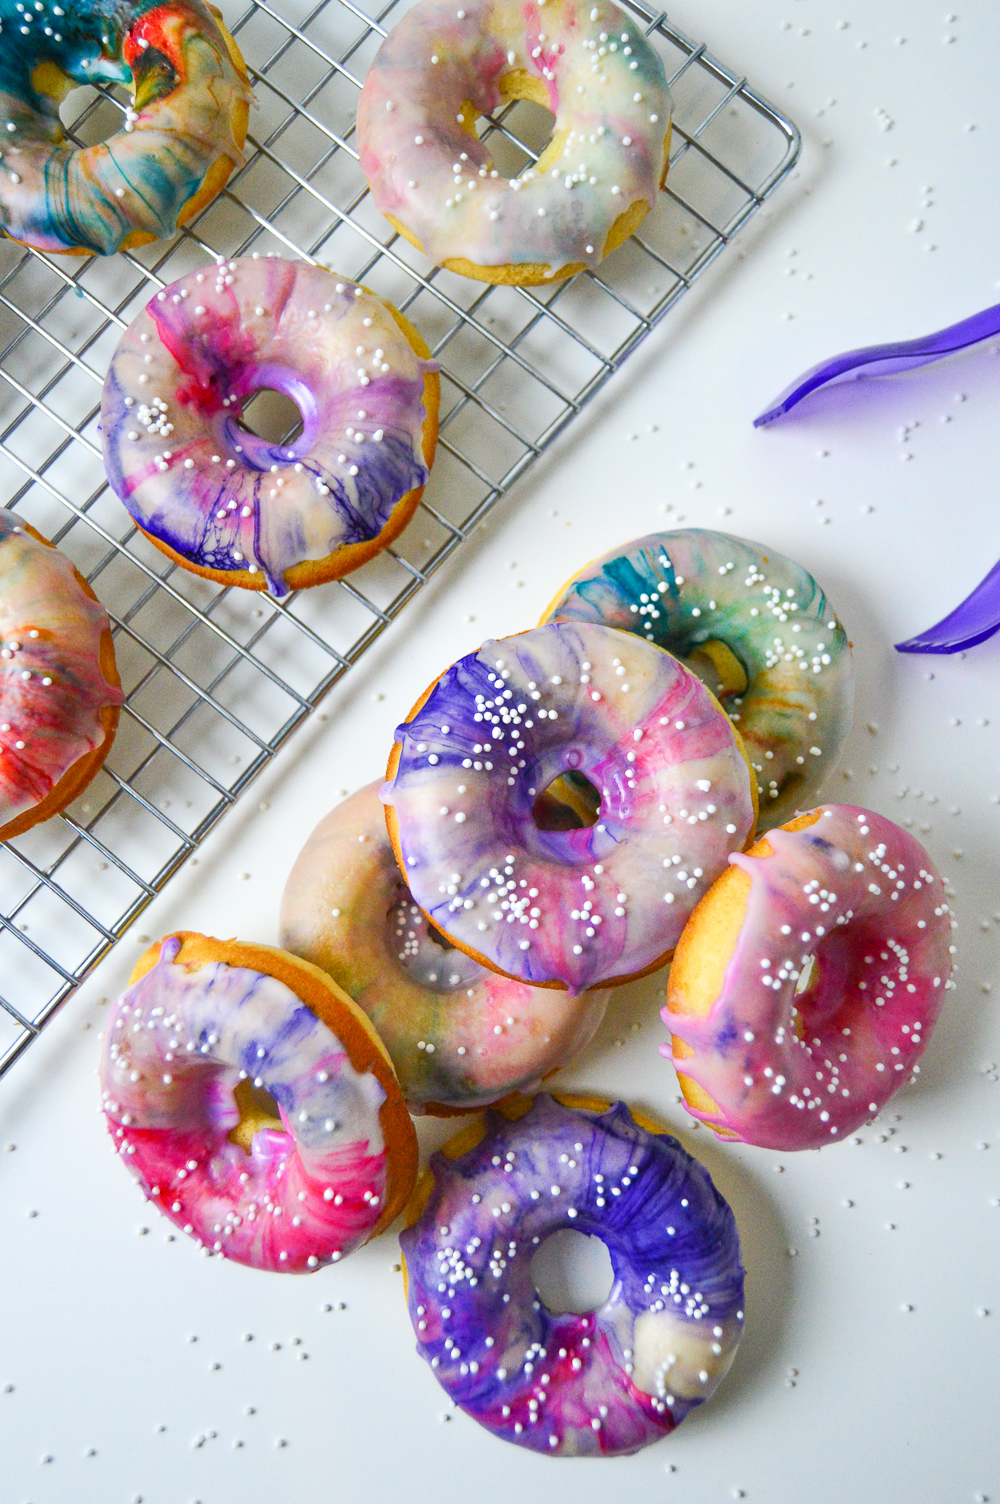
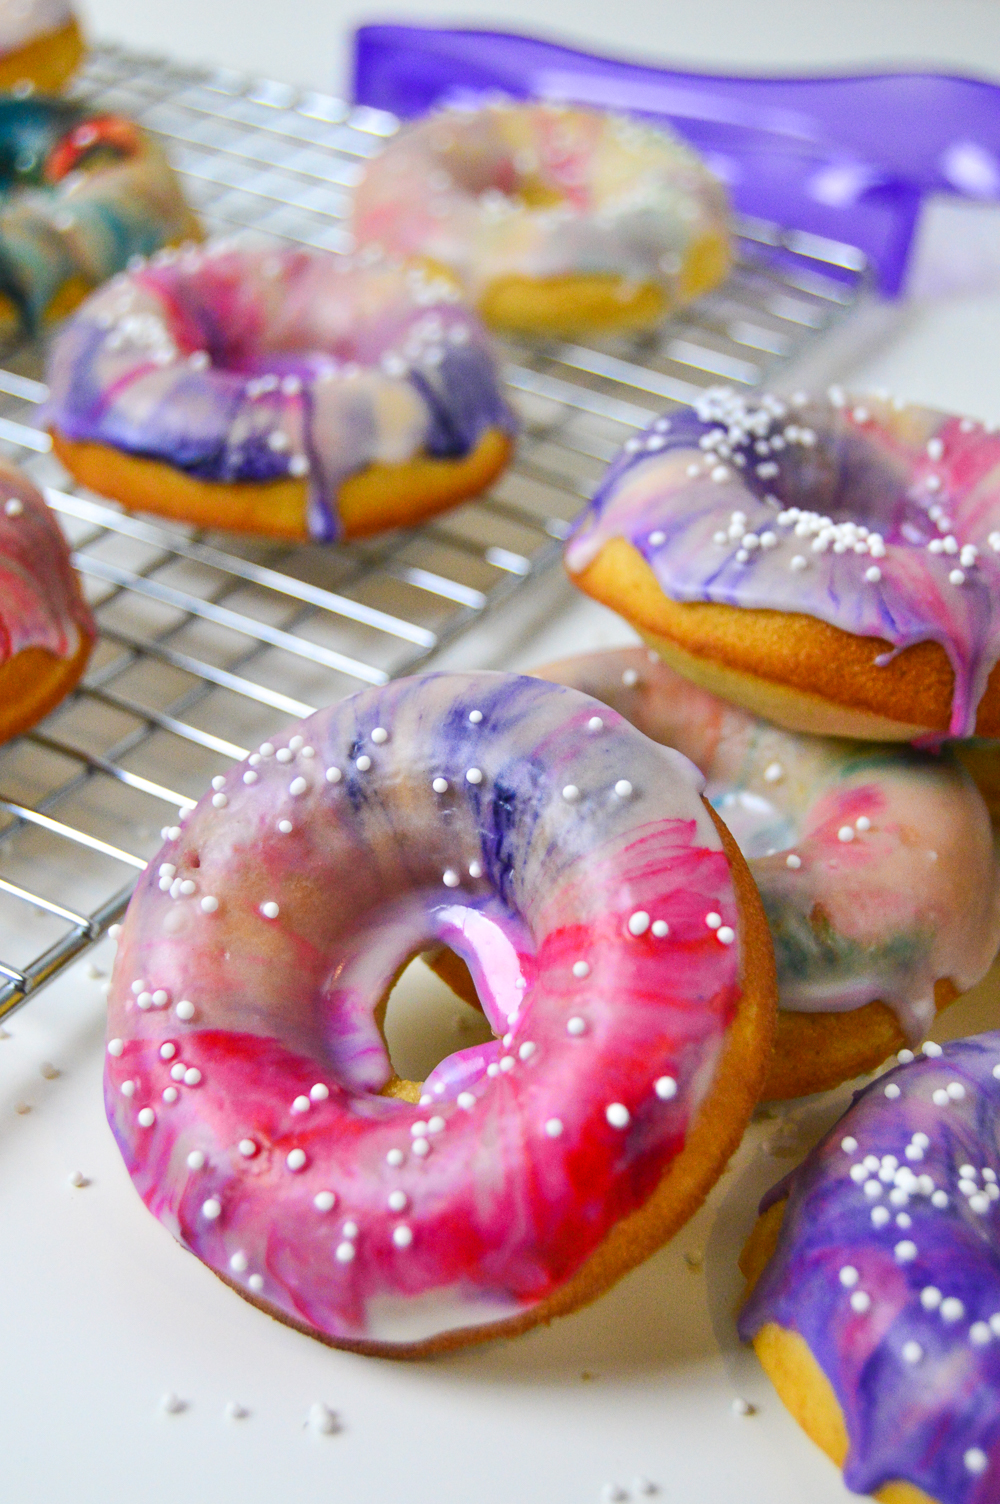
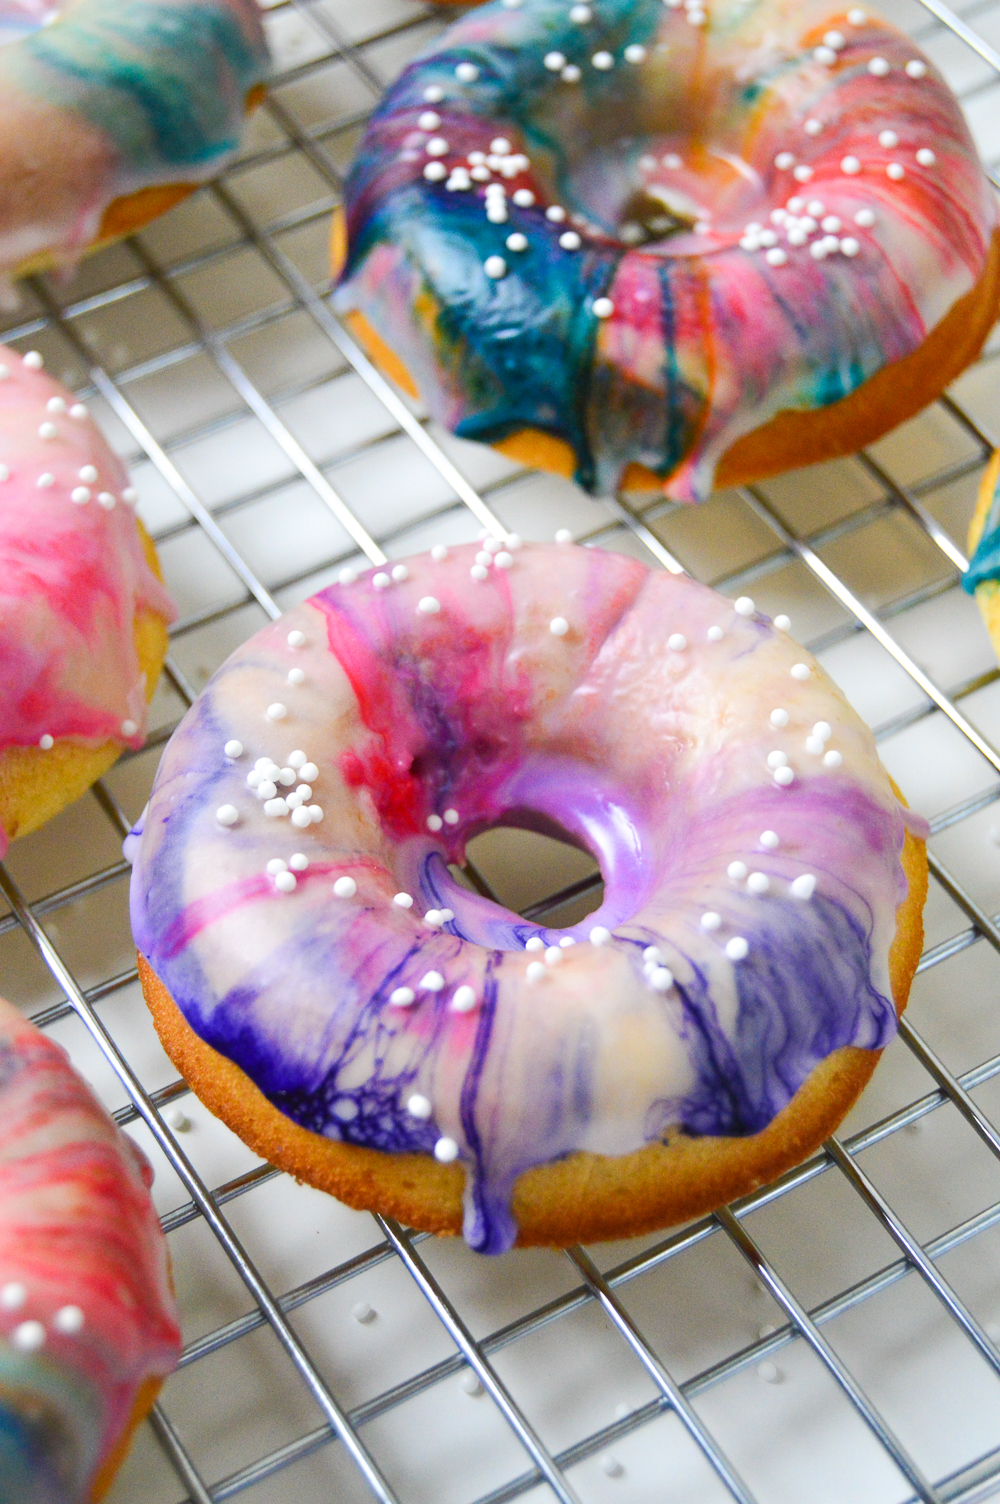
I tried out a marbling technique with the vanilla glaze and immediately fell in love, so I tried it in a few different color patterns. I’ve seen marbled donuts made a few different ways, but this swirled and dipped method is my preferred way of making them because I find it easier to get exactly the pattern you want. They’re not that difficult to make as long as you have a donut pan, and it’s fun to create the marbled look with the glaze (which is good enough to eat by itelf, TBH).
For the donuts:
- 1/2 cup butter, room temperature
- 2/3 cup sugar
- 2 eggs
- 1 tsp vanilla extract
- 1 ¾ cup all-purpose flour
- 1 1/2 teaspoon baking powder
- 1 tbsp corn starch
- 1/4 tsp salt
- 3/4 cup buttermilk
For the glaze:
- 2 cups powdered sugar, sifted
- 1 tsp vanilla extract
- 3-4 tbsp milk
- Food coloring
- Sprinkles (optional)
Preheat the oven to 350 degrees and spray donut pans with cooking spray. Whisk together the flour, corn starch, baking powder and salt in one bowl and set aside.
In the bowl of your mixer, beat the butter and sugar until light and fluffy. Then mix in the eggs and vanilla. Add the dry ingredients in batches, scrape the bowl and mix in the buttermilk until smooth. Move the batter to a pastry bag or large ziplock bag, cut the tip and fill each donut cavity with batter.
Bake for 10-12 minutes until an inserted toothpick comes out clean and set aside to cool completely before glazing.
To make the glaze, sift the powdered sugar into a large bowl and whisk in the milk and vanilla until smooth. Separate the glaze into various bowls depending how many different marbled colors you want. Add a drop of each desired color (1-2 colors is ideal) and swirl with a toothpick. Dip each cooled donut into the glaze and set on a cooling rack to dry. Continue to dip the donuts and reswirl the colors as needed.

Once you make your own donuts, you don’t go back! Plus, the local donut shop probably doesn’t have beautiful marbled donuts, but if it does, that’s awesome! I guarantee these marbled donuts will impress your friends, and you can make them in specific colors to work well for any party or occasion. Have fun with it!
- 1/2 cup butter, room temperature
- 2/3 cup sugar
- 2 eggs
- 1 tsp vanilla extract
- 1 ¾ cup all-purpose flour
- 1 1/2 teaspoon baking powder
- 1 tbsp corn starch
- 1/4 tsp salt
- 3/4 cup buttermilk
- 2 cups powdered sugar, sifted
- 1 tsp vanilla extract
- 3-4 tbsp milk
- Food coloring
- Preheat the oven to 350 degrees and spray two donut pans with cooking spray. Set aside
- Whisk together the flour, corn starch, baking powder and salt in one bowl and set aside
- In the bowl of your mixer fitted with a paddle attachment, beat the butter and sugar until light and fluffy
- Mix in the eggs and vanilla
- Add the dry ingredients in batches, scrape the bowl and mix in the buttermilk until smooth
- Move the batter to a pastry bag or large ziplock bag , cut the tip and fill each donut cavity 3/4 full with batter
- Bake for 10-12 minutes until an inserted toothpick comes out clean and the edges have barely browned
- Set aside to cool completely before glazing
- Sift the powdered sugar into a large bowl
- Whisk in the milk and vanilla until smooth
- Separate the glaze into various bowls depending how many different marbled colors you want
- Add a drop of each desired color (1-2 colors is ideal) and swirl with a toothpick
- Dip each cooled donut into the glaze and set on a cooling rack to dry
- Continue to dip the donuts and reswirl the colors as needed
- Top with sprinkles if desired
Reebs
These are beautiful!! Thanks for the recipe. How many days in advance do you think I can make these? I want to make for a donut wall for a brunch but there is so much to do the day of. Please let me know. Thanks
Holly Wade
ReebsYou can bake the donuts up to 2 days in advance and store in an airtight container, but I would not marble/ice them until the day-of. Otherwise, you’d risk the icing making the donuts soggy. Good luck, I hope you enjoy them!
Courtney McAulay
Hey Holly! Thank you so much for sharing this yummy recipe! I have included it in my “Popping Ideas” roundup of 9 Must-Have Donut Recipes at PopItUpGirl.com. I’m a big fan of your site and will be back to see what you “cook” up in the future. 🙂
https://www.popitupgirl.com/best-donut-recipes-and-free-printable/
Courtney @ Pop It Up Girl
Holly Wade
Courtney McAulayHi Courtney! Thanks, I really appreciate that!!