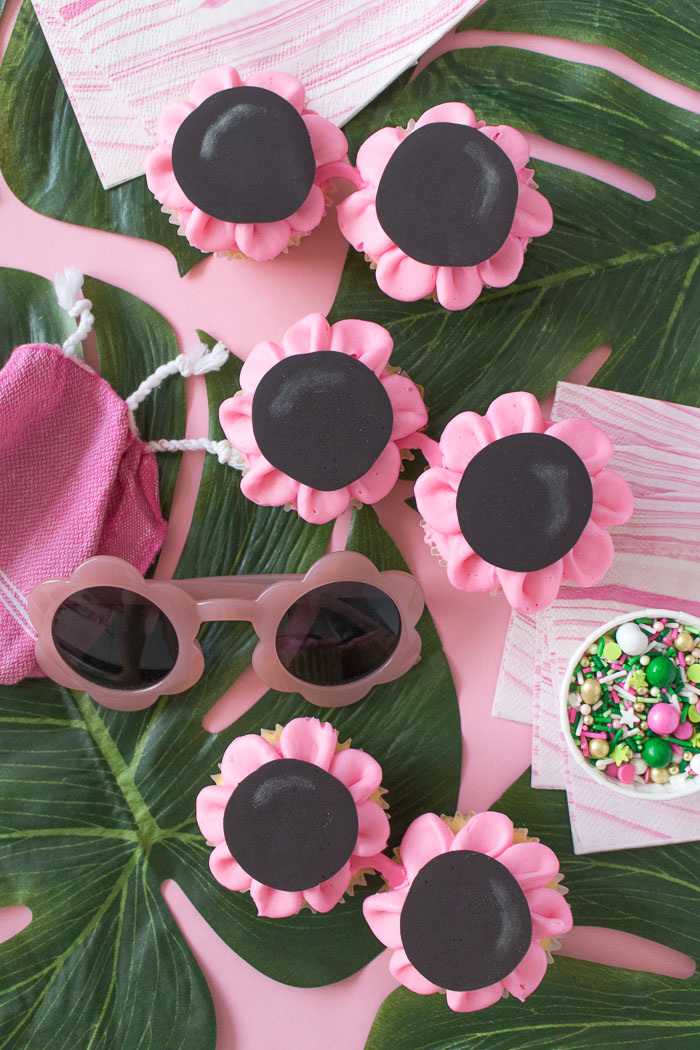
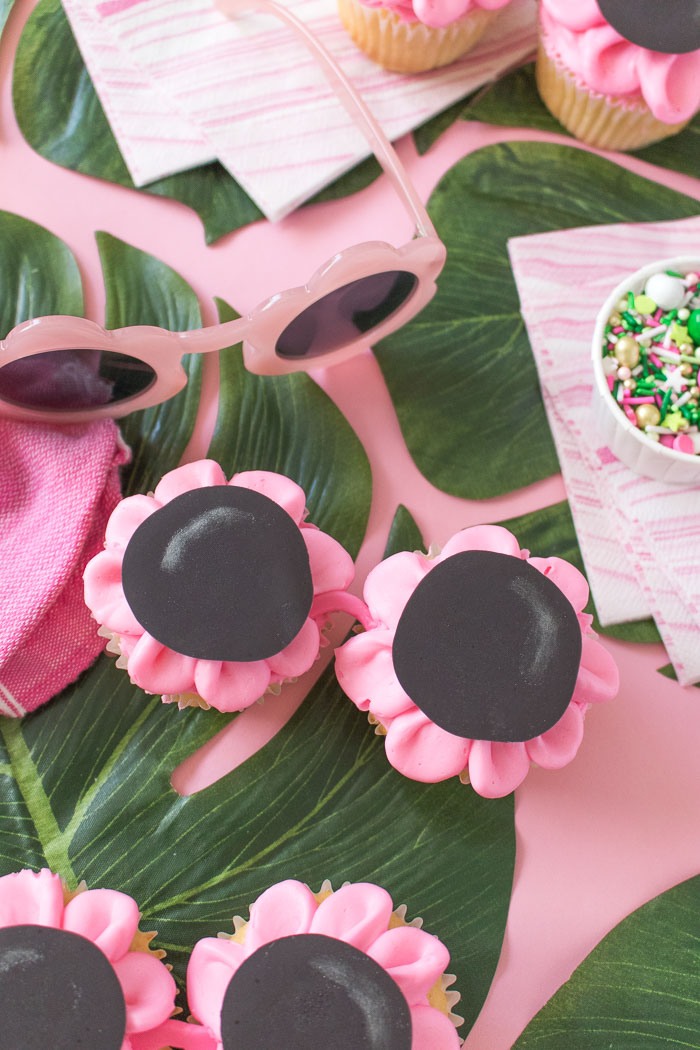
In case you haven’t noticed from my Instagram feed, I’m a pretty big fan of my Oui Fresh flower-shaped sunnies. I love them so much that they became my inspiration for a new recipe idea. Using my favorite coconut cupcake recipe, I made these floral sunglasses cupcakes inspired by own pink sunglasses! With a special piping tip and candy melts, it’s easy to recreate the look of sunglasses with two cupcakes. It’s the perfect way to split cupcakes with a friend!
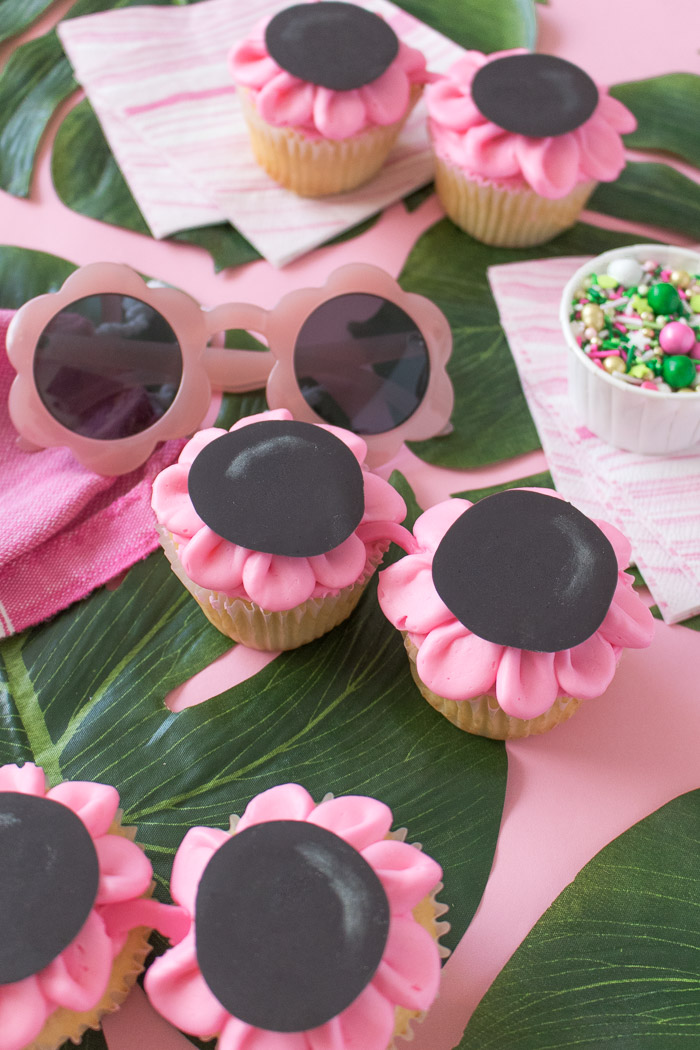
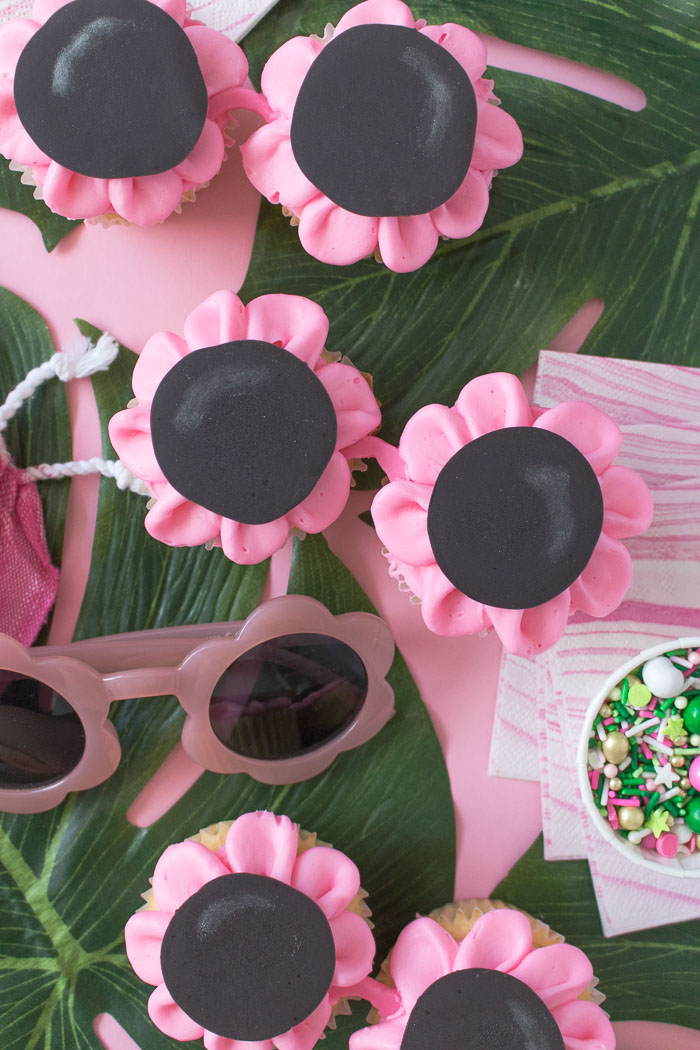
With summer upon us, this is the perfect time to think about sunglasses! I’m obsessed with several pairs right now, and these Oui Fresh sunnies by A Beautiful Mess are one of my favorites. In order to make flower-inspired cupcakes, it’s all about the piping tip. Using a piping tip with a thinner end and a thicker end (example linked below) will help you create the petals similar to the glasses. The “lenses” of the sunglasses cupcakes are made out of black candy melts, and I added a little swish of silver luster dust to give them the appearance of a glare. The nose piece of the glasses is also made out of candy melts and simply piped and left to harden.
Make these floral sunglasses in your favorite color for a summer party!
 How to Make Floral Sunglasses Cupcakes
Supplies:
- Cupcakes
- Buttercream, dyed pink
- Piping tip #103 (large)
- Small round piping tip
- Pastry bags
- Wax paper
- Spatula
- Black candy melts
- Pink candy melts
- Silver luster dust
- Food paint brush
Step 1: Melt the black candy melts in a bowl in the microwave in 30 second increments, stirring until melted. Lay out a piece of wax paper and use a spoon to create circles of black candy about 2 inches wide (almost the width of the cupcake). Allow to harden.
Step 2: In a separate bow, melt a small amount of pink candy melts or other chosen color. Move to a pastry bag fitted with a small round piping tip. Pipe small arches on the wax paper to create the nose piece of the sunglasses cupcakes.
Step 3: Use the spatula to spread a little pink frosting onto cooled cupcakes so that it is thicker on the sides, making domed cupcakes appear flatter.
Step 4: Move the remaining buttercream to a large pastry bag fitted with the petal piping tip. Pipe arch shapes (thicker side facing out) to create individual petals all the way around the cupcake.
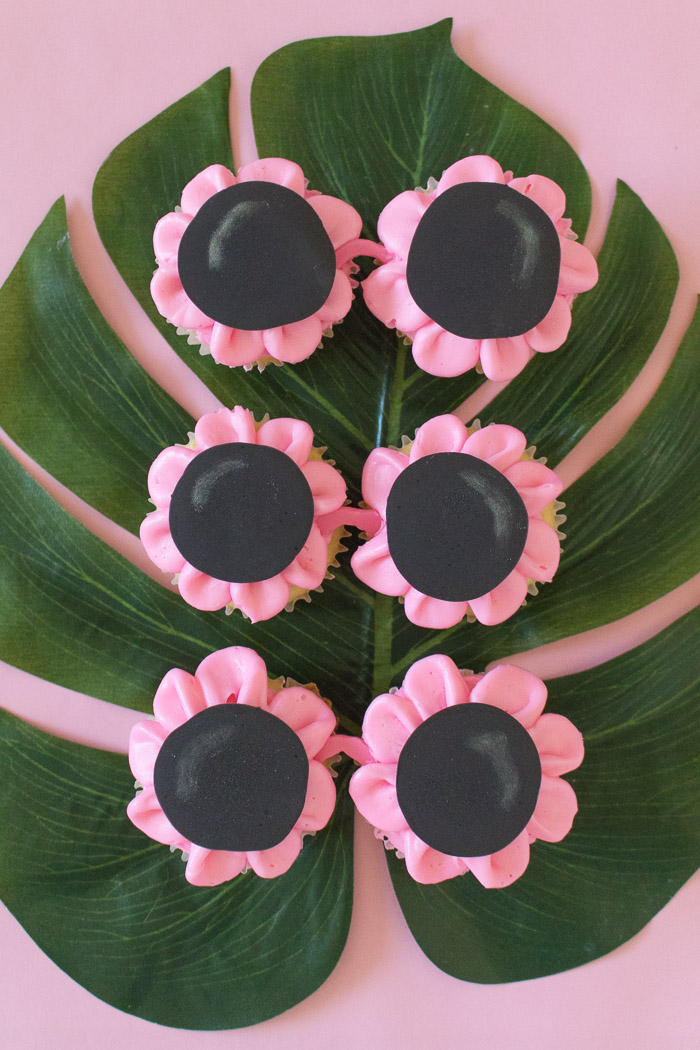
Step 5: Remove the hardened black circle from the wax paper and immediately place in the center of the cupcakes with the flat side facing up. Connect two cupcakes with a pink arch-shaped piece.
Step 6: Apply a small amount of luster dust with a brush on the edges of the black circles to create the appearance of a glare.
Now your floral sunglasses cupcakes are ready to serve. Grab two to share with a friend, or just use it as an excuse to eat two cupcakes! I mean, if they’re connected, that means they’re basically one cupcake, right? I won’t judge!
Please note this post contains affiliate links from which I may collect a small profit should you choose to make a purchase. I only link to products I personally use or recommend.
Amanda
Wow, these are so cute! I’ve been obsessed with these sunglasses too, they just make me want to instantly smile, just like your cupcakes! xo
Holly Wade
AmandaYou’re too sweet, thanks Amanda!