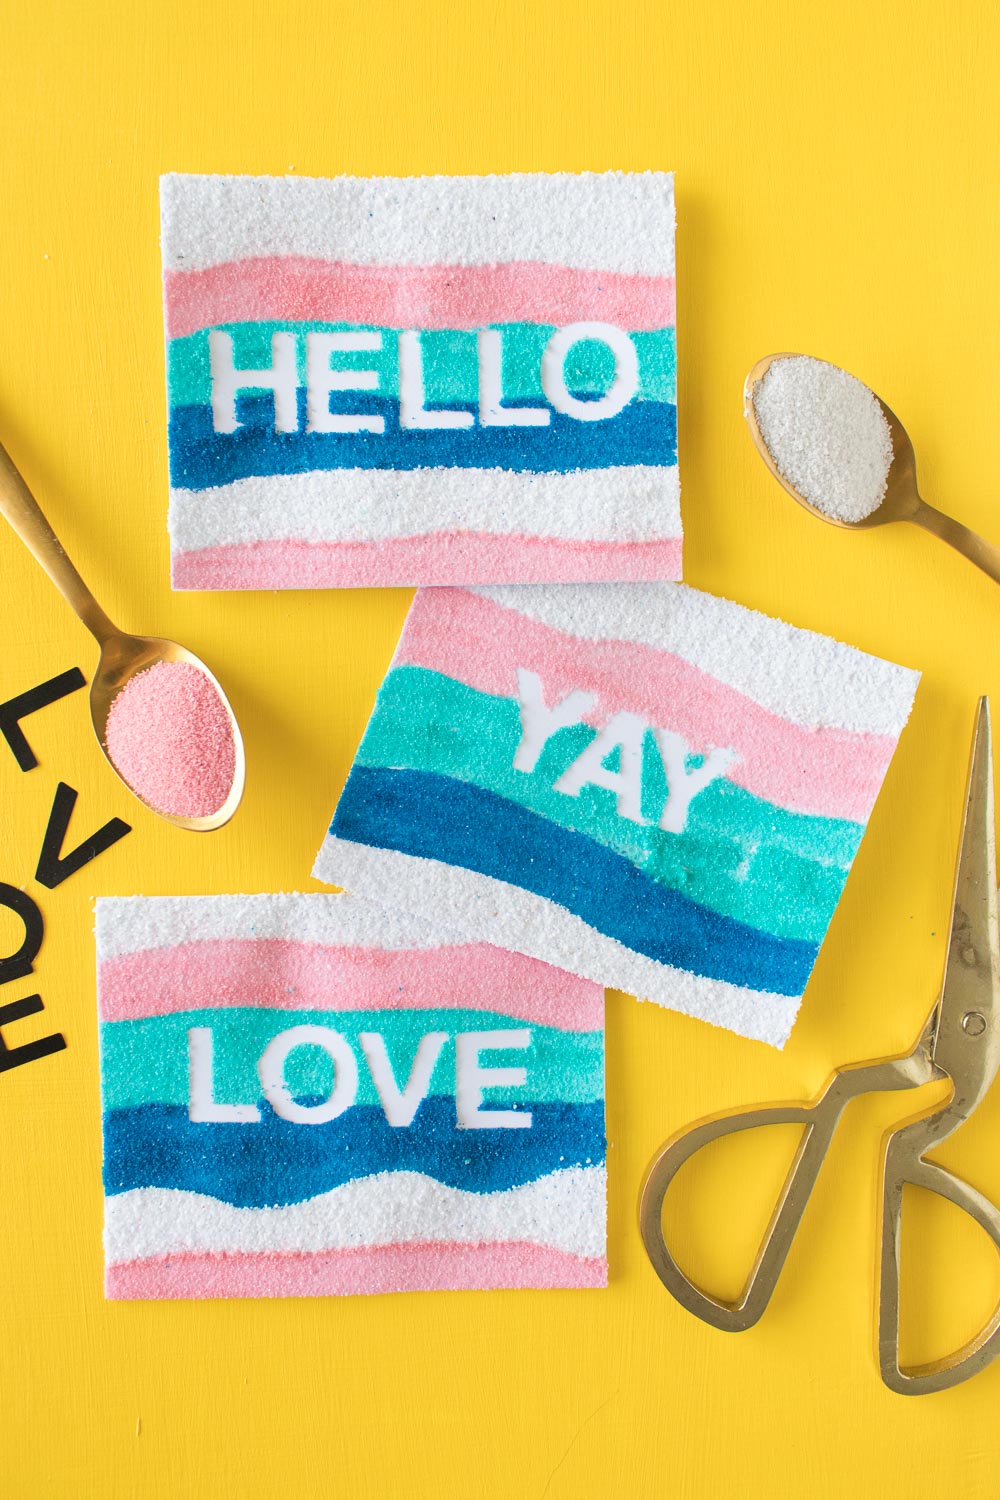
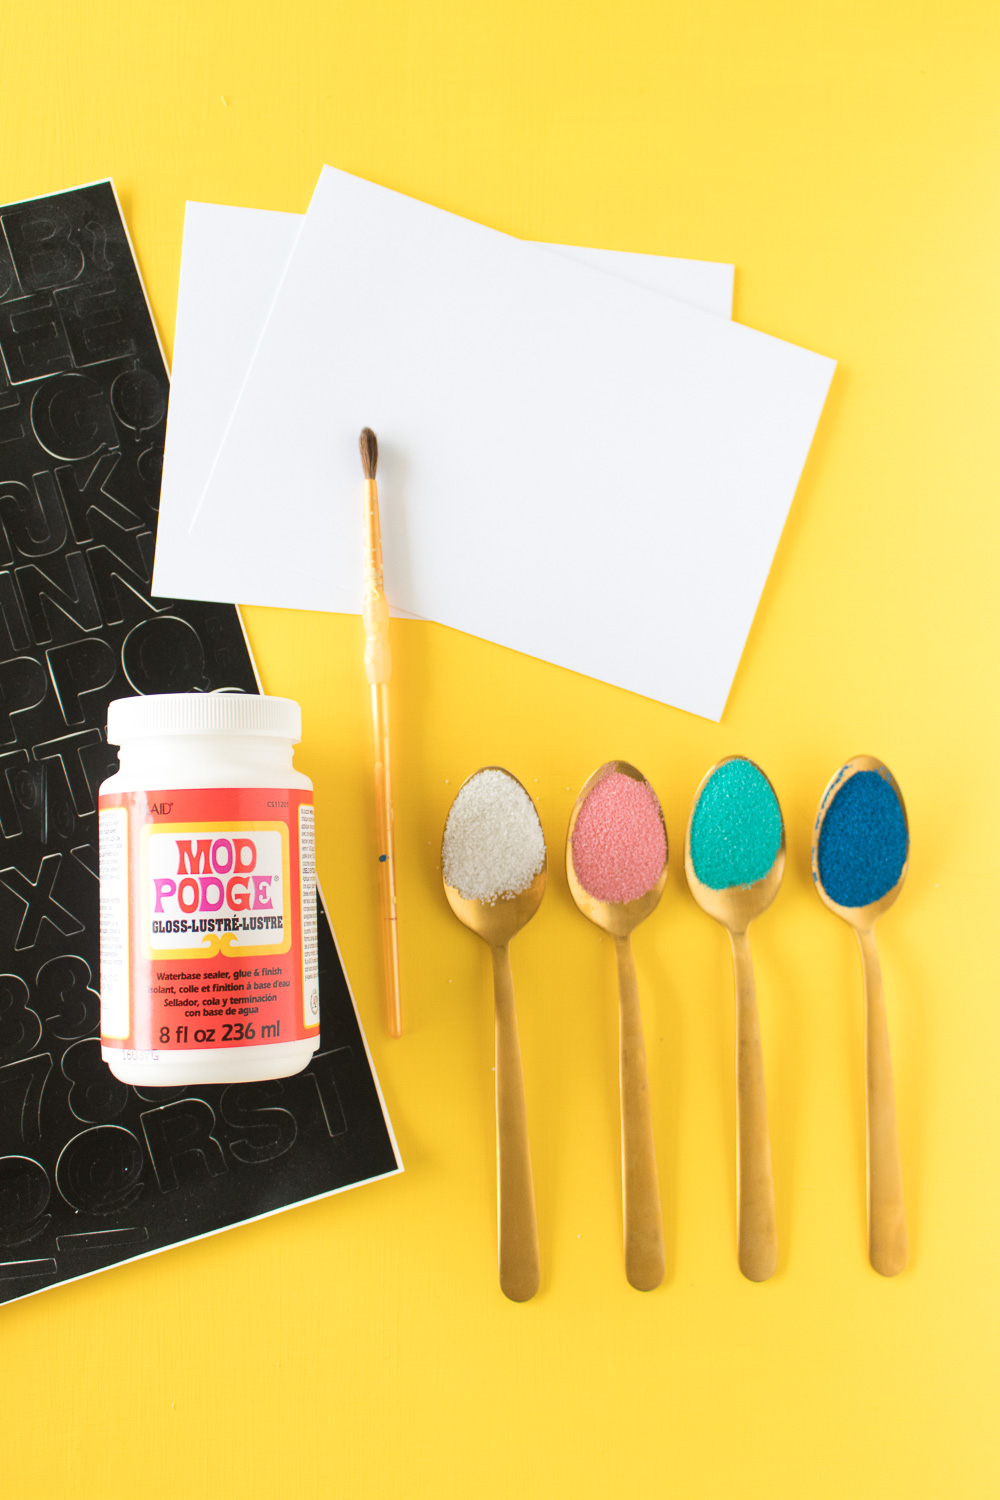
Do you guys remember sand art? I remember back in the day (aka, the late 90s), sand art kits were really popular and you could layer colored sand in jars. Since then, I’ve seen in make a few comebacks in terrariums and other projects, but I wanted to bring it back in another way. I picked up a few colors so that I could make these sand art cards!
Using stickers to create fun sayings for the cards, I simply peeled them away at the end to reveal the plain paper underneath. I think this is actually one of my favorite projects in a while! Not only are they fun and colorful, but making them just takes me back to childhood. This is one of those projects that can be a little messy but in the BEST way.
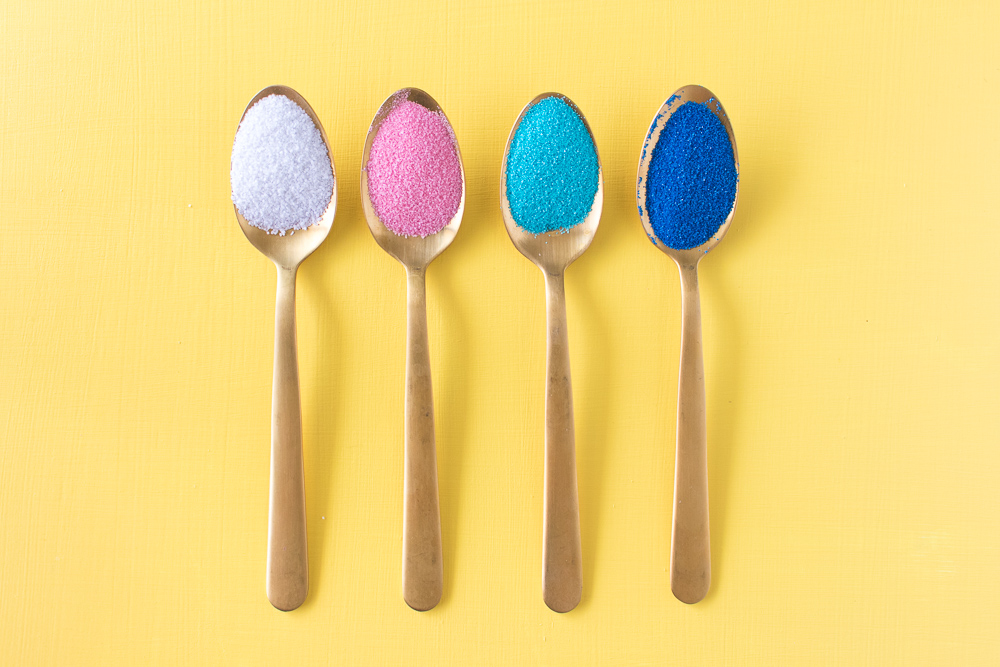 I went in search of colorful sand at the craft store, not knowing what kind of selection I’d find. It just so happened that they had four colors, so I grabbed all four and started working. When you’re shopping for supplies, not that the finer sand the better, and you’ll probably find it in the floral section of the store.
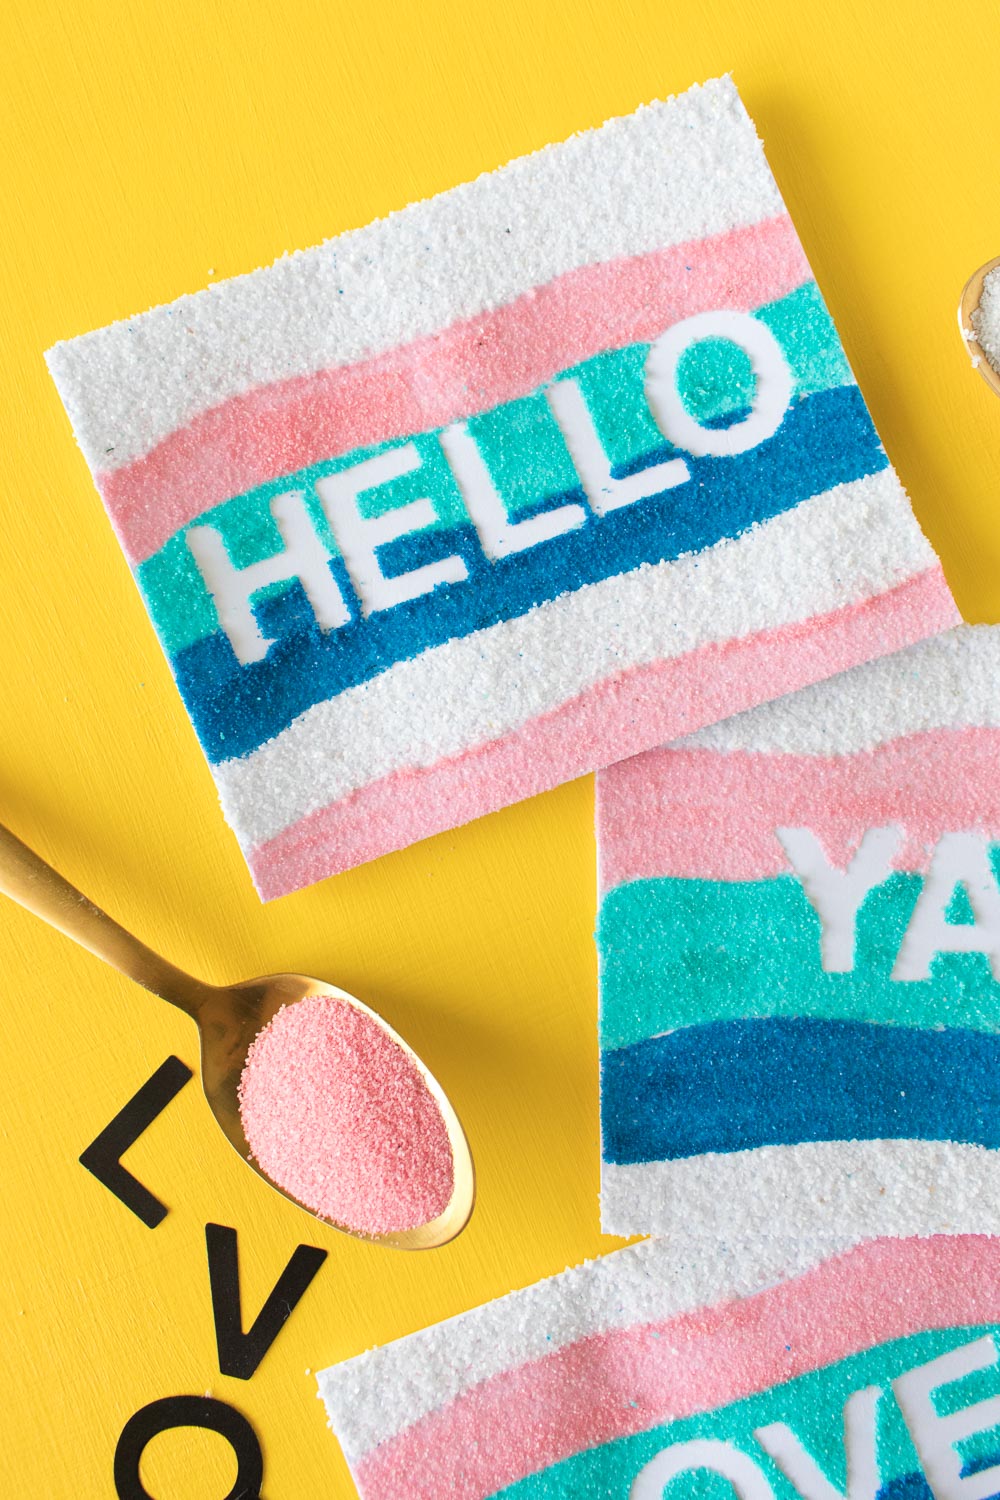
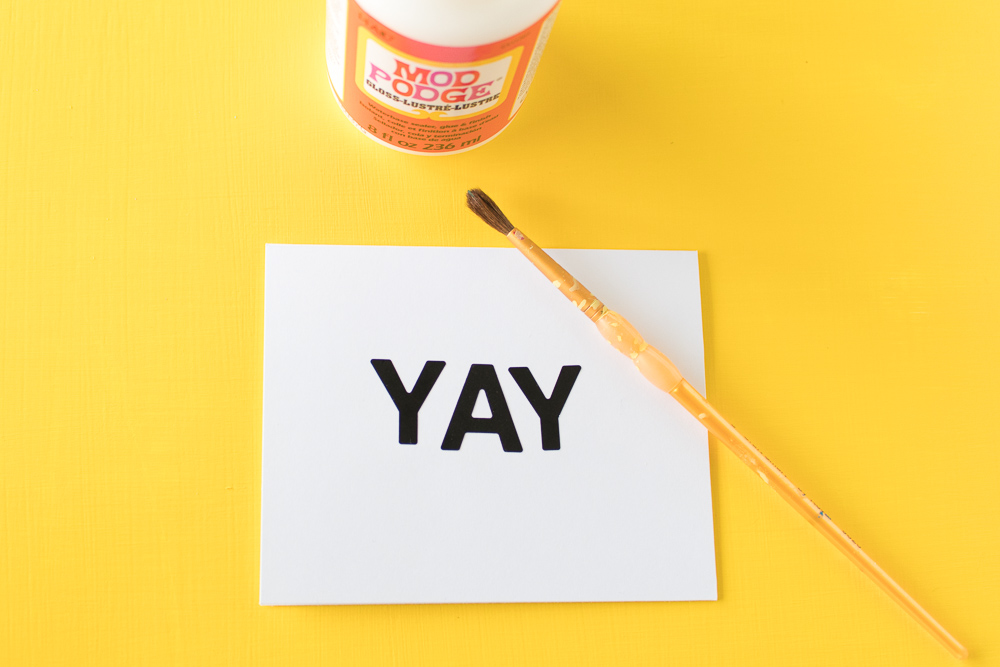
When choosing your color pattern, keep in mind that if you’re using white sand on a white card, avoid using it across where the stickers will be located or it could impact how well you can read them later. In my case, I kept the white sand along the top or bottom.
 Time: 20 minutes
Supplies:
- Cardstock cards, cut to desired size
- Large alphabet stickers
- Mod Podge, classic
- Paint brush
- Varieties of colored sand
 Step 1: Place the stickers in the middle of the card where the saying will be. Press down just enough that they stick, but remember you’ll need to remove them later.
Lay down a piece of paper or newspaper to catch excess sand.
 Step 2: Dip a paint brush in Mod Podge or a similar solution and brush along the top section of the card to create a layer. Remember, a little goes a long way! Sprinkle the first color of sand on top and press in place.
Step 3: Repeat with the next color of sand in sections until you reach the bottom. Try not to overlap with the glue or it could become overly messy.
Try keeping a damp paper towel with you to wipe sand from the paint brush before returning to the Mod Podge container.
Step 4: Once all of the sand is in place and the glue is still wet, carefully remove the stickers to reveal the white space underneath. Use your nails or tweezers to do this so that you do not disturb the sand while it’s drying.
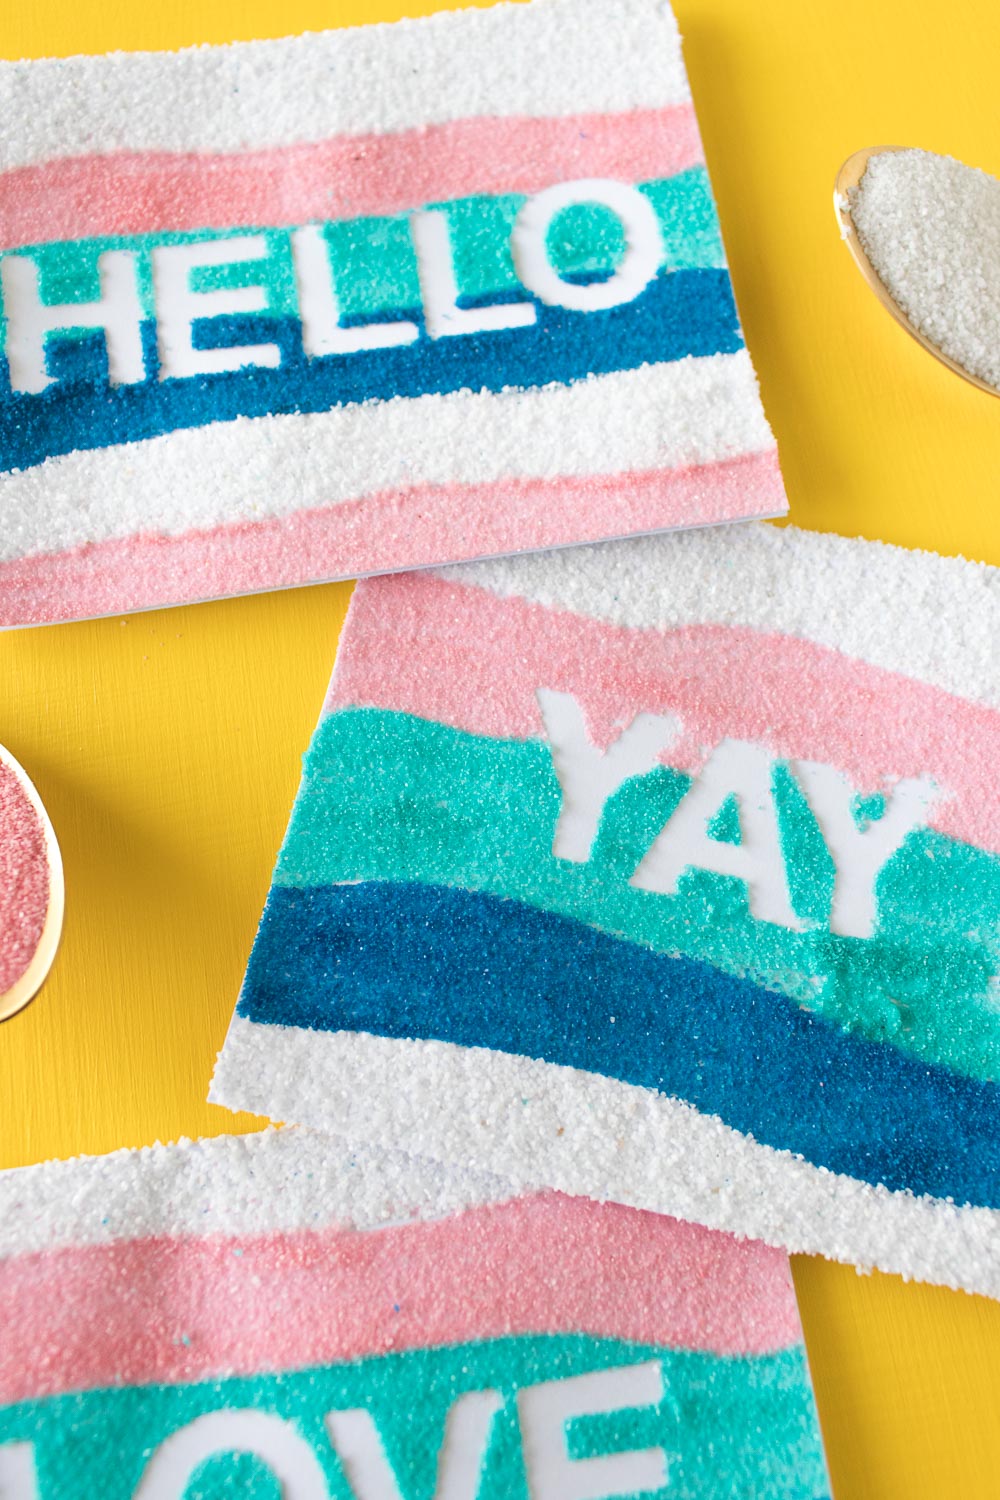
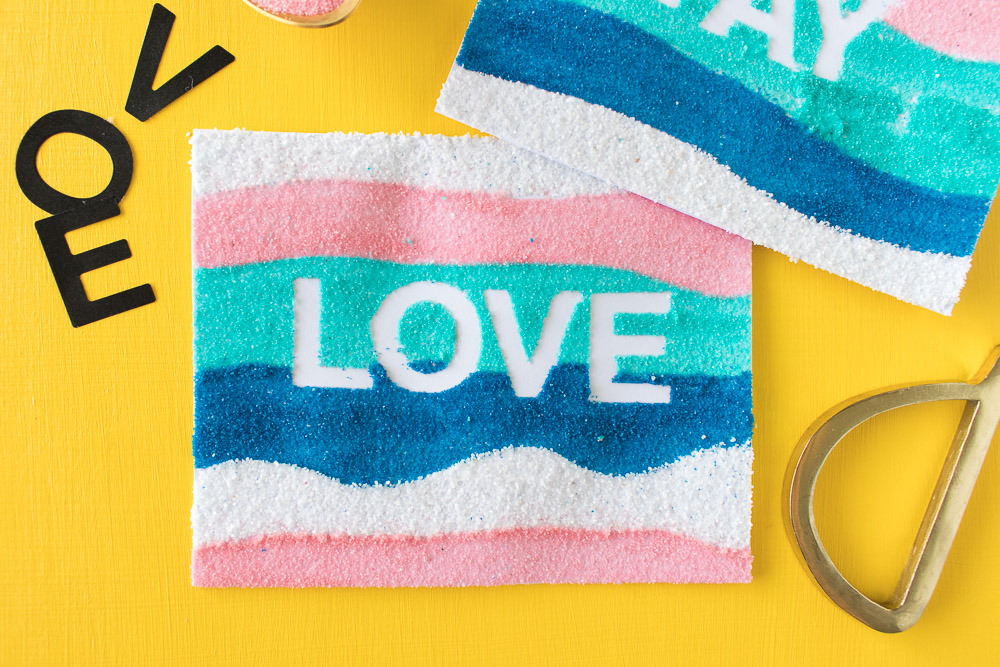
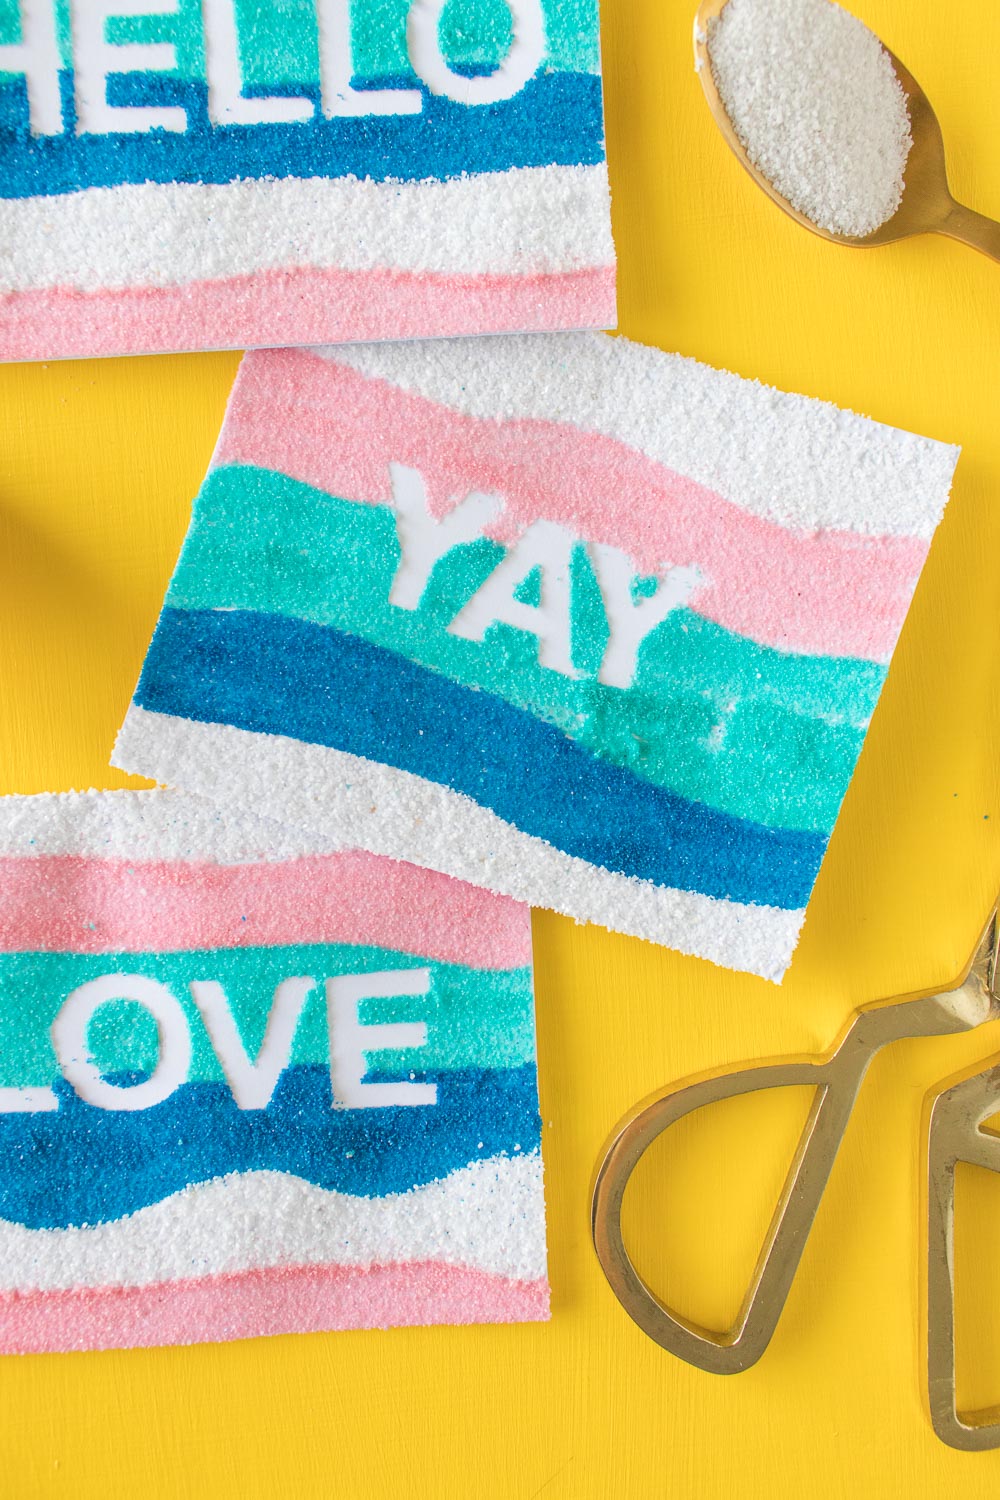
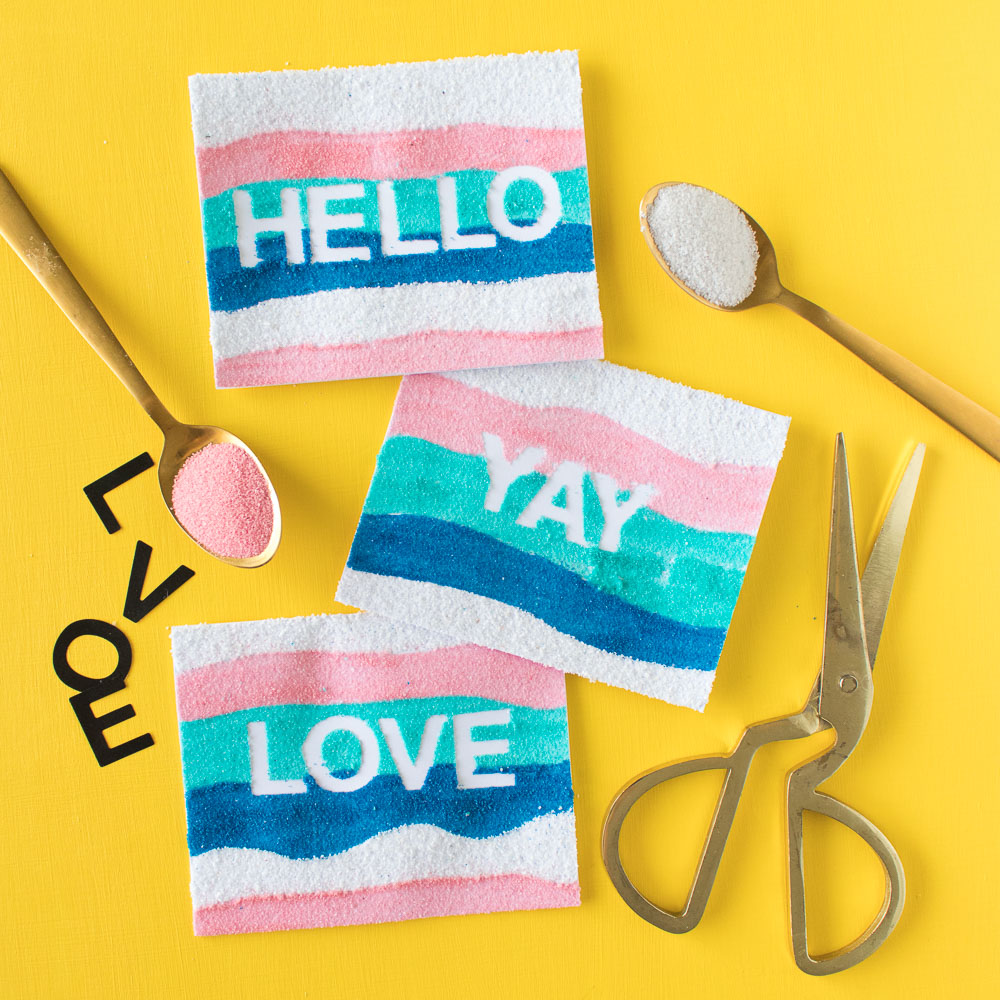 Set aside to dry completely and the sand will stay perfectly in place, even through some wear. I love the texture it adds in addition to the color, and I think these will be so fun to use for an upcoming occasion!
Shawnee Bell
I love DIY stuff and easy ones and ones kids can help
Diana Jenkins
Love Love Love this Sand Art Idea. I have a Girl Scout Troop and will use this idea for place cards for our next event. The girls will love doing it. I picked up some awesome sand at Coloredsand.com they have 19 different colors with free shipping.
Lisa
I love these!
Definitely getting that sand art nostalgia. I had a kit which came with brightly coloured sand plus a little tube of silver glitter which I thought was so special.