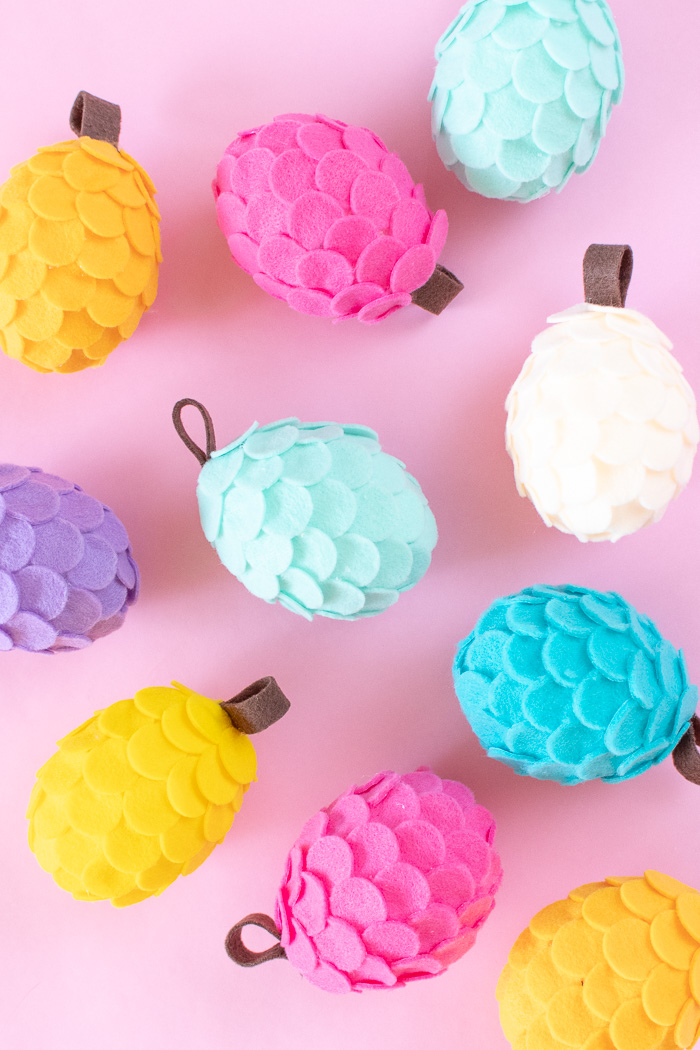
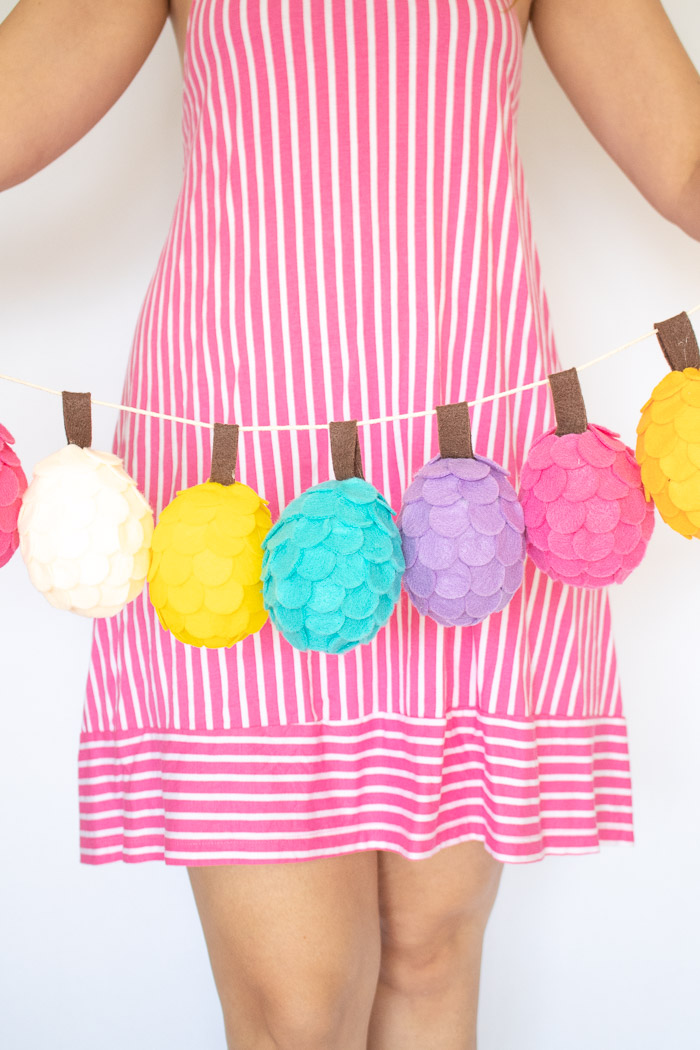
Happy Friday, friends! I’m excited to finally share this project with you all because it took a lot of trial and error. Luckily, that means I worked out the kinks so that it’ll be easier for you to create! With fall officially upon us, I decided my home needed new colorful fall decor (so hard to find!) so I made a bunch of colorful felt pinecones to make a pinecone garland and ultimately create a decorative centerpiece on my table. Use a variety of colors of felt to make these fun felt pinecones you can reuse for years to come!

Like I mentioned above, I went through a lot of trial and error making these felt pinecones. The main issue was how to best cut felt with my Cricut Explore Air. I experimented with different settings, embroidery strengthening paper, cutting the felt directly on a mat, etc. until I discovered that the BEST way to cut felt with Cricut was with Ultrahold Heat N Bond, a NEW Cricut Standard Cutting Mat and a Deep Cut Blade. All three of these elements are required for best results. Cutting felt will wear out your mats quickly, so be aware your mat may loose stickiness (and therefore effectiveness) after making a couple felt pinecones. I also have read that using the pink Cricut mats designed for fabric work well, but I didn’t try this method.
The only reason this project takes a while is the cutting. I highly recommend using a cutting machine like a Cricut to cut out the circles, but even then, scraping away each circle from the mat will take some time. I just put on Netflix and spent an evening cutting and scraping. If you try to cut circles by hand, I commend you!! I don’t have the patience. However, a felt punch may work for making felt pinecones as well.
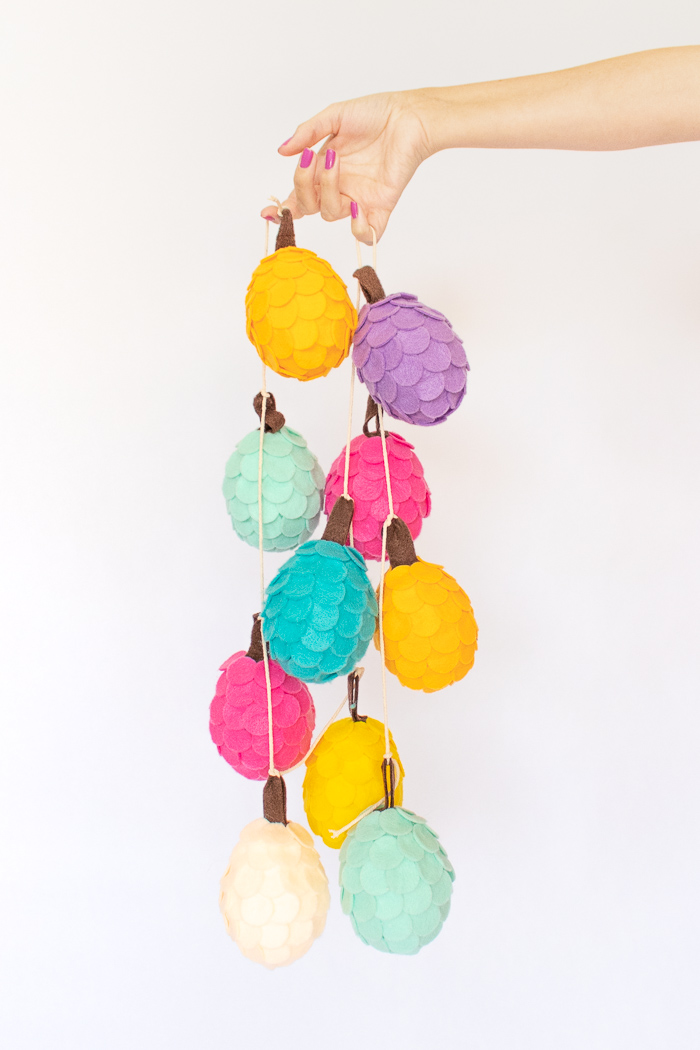
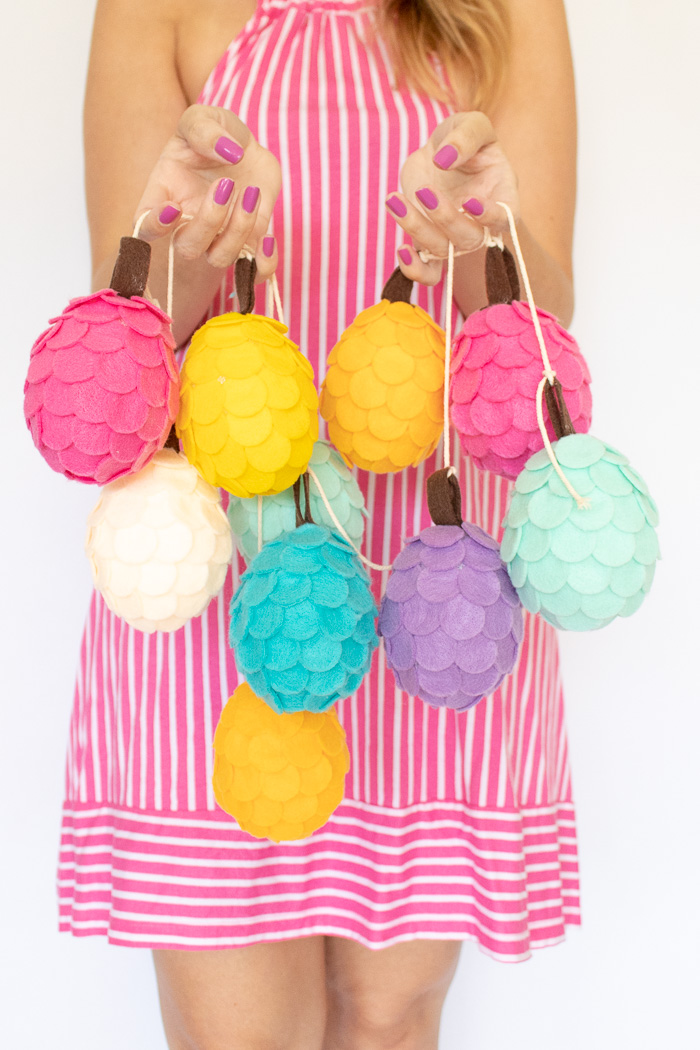
OK, now let’s make some cute, colorful felt pinecones you can use to decorate for fall! Mine are currently in a decorative bowl, but I also strung them into a garland, tying each pinecone in place so that they didn’t slip (see photo below).

Time: 1 hour
Supplies:
- 1 sheet brown felt
- Colorful felt sheets, one per pinecone
- Heat N Bond (medium or ultra recommended)
- Styrofoam eggs
- Hot glue gun
- Scissors
- Iron
- Cricut or cutting machine
- Cricut Standard Cutting Mat
- String, optional for garland
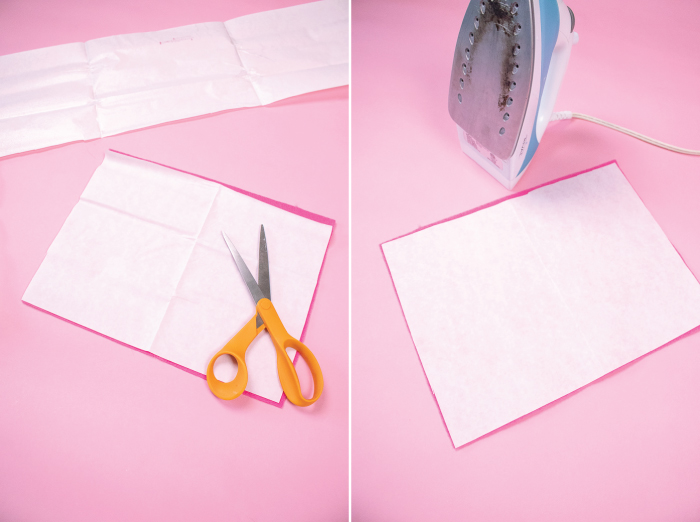
Step 1: Cut a piece of Heat N Bond to slightly smaller than a piece of colored felt. Place adhesive side down and iron for about 30 seconds on no-steam until adhered.
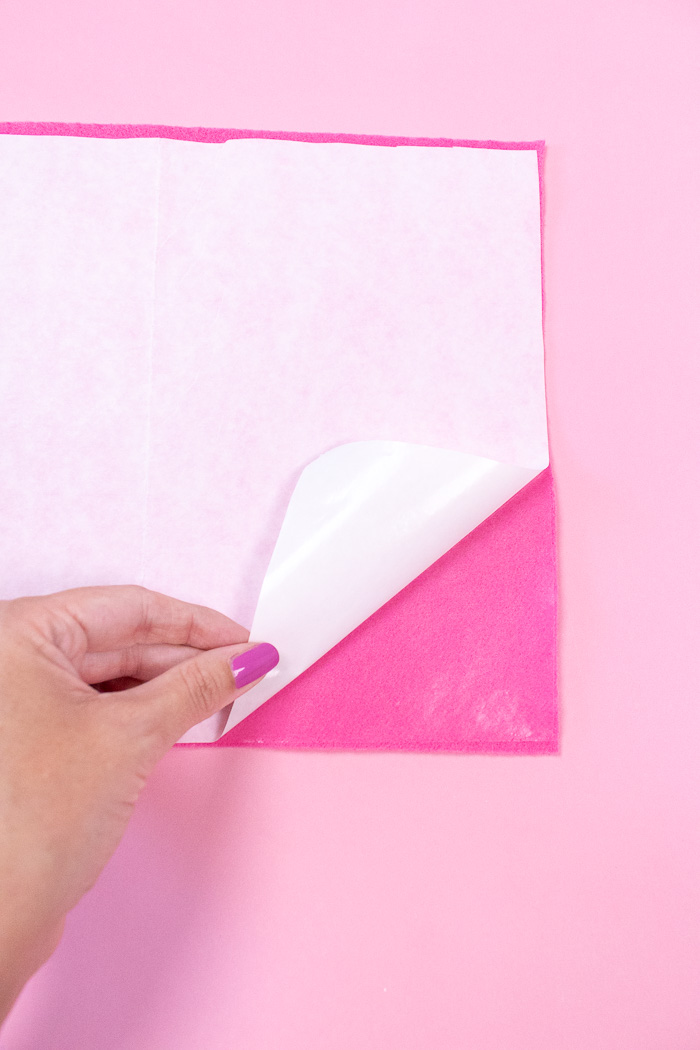
Step 2: Peel away the paper backing of the Heat N Bond.
Note, this is what helps the felt stick to your cutting mat. I recommend using the medium or ultra strength Heat N Bond so that it sticks well. I tried using the Lite Heat N Bond, and although it did stick, there was more damage to the felt than with the medium or ultra.
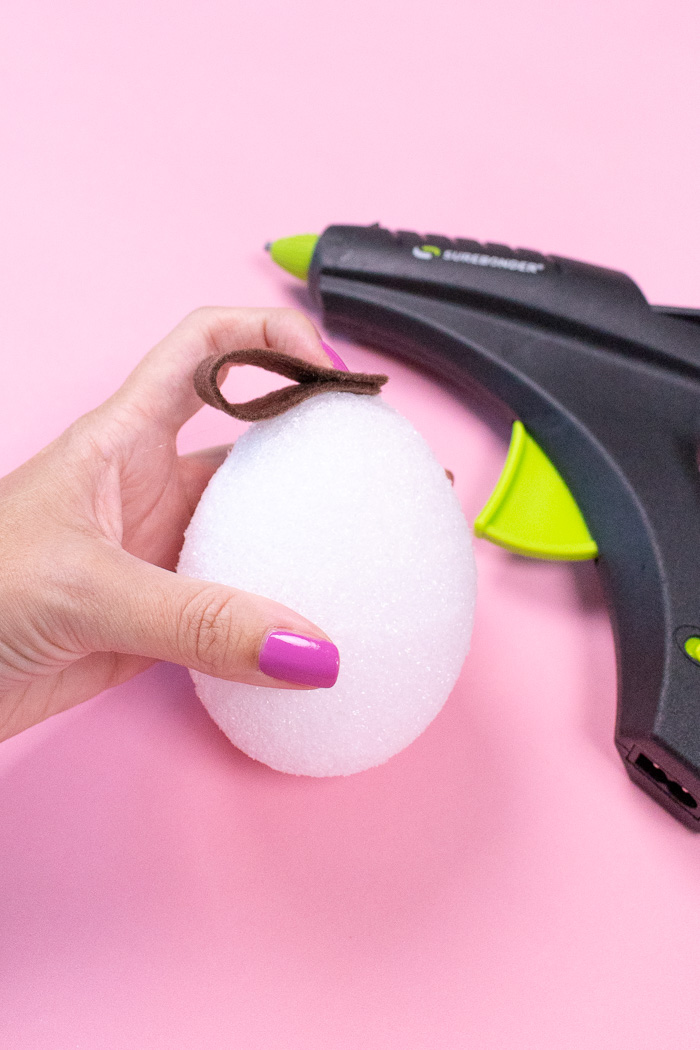
Step 3: Cut a half-inch strip of brown felt about 4 inches long. Glue the ends together with a hot glue gun, then glue the loop to the top (thinner end) of the styrofoam egg.
Note, for extra strength if you will be making a garland, I recommend using small pins to poke into the tops. Over time, the glue may easily come off, so this strengthens the loops.

Step 4: Next, cut a bajillion 1-inch circles. Cut as many 1-inch circles as one sheet allows. Each sheet equals one pinecone.
How to Cut Felt with a Cricut Machine:
- Use Heat N Bond to help the felt stick to your NEW Standard Cricut Mat. Place shiny down down and smooth with a scraper tool.
- Choose the “Custom” setting on your Cricut machine. Search for Felt, Bonded from the menu.
- Select “Default” pressure. If your felt is not cutting well, you can adjust this setting mid-cut.
- Insert a Deep Cut Blade and choose the setting on your computer.
- Load the mat and press cut. Check often to make sure the felt is sticking. Otherwise, pause the machine to re-smooth areas.
- Once finished, peel away the negative felt and use the small Cricut spatula to remove the felt circles.
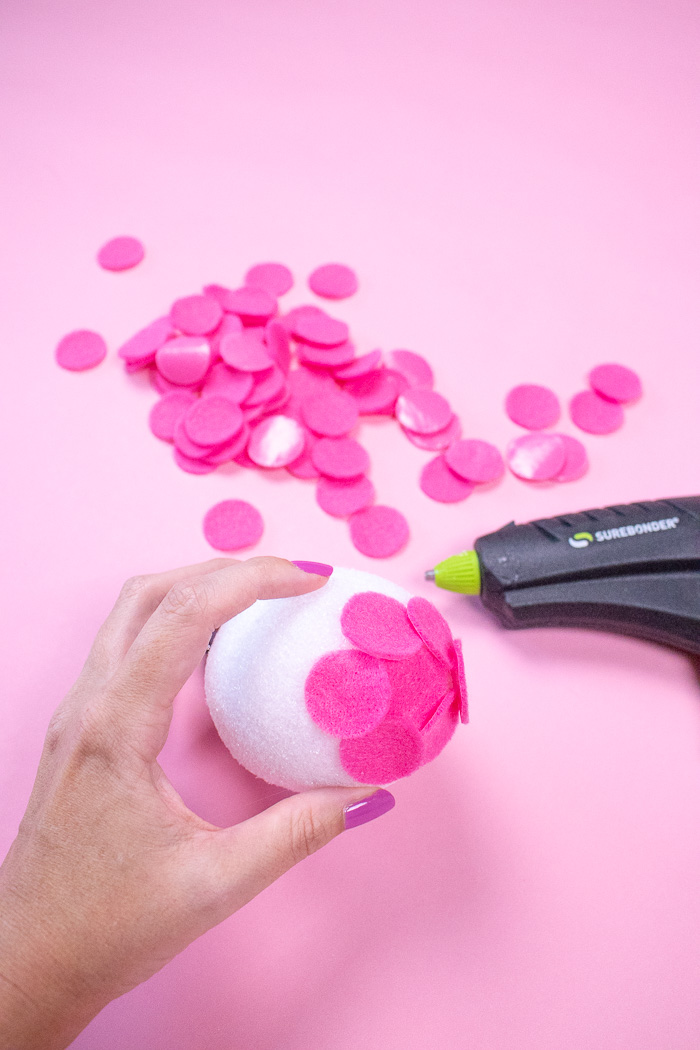
Step 5: Glue one circle to the bottom of the egg. Then glue circles overlapping one another like scallops. Continue this pattern all the way up to the top, overlapping circles so that no styrofoam is visible.
Please be careful! All that gluing gave me quite a few burns.
Remove excess glue strings, and make as many felt pinecones as your heart desires! I love how they look in a copper basket on my dining room table right now. What else can we do with felt pinecones?!
Jennifer David
Thanks for the DIY but from where can I get those embroidery strengthening paper? I want to try this out.
Holly Wade
Jennifer DavidHi Jennifer! Heat N Bond is available on Amazon or in stores like JOANN