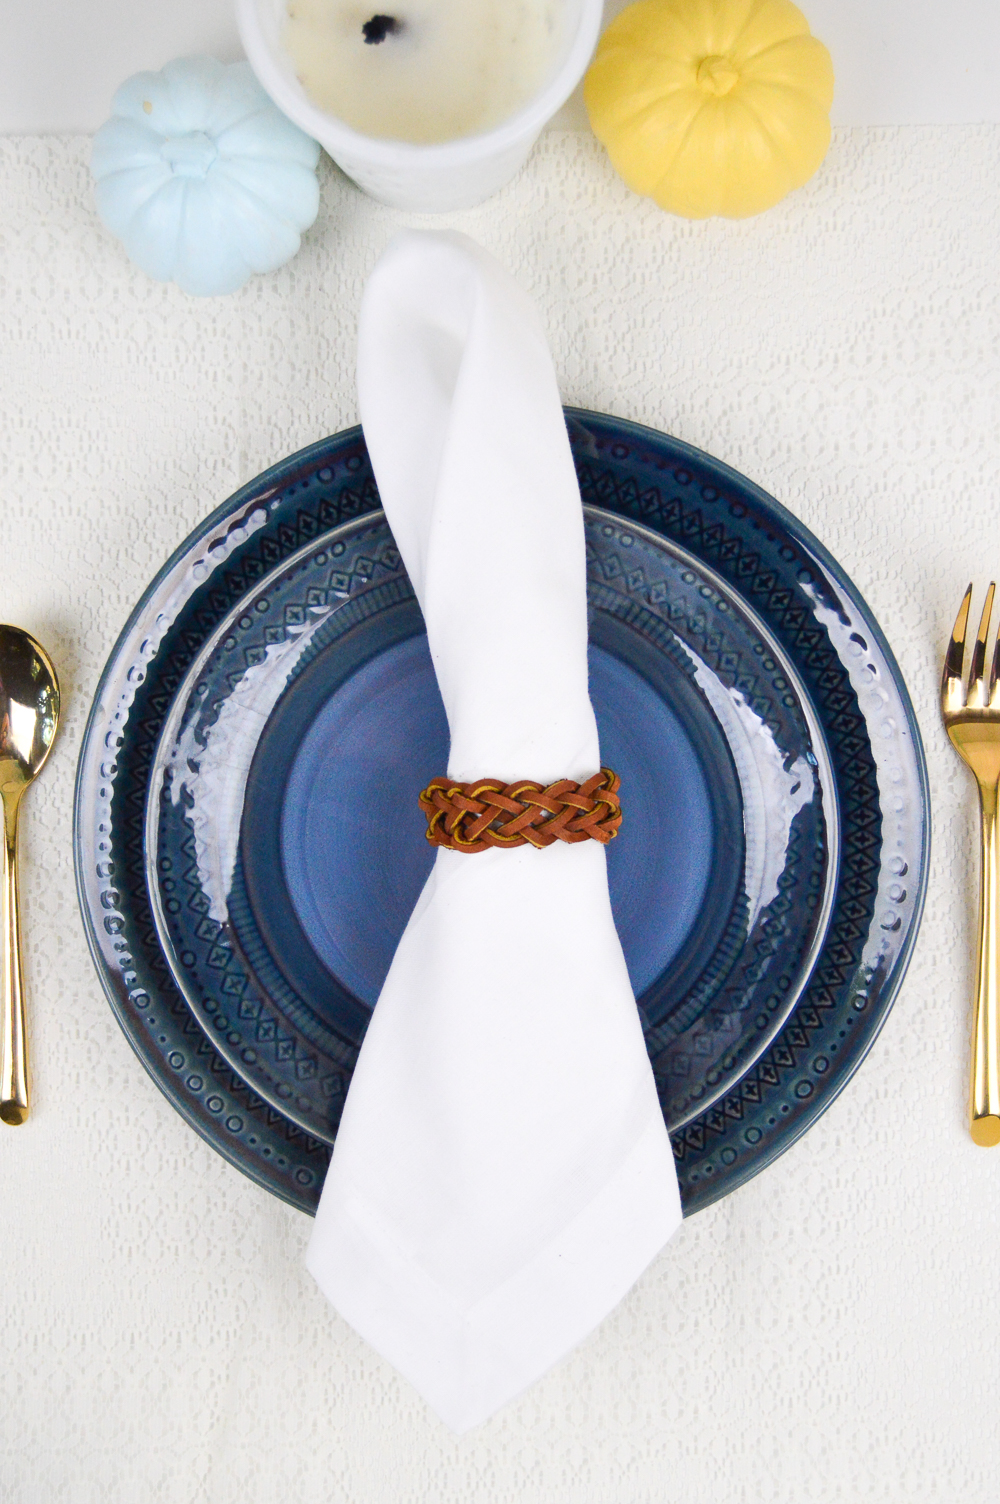
Growing up, my mom had a napkin ring collection (among a thousand other collections). I think many of them have been put into storage or given away to make room for new collectibles, but I remember always being a little confused my napkin rings when I was younger because we had all of these antiques ones on shelves but I had never actually seen one used. We don’t consider ourselves fancy people and happily ate many dinners on paper plates in front of the TV rather than on fancy china with napkins wrapped with rings. I’ve continued this tradition as I live on my own, though that’s mostly because I’m a terrible cook and we don’t have an actual dining room.
Nonetheless, while napkin rings may not be used on a regular basis, I think the holidays tend to bring them out of hiding. These DIY leather braided napkin rings are easy to make and perfect for hosting a rustic or bohemian-inspired Thanksgiving dinner or other event. Made with leather string, they come together really quickly and can be stored and reused for years to come. So if you’re like me and like to have some DIY elements to every event, why not start with the oh-so-under-appreciated napkin ring?
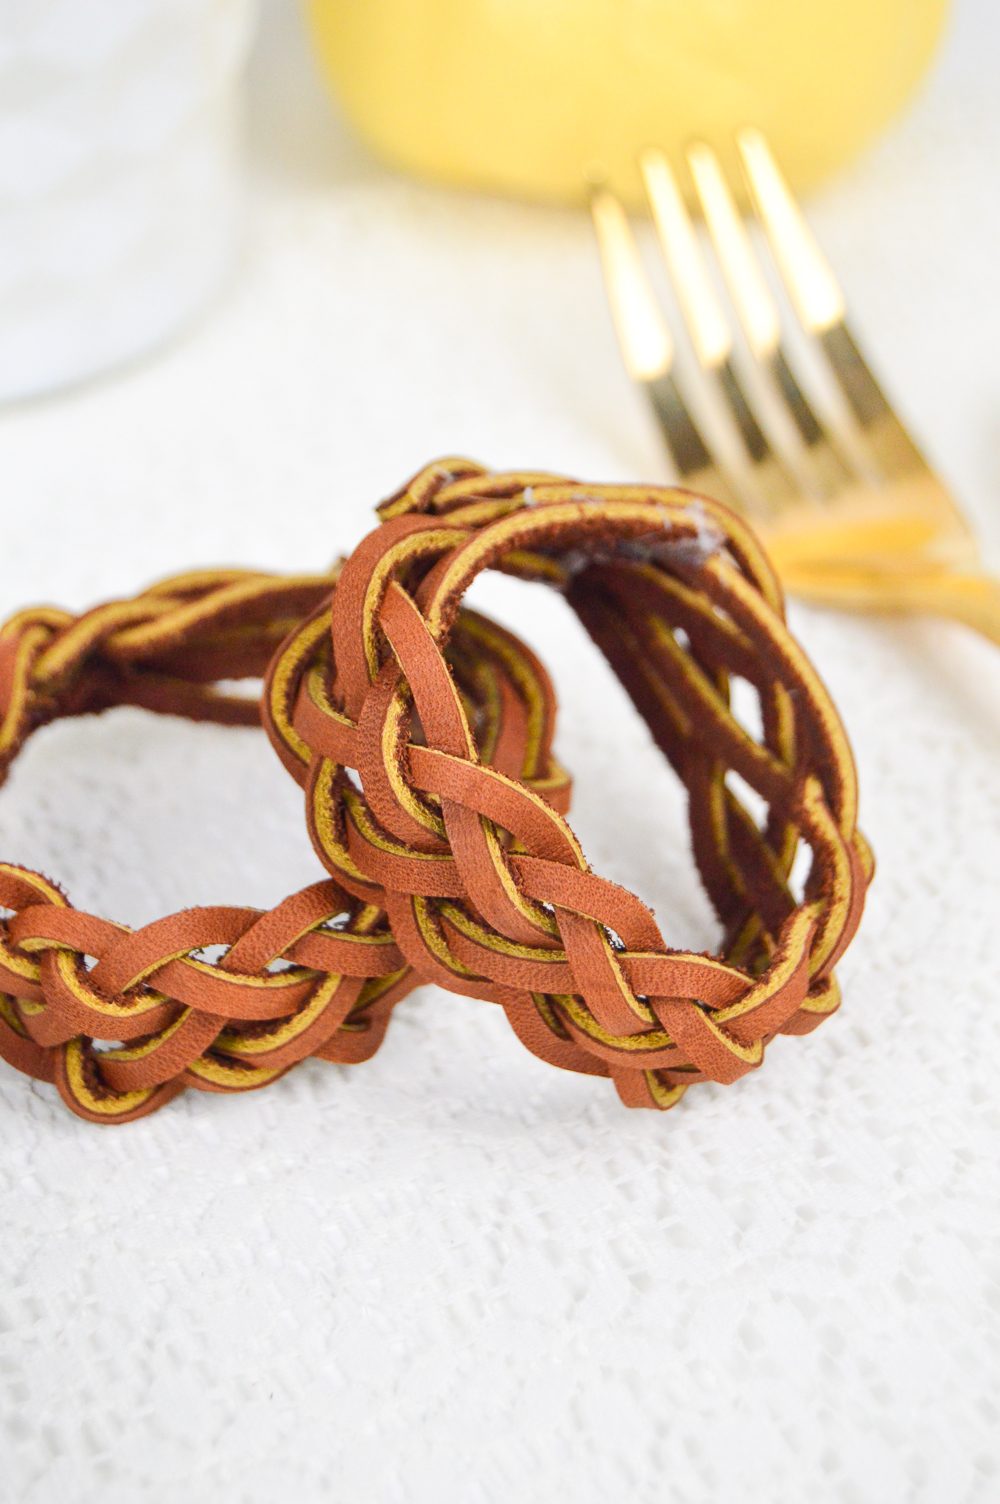
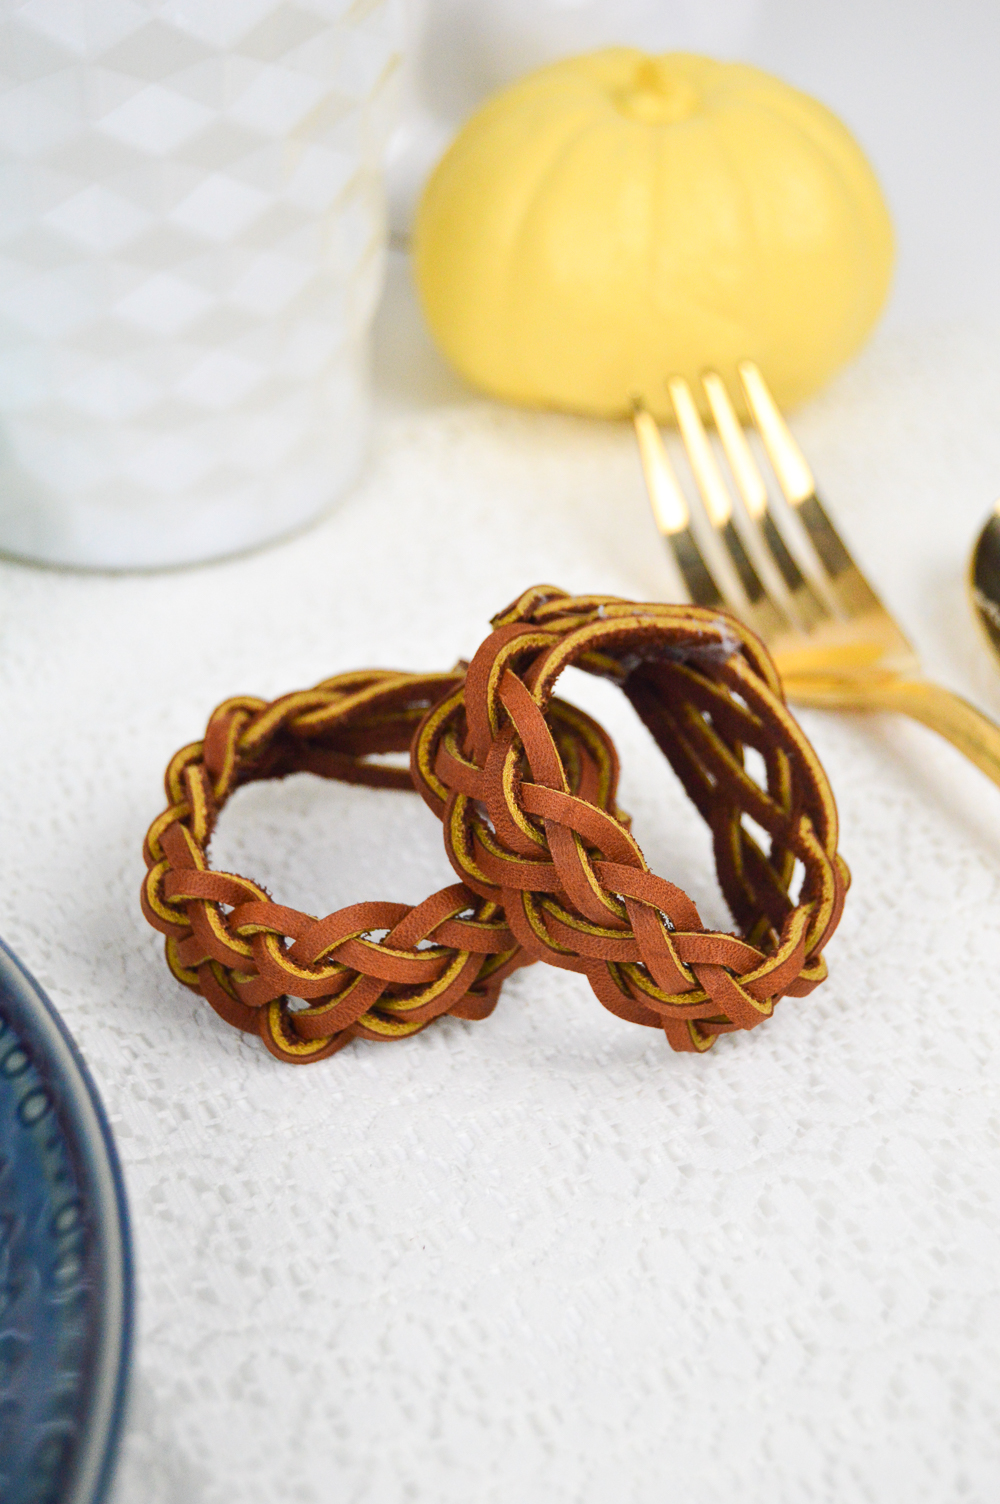
A 6-strand braid is easier than it sounds, and when done somewhat loosely (which is necessary with such thick string), it lies flat. I’ve included a tutorial below that shows exactly how to make a 6-strand braid, but you essentially use the outer string on each side to weave under-over and back and forth until complete. Trust me, one quick tutorial is all you need!
Here’s how to make them!
Time: 10 minutes
Supplies:
- Leather/suede string
- Fabric glue or equivalent
Step 1: Cut six 5-inch-long pieces of leather/suede string and tape the ends to a table
Step 2: Weave a 6-strand braid and, with the other side still taped, add glue to the ends of the braid (see this tutorial for a 6-strand braid)
Step 3: Carefully remove the taped end, bend the braid and match up the strings with the opposite side to glue them together
Step 4: Press and hold together with your fingers for about a minute until glue holds on its own, then let cure for 30 minutes before using

Once the glue is completely dry, you can slip a napkin into the braided napkin ring with ease, and the glue should be strong enough to hold even with wear. Simply use the glued side as the backside to hide the seam, and these will look like something you picked up at the store!
Trinity
This would be great as a choker! Any tips to adapt this to work as a choker?
Holly Wade
TrinitySure, you could absolutely do that! You could simply make the braid long enough to fit your neck size and attach a ribbon clamp jewelry finding at both ends. You can find ribbon clamps in different colors on Amazon.