I may not be a fashion guru (seriously, not at all), but I can still follow the trends and it’s easy to see that both the 70s and 90s are making a huge comeback, as evident by the amount of crop tops, overalls, bell sleeves, and more. One more style has made a comeback is choker necklaces. Remember those?
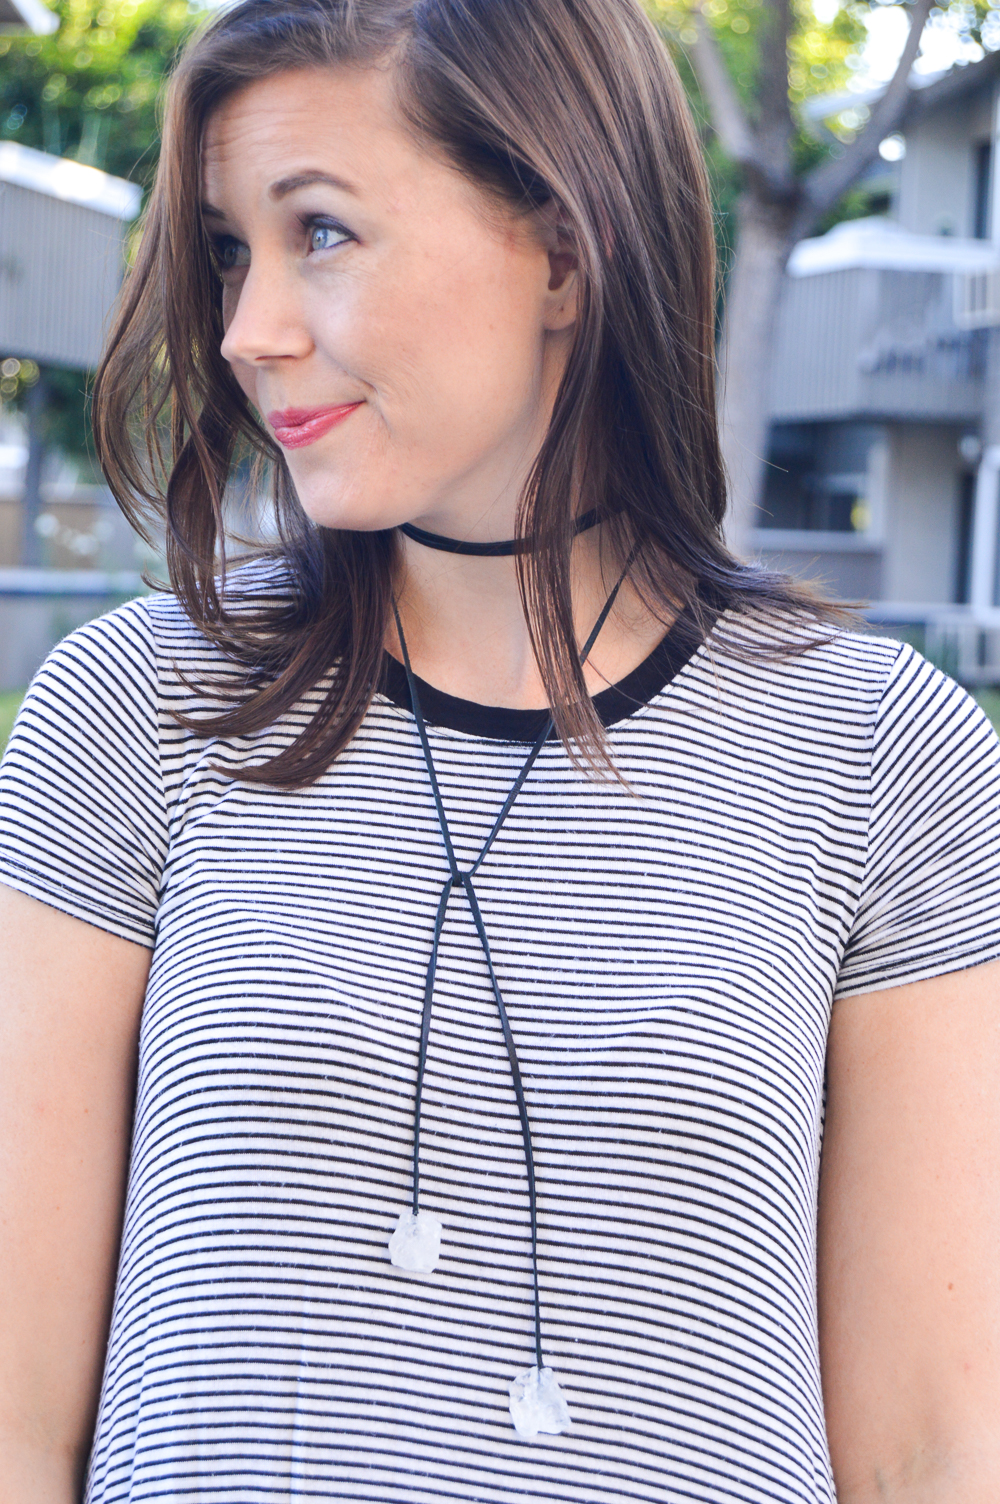
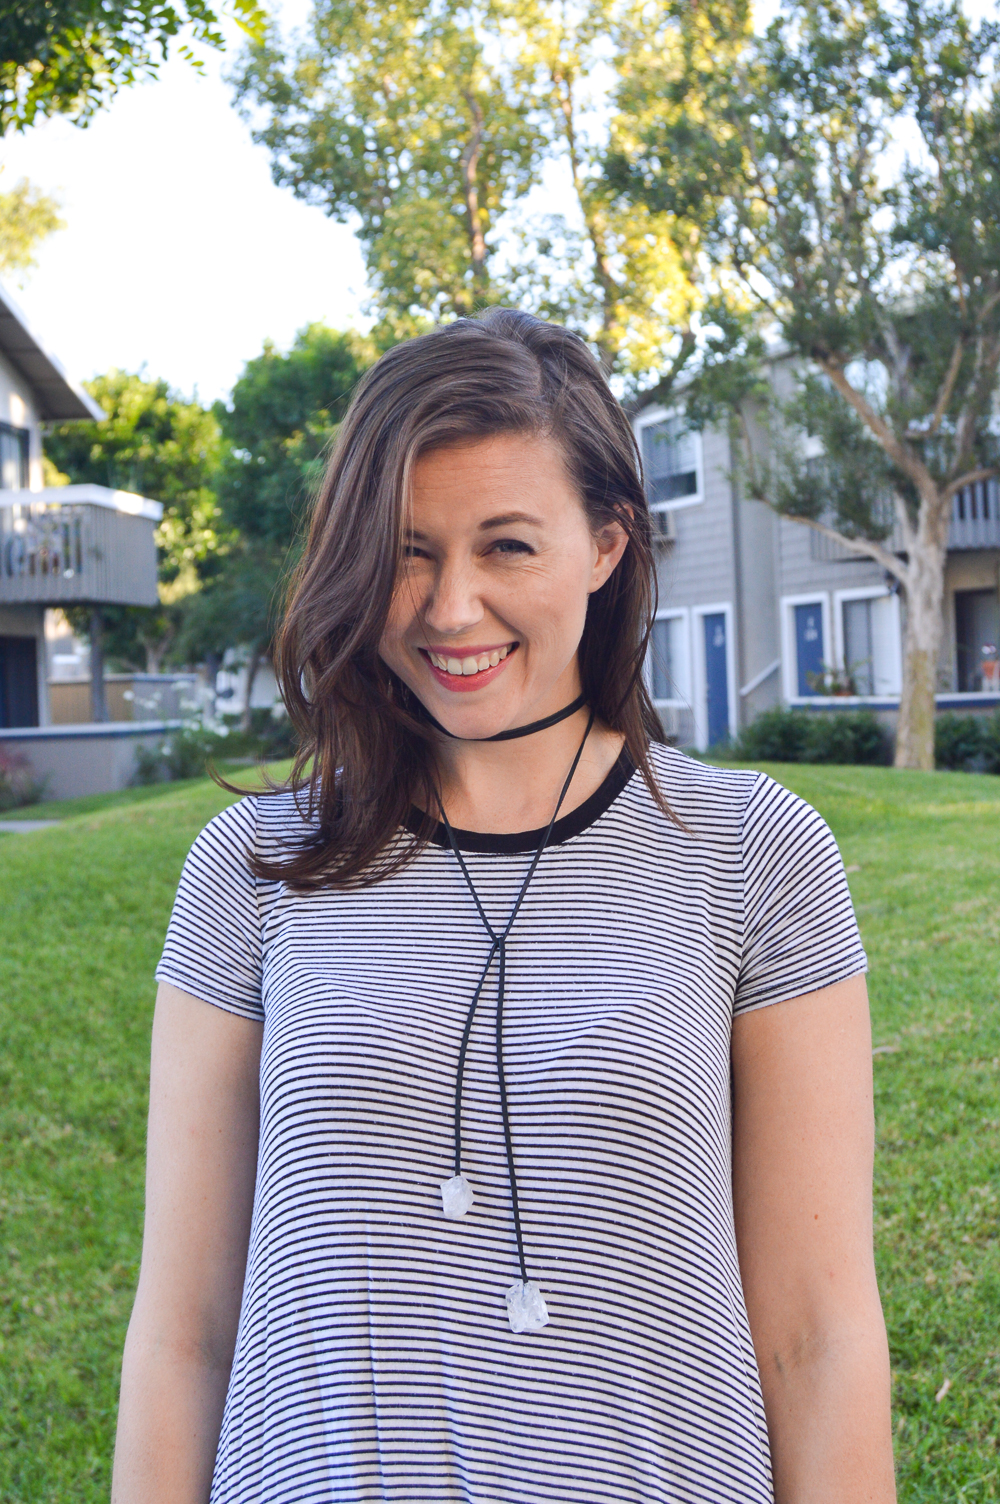
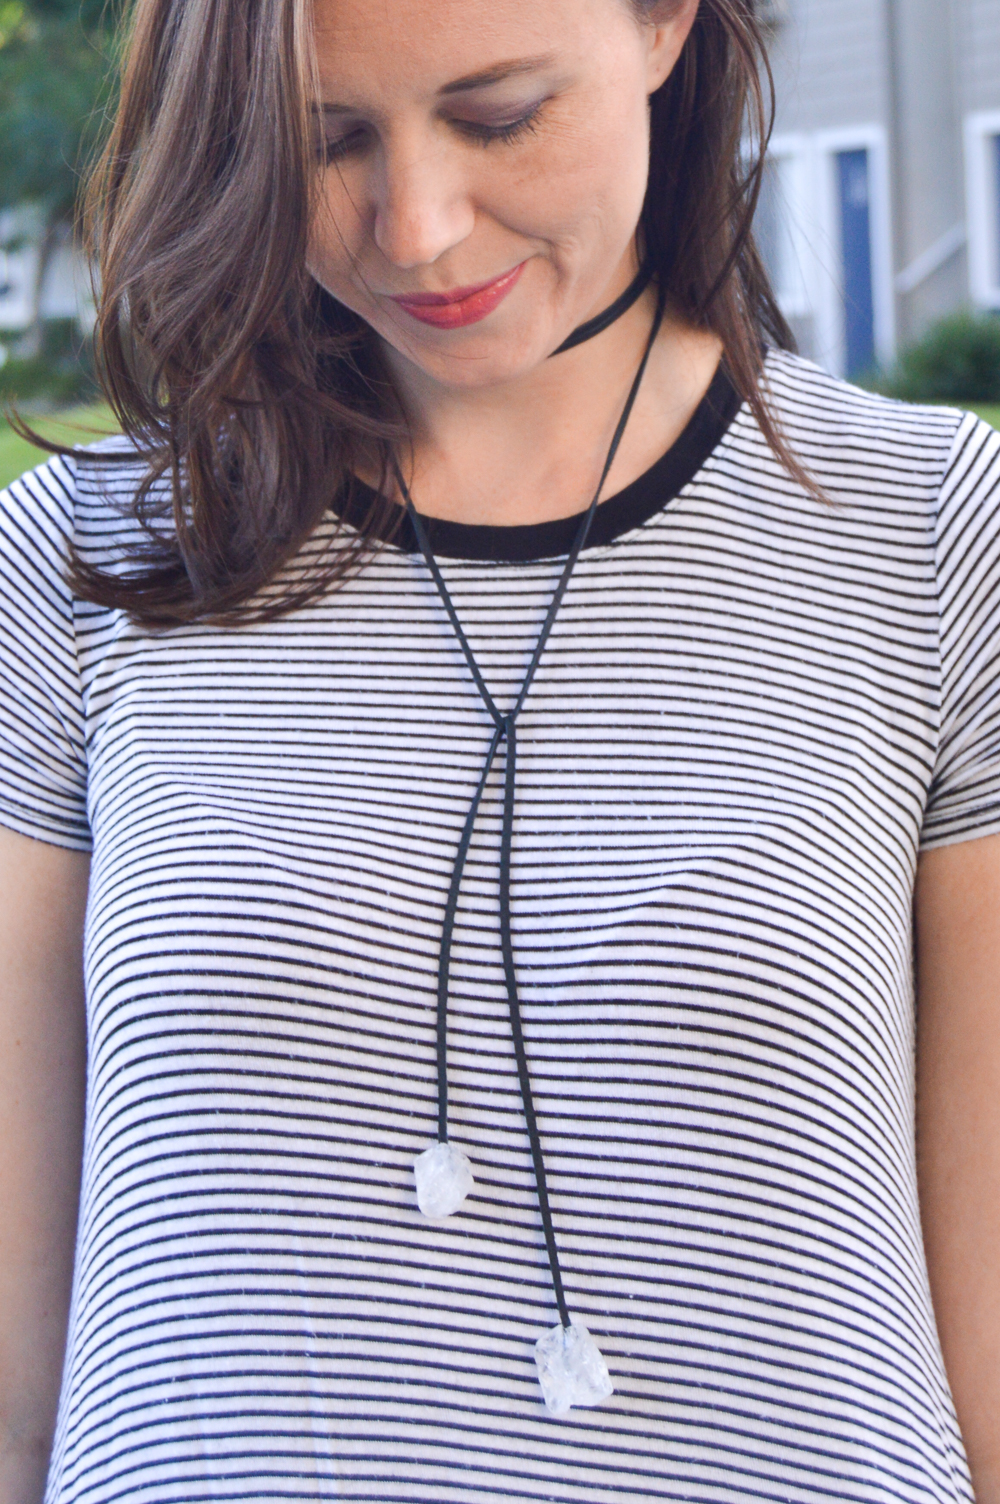
I’m a 90s kid, so I admit I had one of those plasticy choker necklaces that I wore all to often and felt really cool. Well, I noticed that choker necklaces today (although much better looking) can be SO expensive considering what a small piece of jewelry it is, prompting me to say what I always say…”I can make that.” So I did. This DIY gem choker necklace is a play off this lovely Free People choker (or bolo) currently retailing for $78 and I simply cannot afford that. I decided to use chunky gem beads but you can use any kind! Ultimately, I think this project cost me less than $7 and I really enjoy the feeling of creating things that I know I made myself. It’s such a wonderful feeling to be complimented and get to say, “thanks, I made it.” You know?
You can have that feeling too with this super simple DIY gem choker necklace! All of the materials should be available at your local craft store and it comes together in no time at all.
Time: 5 minutes
Supplies:
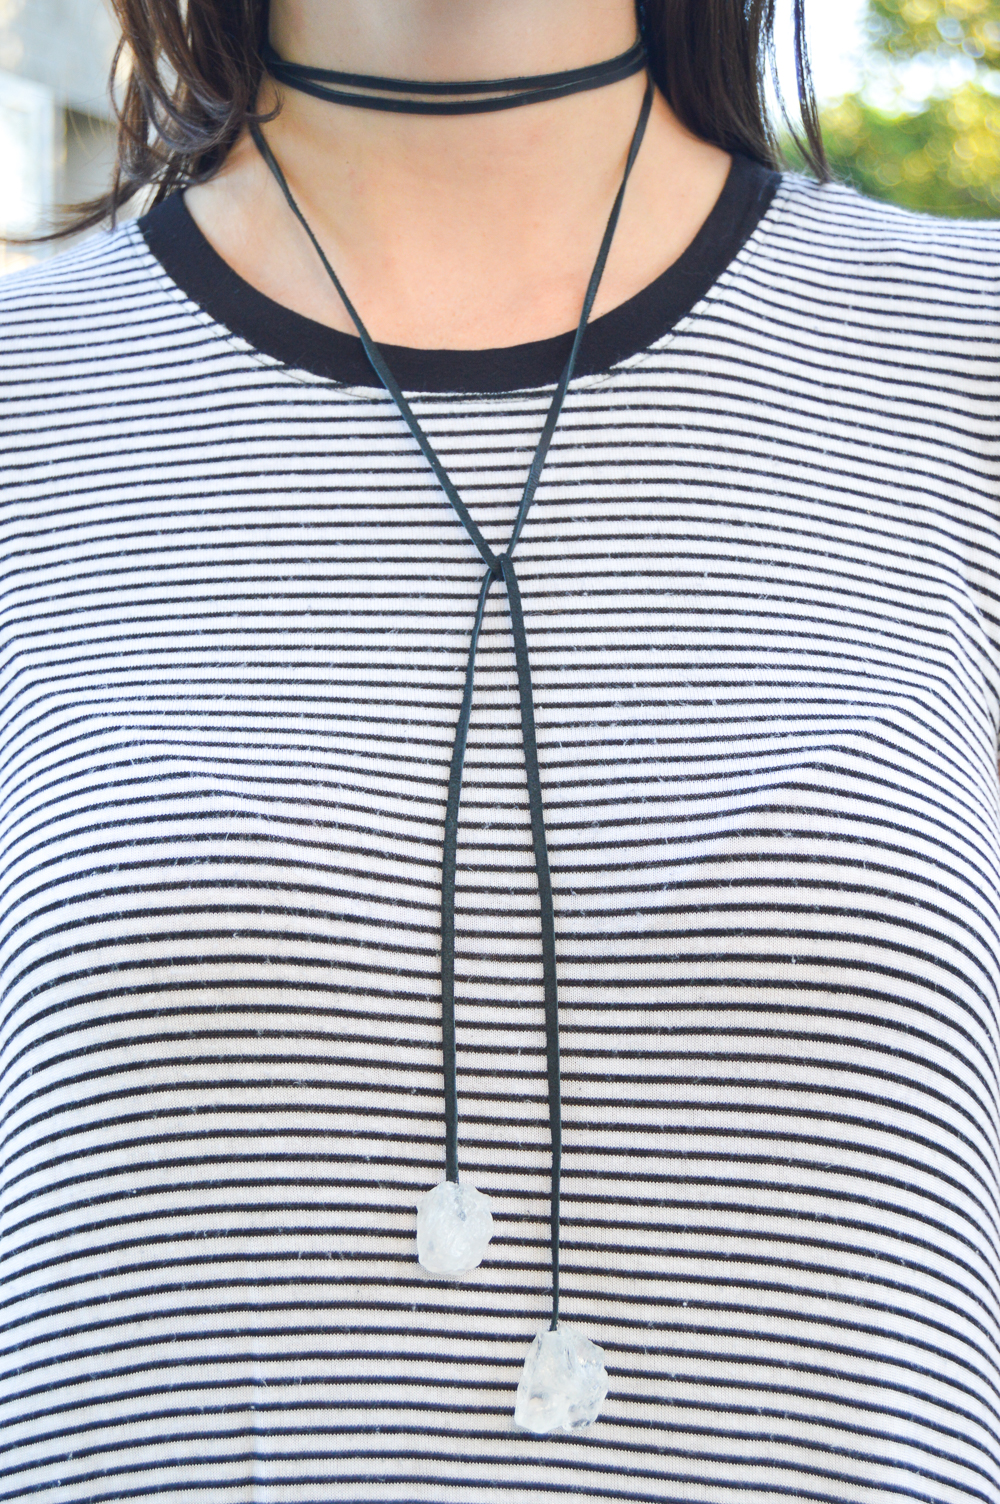
- Leather cord (thinner is better)
- Crystal stone beads
- Scissors
- E6000 glue or equivalent
How to:
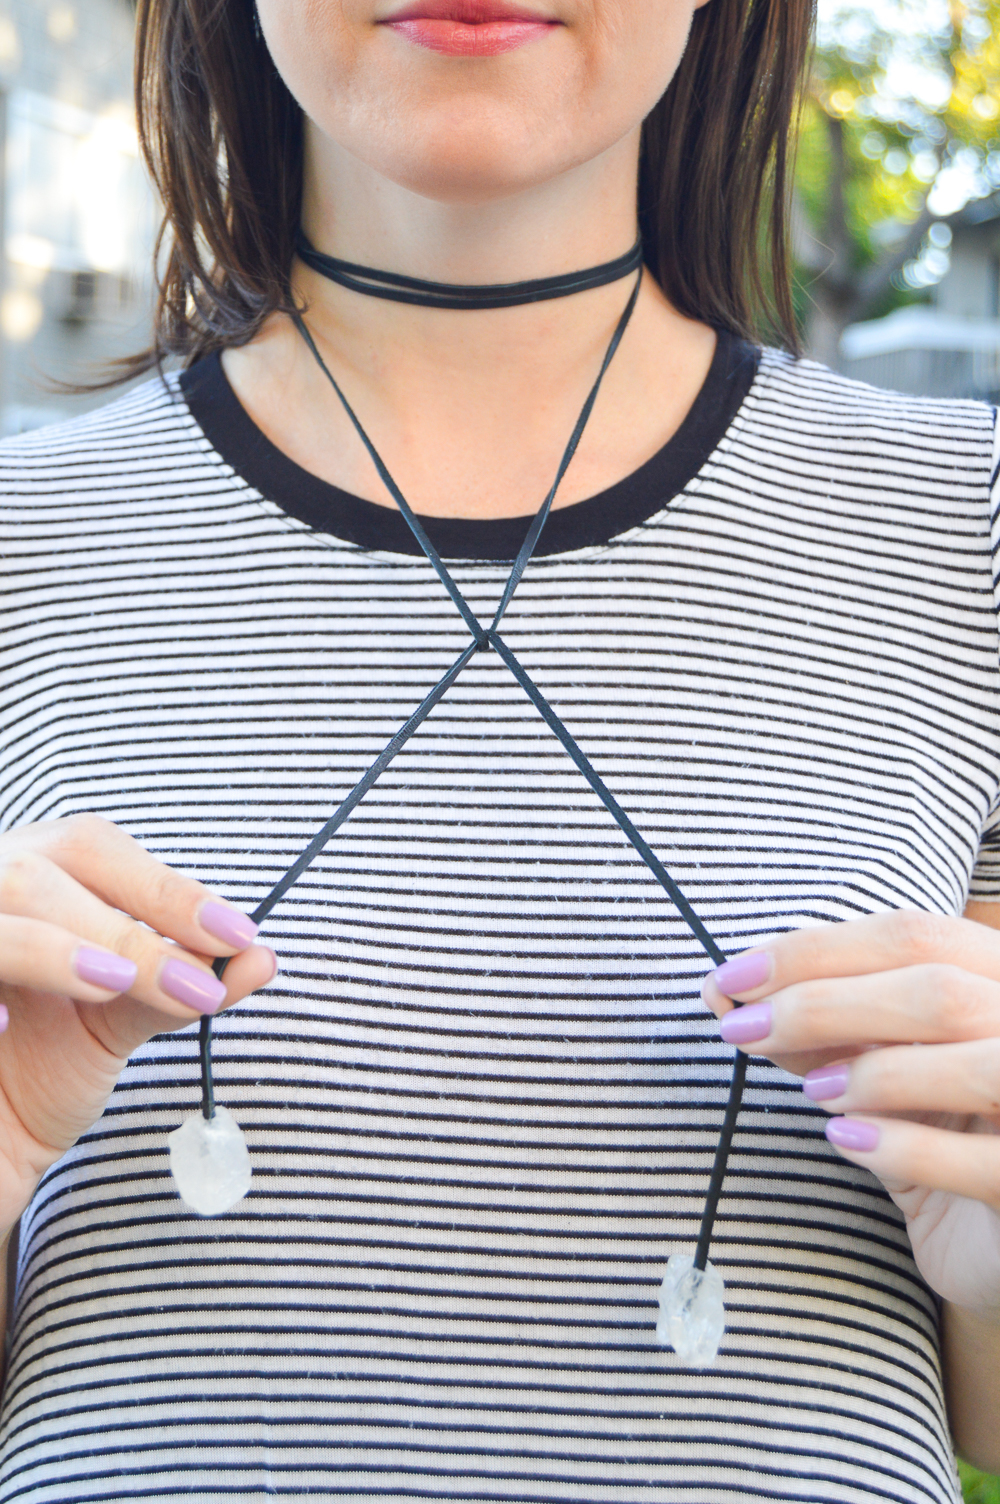
- Cut the leather string to about 4 feet long (better more than less) and carefully wrap it two times around your neck to check that you’re satisfied with the length. Cut again to adjust the strings as desired (I left about 6 inches hanging)
- Unwrap from your neck and add a little bit of glue to each end of the string. Insert into the beads and leave to set for at least 20 minutes
- Check that the glue has cured and it’s ready to wear!
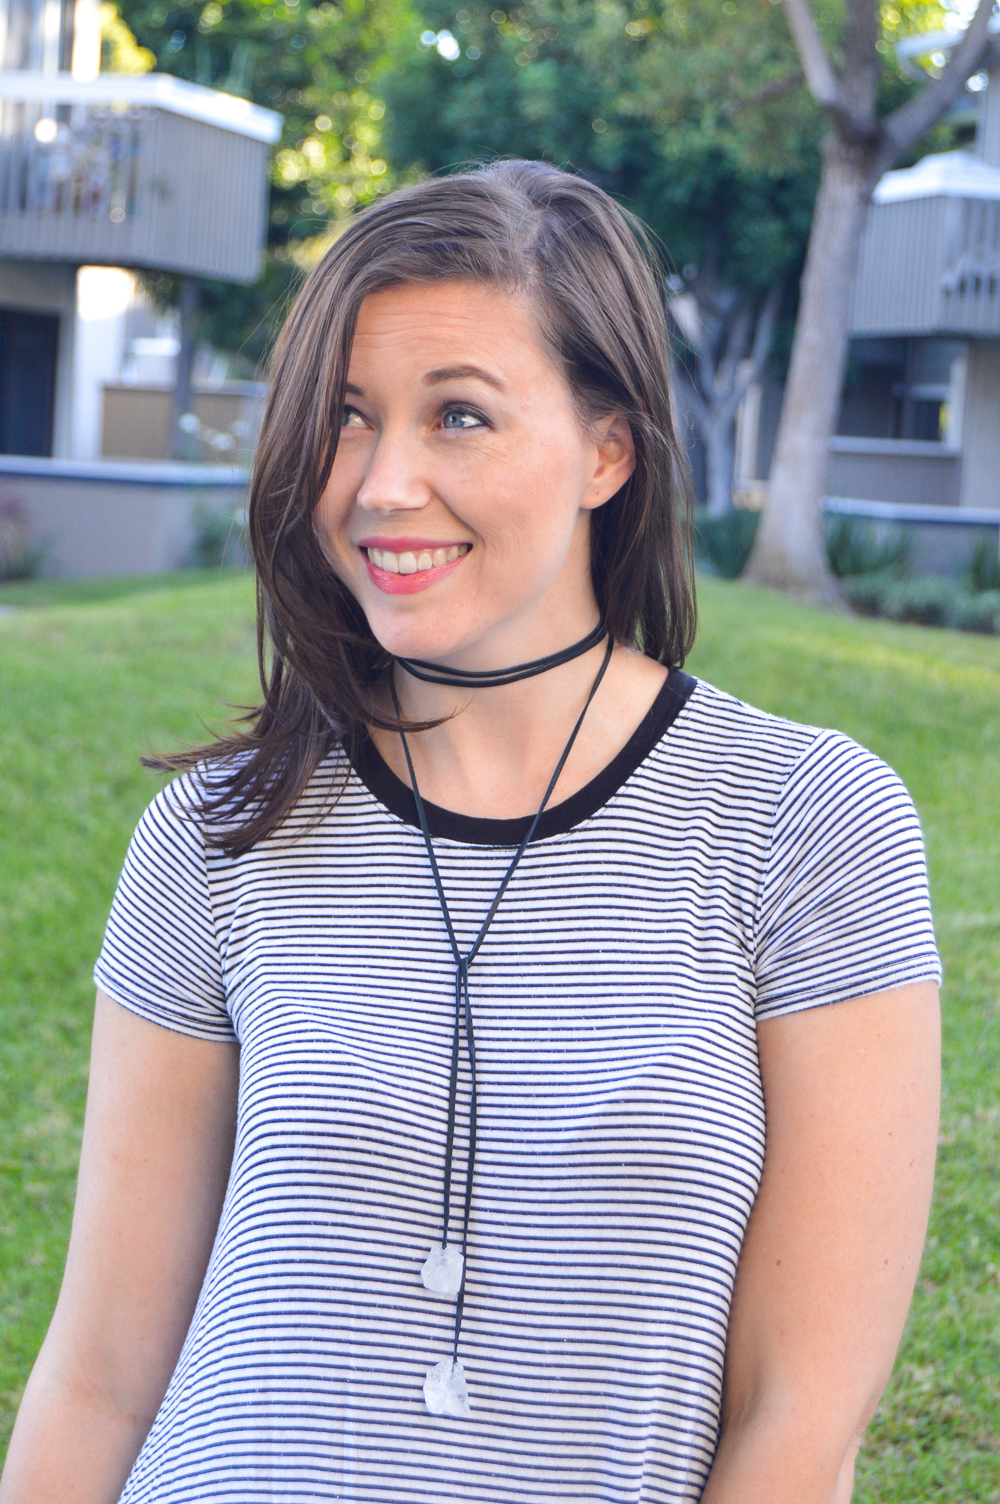
This is probably the easiest piece of jewelry I’ve ever made! I actually wore it out the same say I took these photos and got several compliments 🙂 Bring on the 90s!
Ntina
I used to wear them at the 90’s too and I made myself one (ok I made two!) recently! I like this version and your inspiration to put those beads made it really unique!
Holly Wade
NtinaThanks! It’s funny how every style makes a comeback!