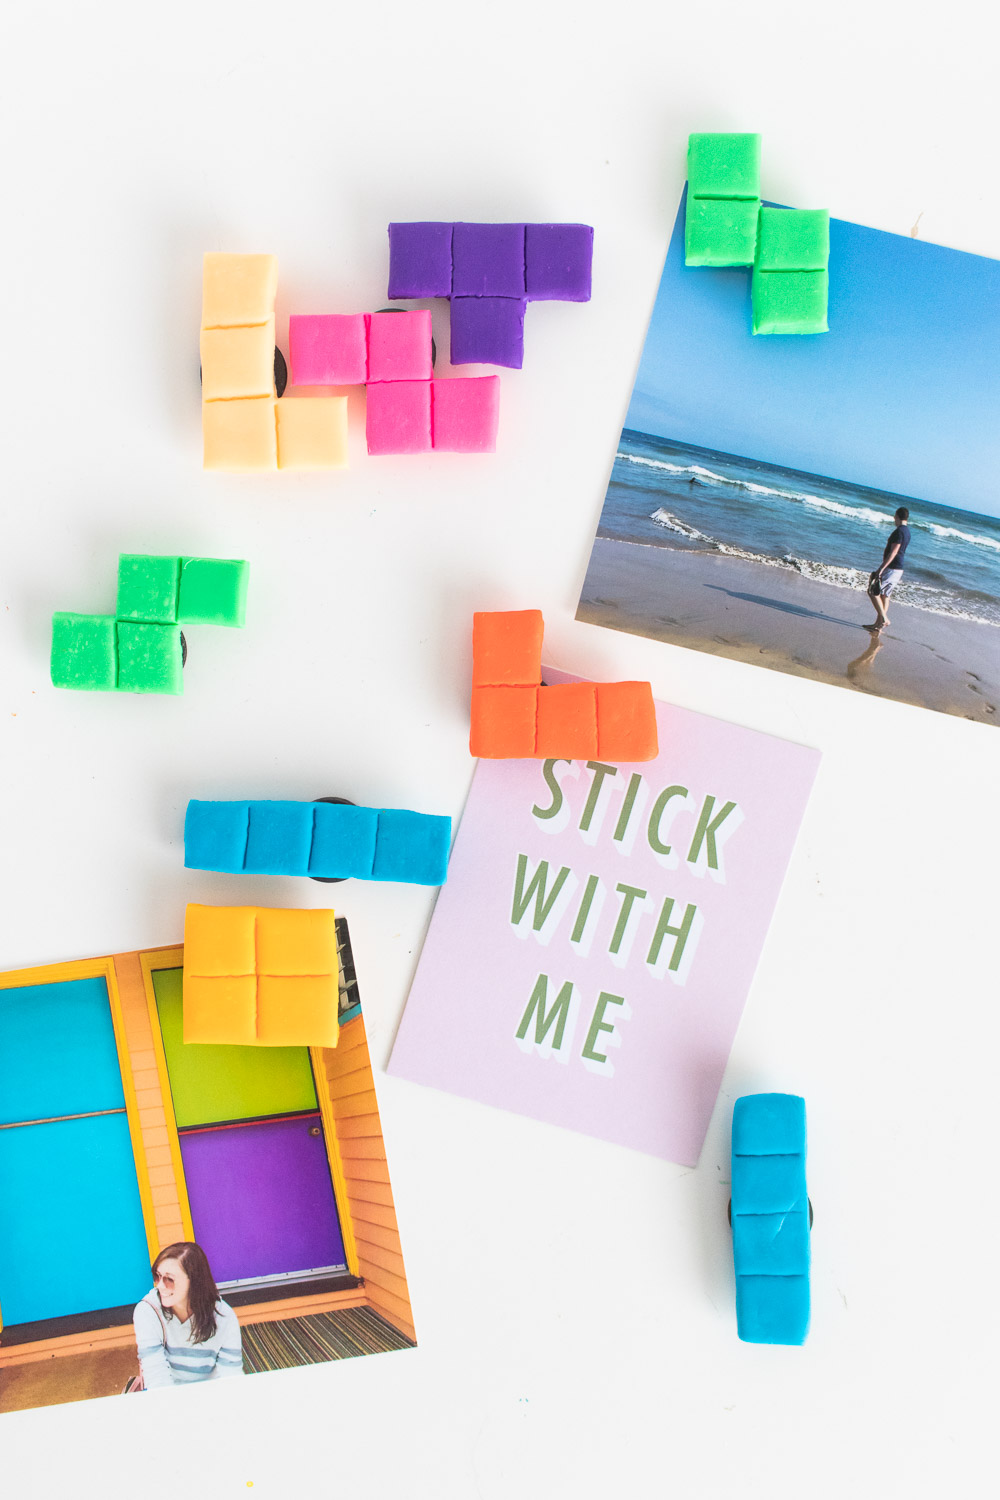
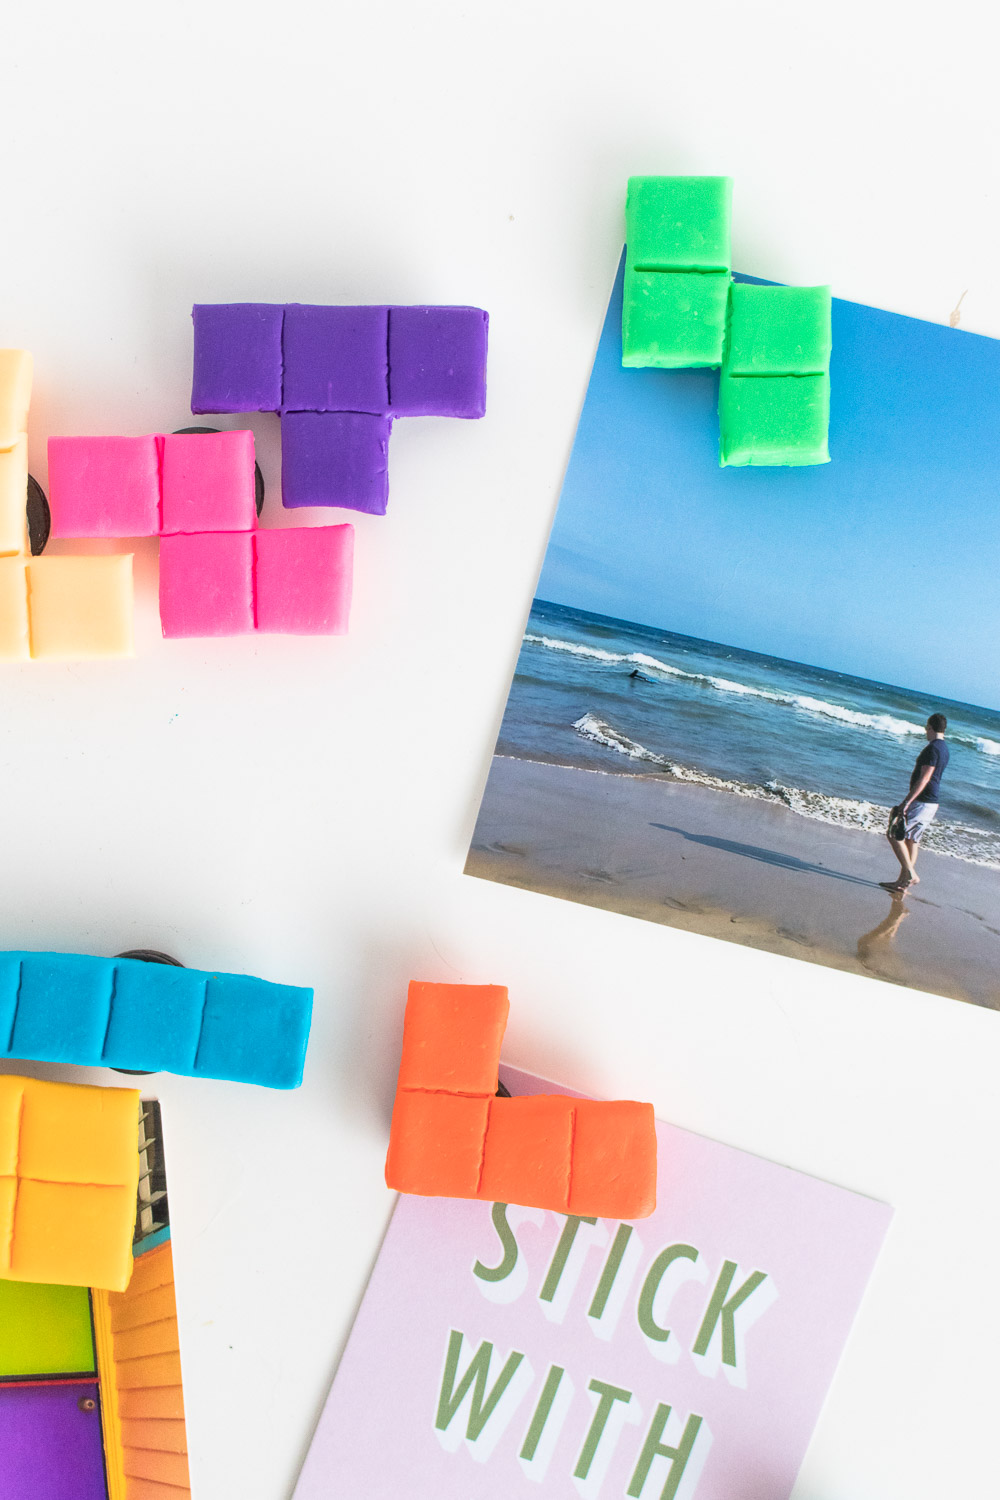
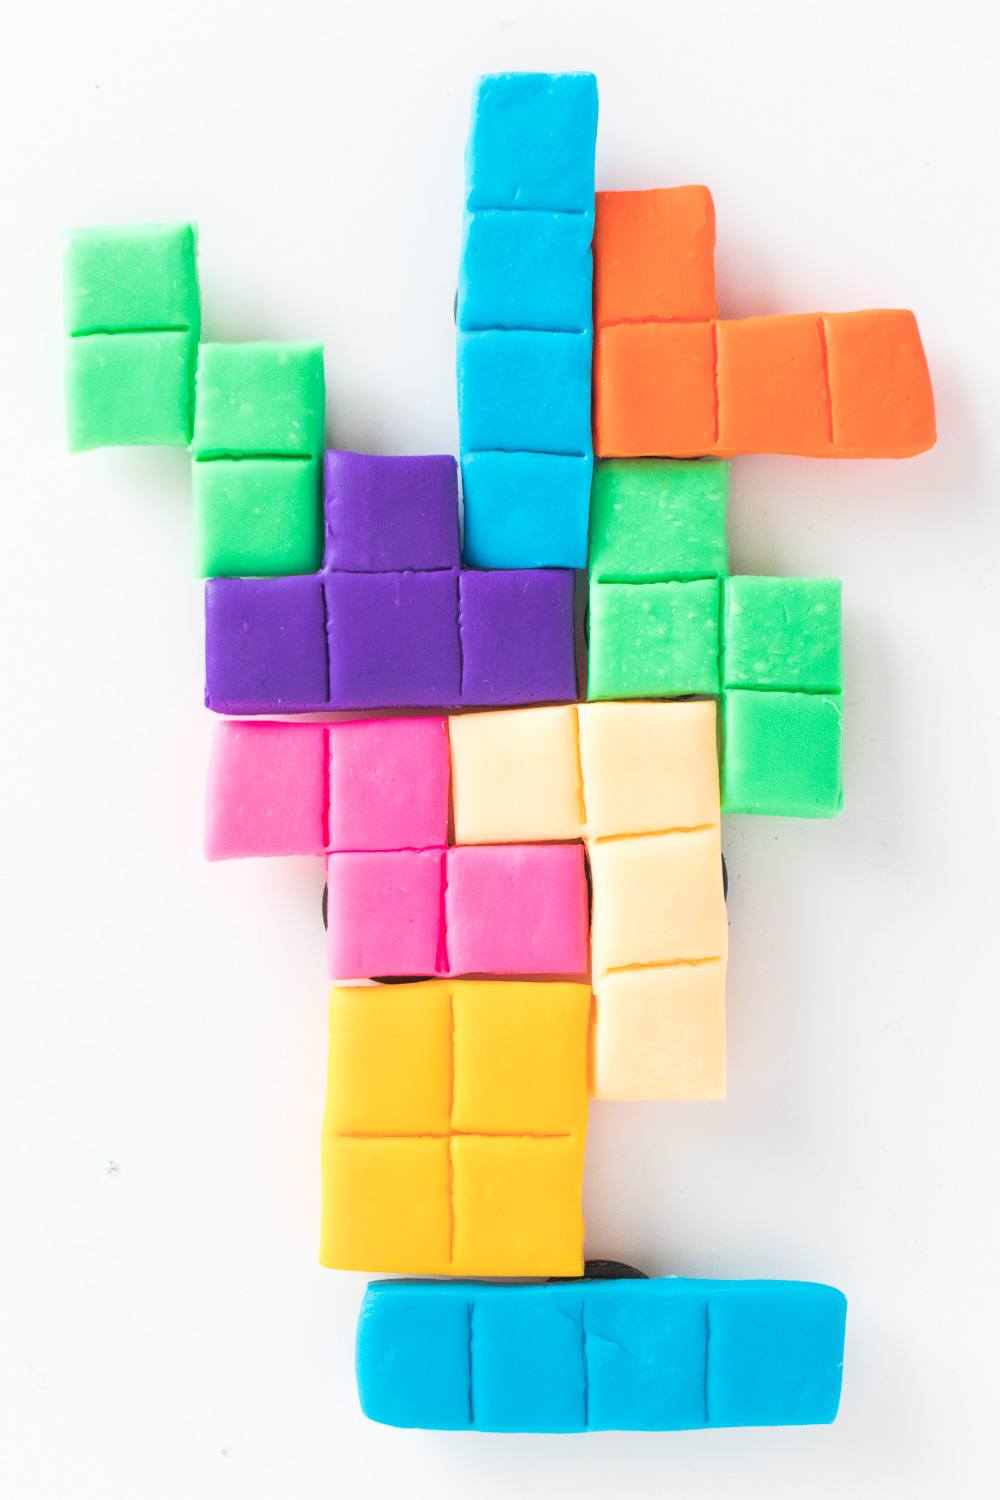
Unlike most things from my childhood (aka, the 90s), the game Tetris has actually stood the test of time. I remember playing it on the old computer in my parents’ garage as a kid and even later on my cell phone. Since it’s still so popular, I thought I’d make a set of simple DIY Tetris magnets in various colors to arrange on my fridge. Is it lame that I stand and rearrange them on the fridge while I wait for my pasta water to boil? OK, whatever.
 They’re as useful as they are colorful! With oven-bake clay, they only take about 15 minutes to harden, and they arrange together just like they would if you were playing the game. As far as DIYs go, this one is incredibly easy!
If there’s one thing I can never have too many of, it’s magnets. One of my cats loves to knock them off the fridge, and they quickly get lost or broken. These Tetris magnets have quickly become my favorites, and I tried to closely match some of the traditional colors of the Tetris shapes.
 Time: 15 minutes
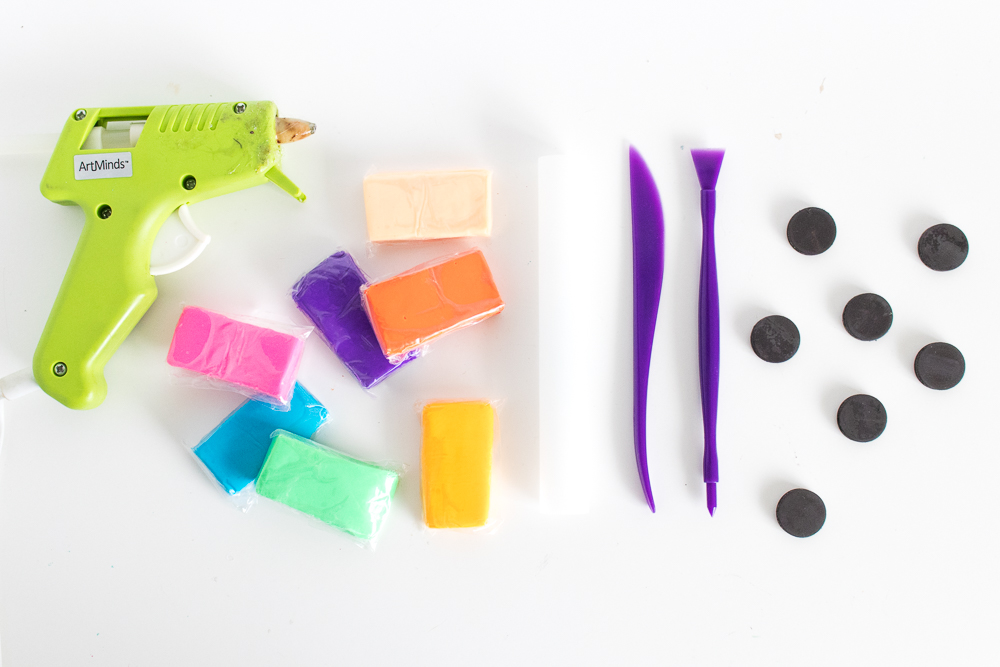
Supplies:
- Oven-bake polymer clay, multiple colors
- Rolling pin
- Clay cutting/sculpting tools
- Glue gun
- Small magnets
Step 1: Roll out a piece of clay flat until it is about 1/4 inch thick.
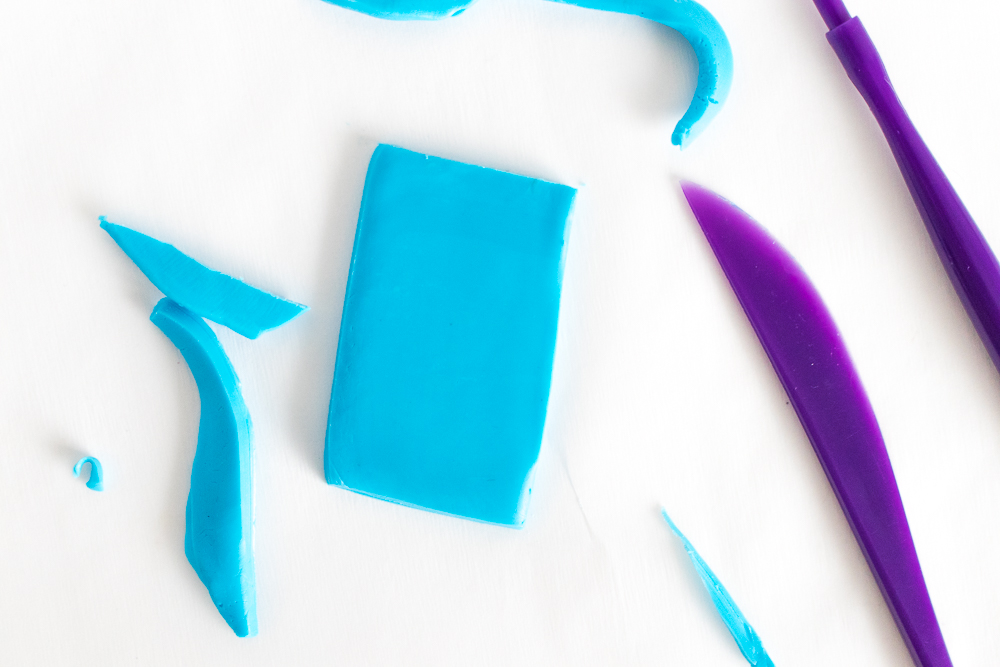 Step 2: To make the basic straight piece, use the cutting tool to cut the clay to about 2 inches x 1/2 inches.
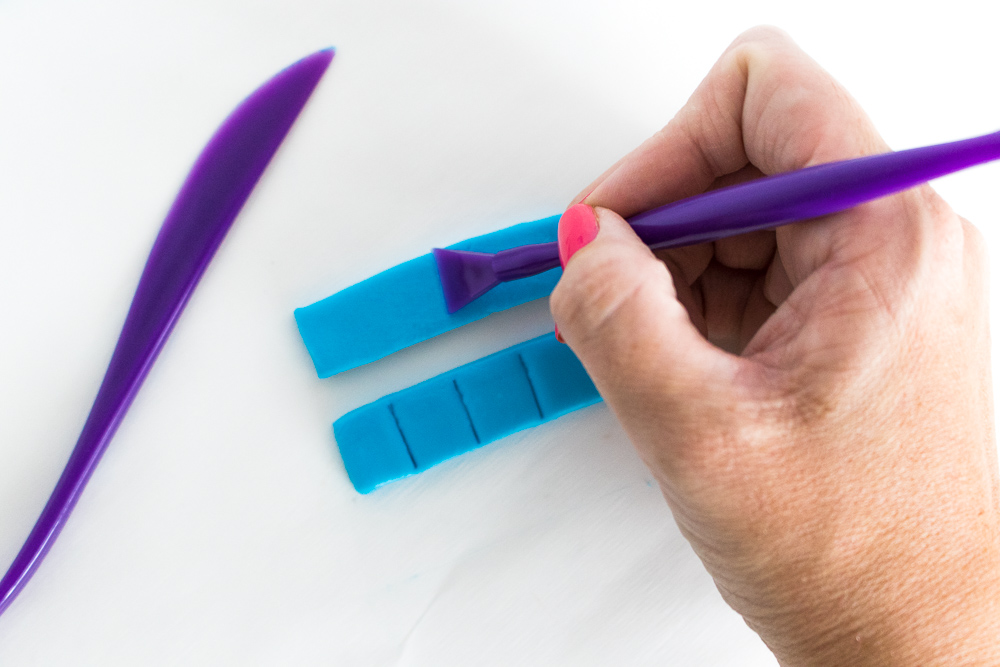 Step 3: Gently indent every half inch to create four equal sized sections in the clay.
Step 4: Bake clay according to package instructions. For this brand, I baked the clay for about 15 minutes at 275 degrees F.
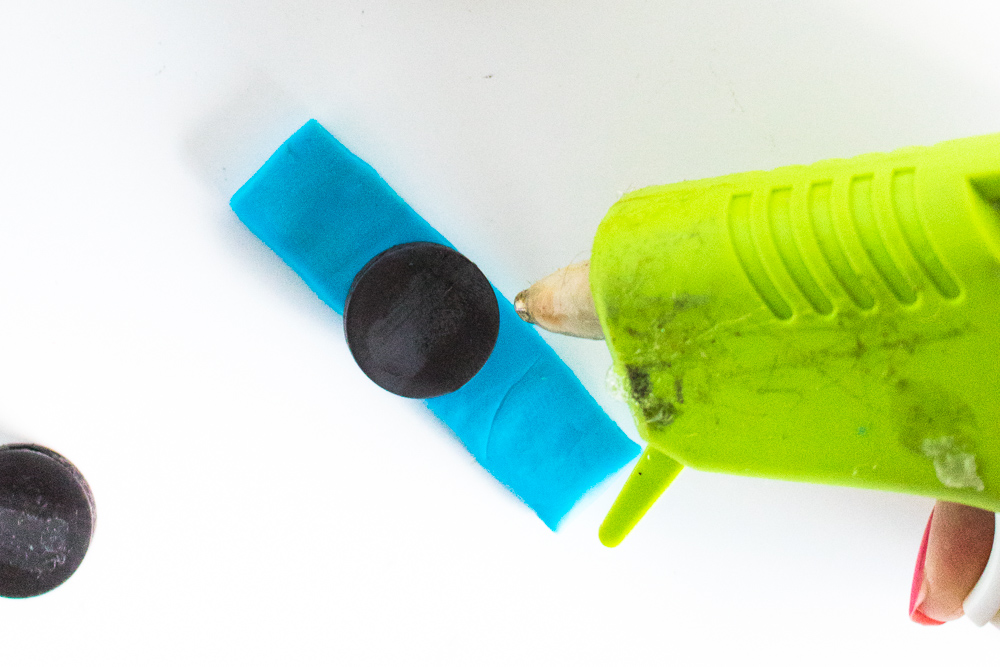 Step 5: Once baked and cooled, glue the magnet to the back of the clay pieces.
Stick to a metal surface and play around with the different shapes!